Triton8273
Explorer Addict
- Joined
- April 27, 2010
- Messages
- 1,140
- Reaction score
- 2
Finally had the chance to get this done and I know that many of you were waiting for this.
Part Number (PAC20-235)
Required tools:
7mm socket
7/64” drill bit
5/32” drill bit
1/4” drill bit or Uni-bit
Philips head screwdriver
Flat head screwdriver
Wire Stripper and Crimp tool
Painter Tape
Serious patience
There's a lot of pics to this one.
Enjoy!
Located in the remote holder is a Philips head screw which is the only thing to remove, to remove the console.
After removing the screw, slowly pull down working from the back. There will be 4 wire harnesses to unclip.

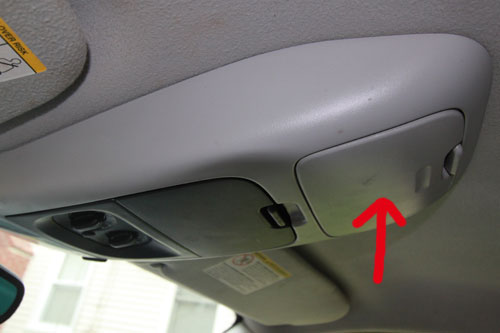
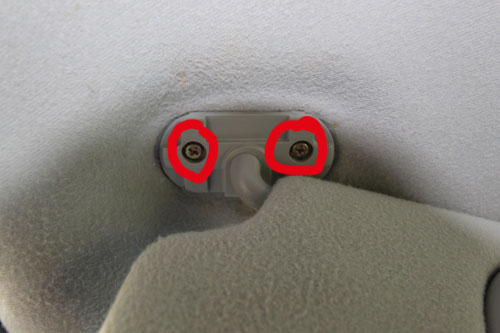
With a flat head screwdriver, remove the cover hiding the screws. Be careful not to break the cover. Slowly and carfully pry from the corners. Then remove the two screws. Do this on both sun visors.
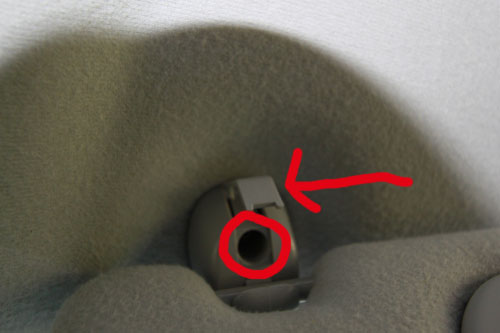
With a flat head, pry the flap up and remove the philips head screw. Do this on both sun visors.
Drivers Side
With a flat head, slide it into top of plastic molding running from dash to headliner.
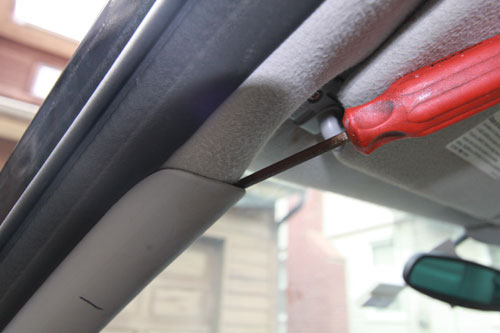
Then partially pull the headliner down so you don't punture it when drilling the holes in the roof.
LIGHT INSTALL
Using painters tape, mark off a large area on the roof to work off of. I suggest using more strips then I did. I ran the white painters tape in line with the roof rack so I had an accurate width of the roof. Going wider than the roof rack is fine but I decided to keep the lights in tighter so that all the lights were level.
Then measure the width of the roof and mark off your center. You will mount the center light and then work your way out.
Place all the lights on the roof and make sure you have them positioned exactly where you want.
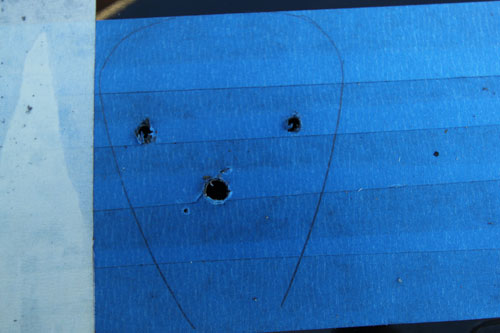
Place the base of the light down and mark the holes for the screws. Use a 7/64” bit to drill the hole and then widen with a 5/32”. If you don't have experience with drilling into sheet metal. Start with the 7/64” bit and work your way up in size to the 5/32”.
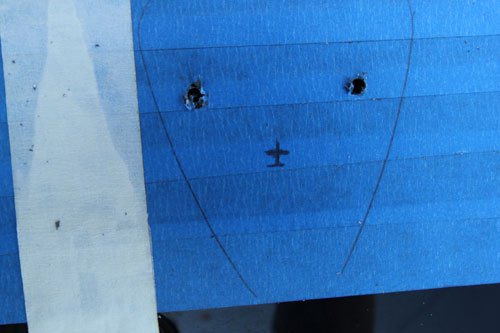
For the wiring hole. Again begin with the 7/64” and work towards a 1/4”. Best way is to use a uni-bit to widen.
The manufacturer suggests placing the ground wires to the mounting screws. DO NOT DO IT, the ring is so small that it rides up on the screw and doesn't make contact with the roof. Send both the power and ground wire through the roof an tie them into long wires running across the headliner. (Explained later)
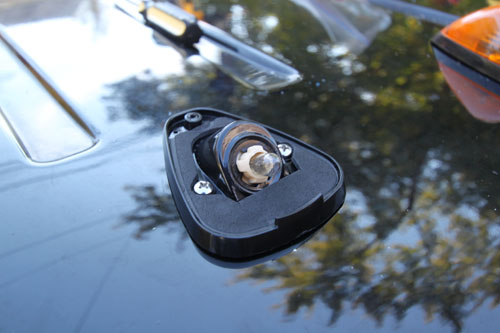
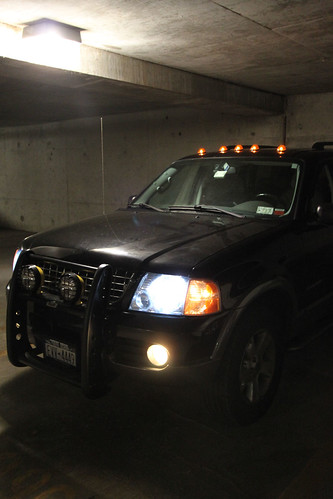
Place the included gasket onto the bottom of the light and screw the light into the roof and replace the lens.
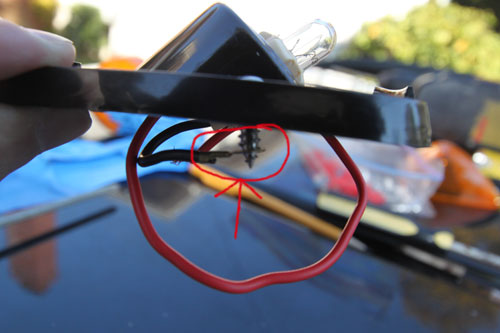
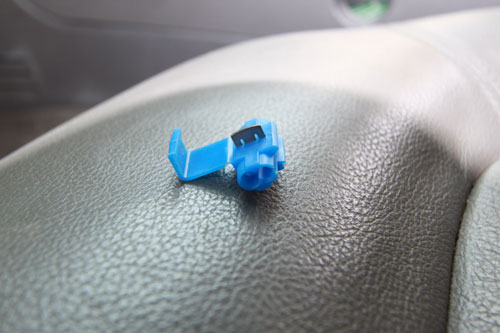
In the kit is a long red wire used to tie all of the lights together. Purchase some thin gauge black wire (lights don't draw much so 12 or smaller should be fine). Using a clip (seen below) (only 5 supplied so buy another 6) Run the long ground and power wires from the drivers side to the passengers side and clip all wires coming from the lights to the long wires.
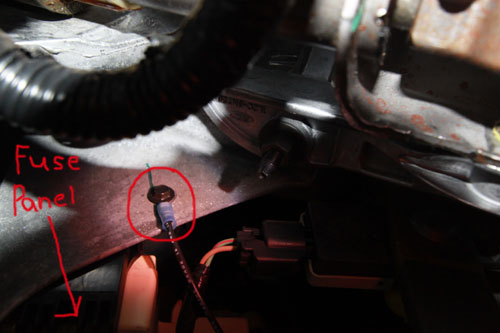
Run the ground wire down and under the fuse panel under the dash.

Next to the fuse panel is one of the screws used to mount the fuse panel, that was the easiest place I found to ground the lights.
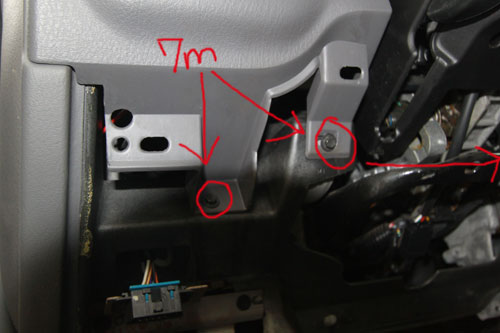
Now remove the lower panel under the steering column. Two 7mm screws.

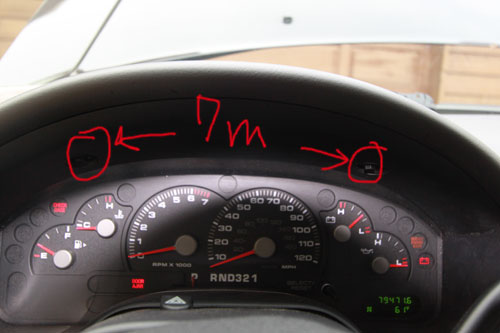
Next remove the three 7mm screws holding the dash panel on (Two on the left and one on the right) and the two 7mm's holding the gauge cover on and pull partially off (just enough to work in there or remove completely if you want). There will be 3 harnesses two un-clip. One on the right and two on the left.
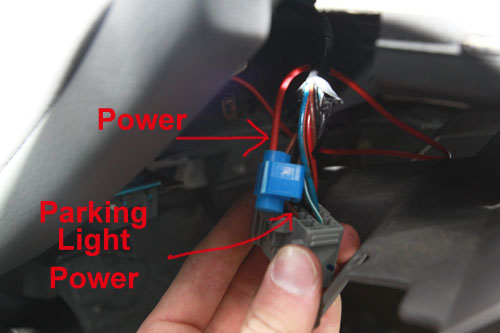
Now with the headlight harness removed, there should be a brown wire coming from the harness. (This is on an 04' so it may be different in other years). If you are unsure, clip the harness back in to the switch, turn the parking lights on and test which wire is getting power and that is the one you want.
Run the power wire the same way you ran the ground but stay in the upper part of the dash and go straight to the headlight swtich.
Using the last wiring clip. Clip the power wire and the brown wire together.
Now your all done.
If you have any questions feel free to ask.
Short video will be posted soon.
Part Number (PAC20-235)
Required tools:
7mm socket
7/64” drill bit
5/32” drill bit
1/4” drill bit or Uni-bit
Philips head screwdriver
Flat head screwdriver
Wire Stripper and Crimp tool
Painter Tape
Serious patience
There's a lot of pics to this one.
Enjoy!
Located in the remote holder is a Philips head screw which is the only thing to remove, to remove the console.
After removing the screw, slowly pull down working from the back. There will be 4 wire harnesses to unclip.
With a flat head screwdriver, remove the cover hiding the screws. Be careful not to break the cover. Slowly and carfully pry from the corners. Then remove the two screws. Do this on both sun visors.
With a flat head, pry the flap up and remove the philips head screw. Do this on both sun visors.
Drivers Side
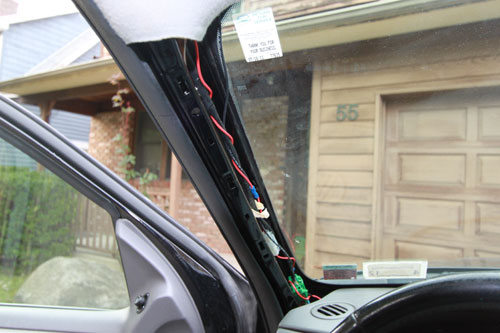
With a flat head, slide it into top of plastic molding running from dash to headliner.
Then partially pull the headliner down so you don't punture it when drilling the holes in the roof.
LIGHT INSTALL
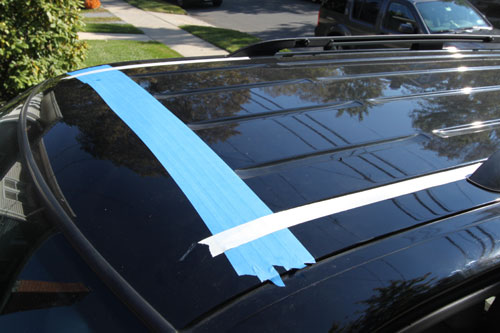
Using painters tape, mark off a large area on the roof to work off of. I suggest using more strips then I did. I ran the white painters tape in line with the roof rack so I had an accurate width of the roof. Going wider than the roof rack is fine but I decided to keep the lights in tighter so that all the lights were level.
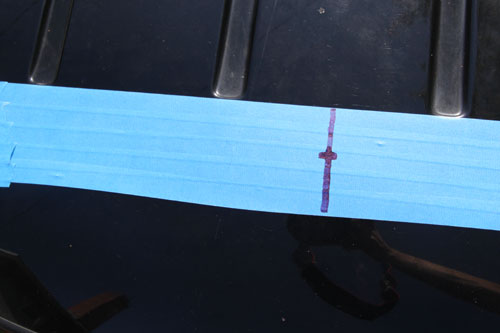
Then measure the width of the roof and mark off your center. You will mount the center light and then work your way out.
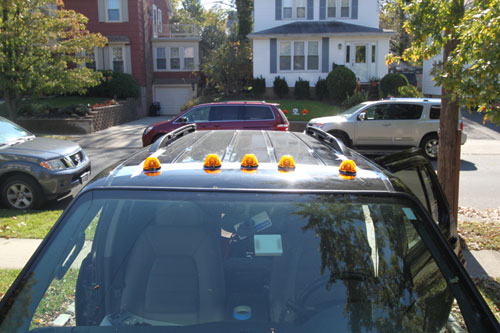
Place all the lights on the roof and make sure you have them positioned exactly where you want.
Place the base of the light down and mark the holes for the screws. Use a 7/64” bit to drill the hole and then widen with a 5/32”. If you don't have experience with drilling into sheet metal. Start with the 7/64” bit and work your way up in size to the 5/32”.
For the wiring hole. Again begin with the 7/64” and work towards a 1/4”. Best way is to use a uni-bit to widen.
The manufacturer suggests placing the ground wires to the mounting screws. DO NOT DO IT, the ring is so small that it rides up on the screw and doesn't make contact with the roof. Send both the power and ground wire through the roof an tie them into long wires running across the headliner. (Explained later)
Place the included gasket onto the bottom of the light and screw the light into the roof and replace the lens.
In the kit is a long red wire used to tie all of the lights together. Purchase some thin gauge black wire (lights don't draw much so 12 or smaller should be fine). Using a clip (seen below) (only 5 supplied so buy another 6) Run the long ground and power wires from the drivers side to the passengers side and clip all wires coming from the lights to the long wires.
Run the ground wire down and under the fuse panel under the dash.
Next to the fuse panel is one of the screws used to mount the fuse panel, that was the easiest place I found to ground the lights.
Now remove the lower panel under the steering column. Two 7mm screws.
Next remove the three 7mm screws holding the dash panel on (Two on the left and one on the right) and the two 7mm's holding the gauge cover on and pull partially off (just enough to work in there or remove completely if you want). There will be 3 harnesses two un-clip. One on the right and two on the left.
Now with the headlight harness removed, there should be a brown wire coming from the harness. (This is on an 04' so it may be different in other years). If you are unsure, clip the harness back in to the switch, turn the parking lights on and test which wire is getting power and that is the one you want.
Run the power wire the same way you ran the ground but stay in the upper part of the dash and go straight to the headlight swtich.
Using the last wiring clip. Clip the power wire and the brown wire together.
Now your all done.
If you have any questions feel free to ask.
Short video will be posted soon.


