cjryan
Well-Known Member
- Joined
- September 24, 2007
- Messages
- 115
- Reaction score
- 0
- City, State
- CA
- Year, Model & Trim Level
- 2000 XL 4.0 OHV 4x4
So I've done lots of searching and I haven't found anything useful.
2000 4.0 OHV
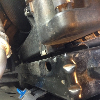
I had stripped crankshaft threads, cleaned the threads, now I'm attempting to install the new damper. If you would like to comment on the stripped threads please do so here in my Explorer 911 thread:
http://www.explorerforum.com/forums/showthread.php?t=287081
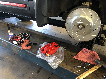
My old one would slip on and off by hand no problem. I had to replace the old one and the new one is much more difficult to put on. I purchased a universal harmonic balancer installer but it didn't work. I think the kit is meant to work with more "flat" style dampers. Mine is relatively "hollow." I tried the three main consumer auto parts stores around me and they all have the same universal kit. I found a ford specific installation tool online for my engine but the website wants $130 for it, more than I paid for my damper, and I can't return it.
I've heard of people baking or boiling the damper so it expands, then putting it on the damper. I'm cautious to do this because of the rubber ring in the center. Although the engine bay gets to near 200 degrees so maybe this wouldn't hurt anything. And yes, I've thought of using the damper bolt to pull it on but my threads aren't perfect and I don't want to mess them up anymore.
I've been turning the damper clockwise and it's been seating more and more each time. I think it's been wearing a very small of material off each time because it's easier to take on and off each time. Problem is, once I get to the key, I won't be able to turn it anymore and I'll have to use the bolt to pull it on, which will require a lot of force.
I even called the ford stealership and they wanted $200 to install the damper. I asked him how long for labor and he said two hours. Yea right!@#!$
I know someone else on here has had to install a new damper. How did you do it? I start school next Monday and I need to get this thing back together ASAP.
Thanks in advance
Update:
I found a three foot threaded rod at a local store that's the right size. I'm going to buy this and attempt to use the metal "peace sign" bracket from the damper removal tool in conjunction with the threaded rod to install tonight. Any input is still welcomed.
2000 4.0 OHV
I had stripped crankshaft threads, cleaned the threads, now I'm attempting to install the new damper. If you would like to comment on the stripped threads please do so here in my Explorer 911 thread:
http://www.explorerforum.com/forums/showthread.php?t=287081
My old one would slip on and off by hand no problem. I had to replace the old one and the new one is much more difficult to put on. I purchased a universal harmonic balancer installer but it didn't work. I think the kit is meant to work with more "flat" style dampers. Mine is relatively "hollow." I tried the three main consumer auto parts stores around me and they all have the same universal kit. I found a ford specific installation tool online for my engine but the website wants $130 for it, more than I paid for my damper, and I can't return it.
I've heard of people baking or boiling the damper so it expands, then putting it on the damper. I'm cautious to do this because of the rubber ring in the center. Although the engine bay gets to near 200 degrees so maybe this wouldn't hurt anything. And yes, I've thought of using the damper bolt to pull it on but my threads aren't perfect and I don't want to mess them up anymore.
I've been turning the damper clockwise and it's been seating more and more each time. I think it's been wearing a very small of material off each time because it's easier to take on and off each time. Problem is, once I get to the key, I won't be able to turn it anymore and I'll have to use the bolt to pull it on, which will require a lot of force.
I even called the ford stealership and they wanted $200 to install the damper. I asked him how long for labor and he said two hours. Yea right!@#!$
I know someone else on here has had to install a new damper. How did you do it? I start school next Monday and I need to get this thing back together ASAP.
Thanks in advance
Update:
I found a three foot threaded rod at a local store that's the right size. I'm going to buy this and attempt to use the metal "peace sign" bracket from the damper removal tool in conjunction with the threaded rod to install tonight. Any input is still welcomed.
") . The method I outlined above is the most professional and safest way to install a damper. I even asked a Ford mechanic if there was an installation tool, and he told me to use the crank bolt. I'm not sure how many dampers he'd installed but, if you want to do it the safe way, use a threaded rod.
. The method I outlined above is the most professional and safest way to install a damper. I even asked a Ford mechanic if there was an installation tool, and he told me to use the crank bolt. I'm not sure how many dampers he'd installed but, if you want to do it the safe way, use a threaded rod.