- Joined
- November 11, 2005
- Messages
- 56,690
- Reaction score
- 1,186
- City, State
- Brooklyn, NY
- Year, Model & Trim Level
- 88 89 93 95 96 Aerostars
The latch that locks the sliding door is the same on all of the Aerostar vans as far as I know. The spring on my 95 van's latch broke. Tuckman (a member on this site from Canada  ) was nice enough to send me one from his Aerostar. This is a diagram from my Ford CD:

This is the description:

The software has the following instructions:
Body: side sliding door (Aerostar).
Removal and Installation.
1. Remove sliding door trim panel, watershield, and access hole cover plates.
2. Unlatch the sliding door.
3. Remove latch actuator rod retainer from center door retainer hole.
4. Disconnect the rear door latch actuator rod from the remote control assembly by opening the clip.
5. Open the door sufficiently to gain access to the three bolts attaching the rear latch to the sliding door. Remove bolts.
6. Remove the sliding door rear latch with the remote control actuator rod attached to the latch, from the sliding door.
For installation, follow removal procedures in reverse order. The three latch retainer bolts must not be tightened more than 9-14 N-m (6-10 lb-ft) when installed.
Some things are not so straight forward such as removing the 3 bolts. The vehicle come with T-30 bolts, and not hex head bolts as the shown in the description. The second thing that I wanted to mention is that it's not necessary to remove the inner panel. It's a lot of extra work which isn't necessary. I was able to replace the latch after removing the 3 bolts. The latch has a bushing which holds the linkage. The next part of this thread will go into more detail about replacing the latch, and how to get around the difficulty of removing seized torx bolts, and broken left over studs.
) was nice enough to send me one from his Aerostar. This is a diagram from my Ford CD:
This is the description:
The software has the following instructions:
Body: side sliding door (Aerostar).
Removal and Installation.
1. Remove sliding door trim panel, watershield, and access hole cover plates.
2. Unlatch the sliding door.
3. Remove latch actuator rod retainer from center door retainer hole.
4. Disconnect the rear door latch actuator rod from the remote control assembly by opening the clip.
5. Open the door sufficiently to gain access to the three bolts attaching the rear latch to the sliding door. Remove bolts.
6. Remove the sliding door rear latch with the remote control actuator rod attached to the latch, from the sliding door.
For installation, follow removal procedures in reverse order. The three latch retainer bolts must not be tightened more than 9-14 N-m (6-10 lb-ft) when installed.
Some things are not so straight forward such as removing the 3 bolts. The vehicle come with T-30 bolts, and not hex head bolts as the shown in the description. The second thing that I wanted to mention is that it's not necessary to remove the inner panel. It's a lot of extra work which isn't necessary. I was able to replace the latch after removing the 3 bolts. The latch has a bushing which holds the linkage. The next part of this thread will go into more detail about replacing the latch, and how to get around the difficulty of removing seized torx bolts, and broken left over studs.


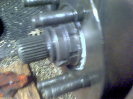
 It wasn't easy getting all the way back to the latch's lever. With the door closed, it's well protected.