- Joined
- February 18, 2009
- Messages
- 5,325
- Reaction score
- 654
- City, State
- Winnipeg, Manitoba
- Year, Model & Trim Level
- 04 Mustang GT
Thanks for the cooler Tim!
I'm not sure what I'll be doing on the harness. For now, I'll set that issue aside.
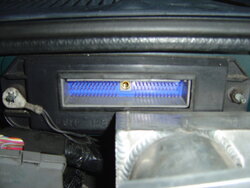
I can see that the pcm will have to be moved. The mount sticks out too far in the fire wall, so it will have to come off. Im sure this is why 4pointslow actually moved his to his centre console.
I don't really want my pcm to be permanently in the engine compartment as the extreme temperatures, and humidity cant be a good thing. I don't have a full centre console, just the bag. Hmm...on top of the knee plate at the steering wheel? Sacrifice my glove box??
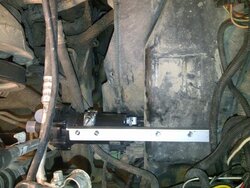
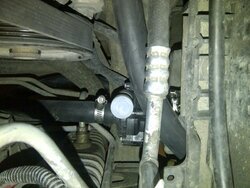
The rad is mounted. I should really pull the bracket and paint it, as its made out of bent steel. It actually worked out pretty well. It looks like I will pull my battery tomorrow and see if under the battery tray will work for the pump, as it does look like there's quite a bit of room there.
its slow going. I started late tonight, and wasn't very focused. Really, all I need to do till my package shows up from Ron is paint bracket, mount pump, and route hoses. That's not much.
I'm not sure what I'll be doing on the harness. For now, I'll set that issue aside.
I can see that the pcm will have to be moved. The mount sticks out too far in the fire wall, so it will have to come off. Im sure this is why 4pointslow actually moved his to his centre console.
I don't really want my pcm to be permanently in the engine compartment as the extreme temperatures, and humidity cant be a good thing. I don't have a full centre console, just the bag. Hmm...on top of the knee plate at the steering wheel? Sacrifice my glove box??
The rad is mounted. I should really pull the bracket and paint it, as its made out of bent steel. It actually worked out pretty well. It looks like I will pull my battery tomorrow and see if under the battery tray will work for the pump, as it does look like there's quite a bit of room there.
its slow going. I started late tonight, and wasn't very focused. Really, all I need to do till my package shows up from Ron is paint bracket, mount pump, and route hoses. That's not much.
")


