New Bronco build | Ford Explorer Forums - Serious Explorations

  • Register Today It's free!

New Bronco build

CougarSE

Active Member
Joined
June 29, 2006
Messages
67
Reaction score
0
City, State
Lancaster, Ohio
Year, Model & Trim Level
84 BII, 98 Mounty
New BII owner here, I bought this back in March but only two weeks ago did I get to start on the buildup. Its an 84 with a 2.8 and C5 auto. Pretty typical trashed Ohio vehicle with lots of rust. The people I bought it from lifted it with f150 coils and short sections of 3x4 landscape timbers. :thumbdwn: Evidently the local parts house only had square u bolts so they used those. The whole thing fell apart and busted the driveshaft and leaf springs. If only they looked at the rotten body mounts and maybe tried to fix those they would have gotten the lift they wanted just buy returning it to stock height. Oh well.

My inspiration for this rig is 410fortunes rig, I've always been a fan of the daily driver/ trail rig and at the utmost importance RELIABLE.

Here it is the day it made it home. Notice how close the rear tire is up in the wheel well. The springs were cracked and the axle slid back. I had to buy a set of jack stands and a jack to start this project,.. oh darn :p:

0924c447-912d-4e0d-9e61-6fc960cf7d57.jpg


I decided to install ex springs since I had to change them and wanted to lift it anyway. I don't have a picture of them but they cost just under $70 from a semi local yard. I work alot and some times dont have a chance to make it to the local pick n pull.

To get the springs out I had to cut only one bolt, the passenger side front bolt, the rest came out fine. While it was apart I had to replace the driver side shackle as it was cracked badly. I had to cut that bolt too..

Here are the old springs out.

8ccbab87-d494-4a06-b9d7-144d76992895.jpg


Here is the new shackle. Had to buy one for an 87 ranger because there was no listing for an 84 B2, they were however the same length.

f42c2263-ebe5-415c-a917-1346d55b5b06.jpg


And a shot of the rear of the B2 sitting on all fours again after being on jack stands for 2 weeks. In this picture the body is propped up to its stock height and remember we have f150 coils in the front. The ex springs lifted it up a good bit.

72116d43-e730-401c-8ee3-76f1d7de4bce.jpg


The body is propped up because of the rusted frame around the body mounts. All but the core support look like this one, some worse.

1b39a4d6-2feb-4e94-a19f-05f3abbfd68d.jpg


Now today I ordered new energy suspension body mounts from Jegs ( one of the perks of living in Ohio, Jegs has actual stores in Columbus) for $80. Cheaper than even ebay. With this I'm going to buy 5 3" lift blocks and cut them in half to have a 1 1/2" body lift. I'm only doing this to make future engine mods/and or swaps easier.

Now to repair the rusted frame I'm going to use this old trailer fender I dug out of the scrap dumpster at a local fab shop I had to do some work for. It is the same thickness as the frame.

8007592d-07da-44b3-8c74-3b700aaf90e9.jpg


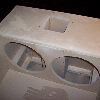
Here is some more rust around the gate. its a pretty rusty beast but for a $300 rig that runs I'll take it. This area will get plated and nothing more. I'm not building a show queen here just a solid trail rig. yes that is an electrical box holding the rear of the body up for now.

a56e977b-006d-4d2e-8dbc-8665c5f46717.jpg


In this picture you can see whats left of the gas tank shield, it is half gone. One strap is in two pieces and the other is almost the same.

a0653f99-aa6d-45e3-bfb8-b334e316fa26.jpg


Now when I have more time I'll post more pictures.


Join the Elite Explorers for $20 each year.
Elite Explorer members see no advertisements, no banner ads, no double underlined links,.
Add an avatar, upload photo attachments, and more!
.


Now today I did get to go to two different pick n pull lots. I got a few items I needed and some I didn't.

Factory iron lift blocks from a 4x4 ranger.

43a854a5-7411-4ae6-8cd9-b28180d6bdc3.jpg


A pair of second gen door panels as no 1st gens could be found.

05cf360d-a93d-4442-8613-32b5c3174e9d.jpg


And a B2 roof rack.

0452bae6-c222-48f9-b462-92b0fa0c1ecc.jpg


Here is one door panel installed on the driver side. I still have to change the handle to the 2nd gen style and install the arm rest support bracket.

4fc7a639-4255-4a8e-9301-bc57df0e2584.jpg


Now last weekend I got this nice woodgrain dash trim to replace my cut piece but today I found out it was different. The center between the two cluster openings is different. You can see in the picture. Woodgrain is an 87, silver is 84.

390e87ad-c33b-493b-acb8-504ff8ca7072.jpg


I installed it any way so I could throw out the old one and to give myself something to do tonight.

9bfa2f00-f390-40ae-81f0-5e9b6c212b8a.jpg


In this picture you can see the bottom of the 87 radio I installed and the odd temp control with the round a/c button.. Every other one I have seen has been square. ??

e48513b3-501f-4cc4-b1f3-d260d1efdd3f.jpg


I guess I will have to get a cluster out of an 87 ish truck to fix this problem.

90aabb21-b057-45d3-8e71-ab43820d7615.jpg


Another odd thing, the gas door has no finger hole. I'm starting to think some of these odd issues are an 84 thing.

fcacd3d6-a1f5-48bd-9ad4-aa1c4cc170b5.jpg


The B2 also has aftermarket cruise installed. Oh yeah :rolleyes:

a1e13d9a-7ad9-466a-b3a2-d64e082ad395.jpg


I do like this nifty early systems sentry in the center console. It even works.

8508f7e4-7cc5-4614-8b2d-1220ec217bb5.jpg


Got some replacement strikes for the rear hatch today at the junkyard.

3a72880b-a86d-4261-a1f1-bf3333864bde.jpg


last but not least is the 85 bronco ii I found for parts. I'm going to take the entire dana 28 to do a cut and turn on and it has the odd ball driveshaft I need. Someone had also done the duraspark swap and the non feedback carb swap too, but it has had an engine fire and the duraspark dizzy wires are melted and the carb is locked up. I'll be sure and snag a few other parts I need too, this one isn't at the pick n pulls but at a local scraper guys place my brother knows. It wont be around for long.

17025b96-b9da-46cd-8d19-85a1a5c96b6f.jpg


1, i love seeing a b2 build
2, don't use the d28. find a d35 and cut and turn it.
3, i'm so glad i live in the south and can find rust free trucks! lol

alright, i'm done with the numbers now lol
you're climate control and gas door really intrest me. i'm confused a little..i've never seen one like it. regardless, keep us updated on this build. i'm new here. this is not my usual forum i'm on. but i'll have to keep a look on this to see how you build a b2.

now to go find this 410fortune build you're speaking of, i must see it!


PICT2004.jpg


I quickly learned that the D28 was an accident waiting to happen and here is when years ago I trashed the 28 and was going 35.
Then I got tired of the bearing problem associated with the 35 when i went with larger tires and then fixed that problem...solid went in with it's larger spaced apart inner and outer bearing and other pluses that it has.
Also every 84 that I've had have the same type gas doors as yours.
I've gone through a few for parts.


PICT4915.jpg


dude i dig the electric box holding up the body, use what you got man. youve got a good start on getting this thing road worthy, im a big proponent of wheel what you got, do a little sawzall bodywork, get some 31 mud terrains on it and wheel, I think im a better driver offroad bk i was running a "handicapped" rig. the fuel door is weird, nice work on thinking through that one ford, gotta have fake acrylic nails like Rookieshooter to get it open hahaha, jk Rick.
ill be watching this build, i like cheaply built but smartly built rigs and i can tell your doing it smart, nice job man.


Ditto 4.0B2's comment on down South Vehicles, rust just isn't a problem if you stay away from salt water beaches & chemical towns. Also I'm looking at an '84 that has the same gas door & I'd never seen one before (perhaps never noticed would be a more accurate phrasing ) that lacked the indent. Glad to see your thread and looking forward to more posts. Rick C.


Nice to see another 84 BII being actually looked at, compared to and differences noted between it and the 85 and up models. My 84 has the same fuel door, two-tone doorskins (NEVER seen another set of them) fake wood dashtrim panel, AND the round A/C button. Mine also has the hooks/loops on the back floor for the removable side windows that never made production.


awesome XD
nice to see someone else working on a '84 2.8L

Have you set any kind of budget limits on this build?


dude i dig the electric box holding up the body, use what you got man. youve got a good start on getting this thing road worthy, im a big proponent of wheel what you got, do a little sawzall bodywork, get some 31 mud terrains on it and wheel, I think im a better driver offroad bk i was running a "handicapped" rig. the fuel door is weird, nice work on thinking through that one ford, gotta have fake acrylic nails like Rookieshooter to get it open hahaha, jk Rick.
ill be watching this build, i like cheaply built but smartly built rigs and i can tell your doing it smart, nice job man.

My biggest thing is reliability, and to me that means smart. Thank you.


awesome XD
nice to see someone else working on a '84 2.8L

Have you set any kind of budget limits on this build?

I've not set a budget, but I'm sure the old lady will eventually. So far the WAF has been pretty good.

The fun thing with this project and money is the g/f graduating college and getting her first job, I as well changed companies and have a much better paying job now so I have a larger budget than I'm used to but I'm still pretty stingy.


1, i love seeing a b2 build
2, don't use the d28. find a d35 and cut and turn it.
3, i'm so glad i live in the south and can find rust free trucks! lol

alright, i'm done with the numbers now lol
you're climate control and gas door really intrest me. i'm confused a little..i've never seen one like it. regardless, keep us updated on this build. i'm new here. this is not my usual forum i'm on. but i'll have to keep a look on this to see how you build a b2.

now to go find this 410fortune build you're speaking of, i must see it!


Found out the guy who had the parts B2 is getting an Explorer in so I will be going D35 now and 8.8.


Got some new to me parts and I couldn't be happier.

I got a hood, tilt steering column, a grill, both tail lights, and all the front signal lights.

0feda303-9988-440d-89fc-1bd4558f4f6a.jpg


A decent fender.

cc7dcc71-812b-4a9c-b911-bfc621a4aaeb.jpg


And my oddball driveshaft!

85ae743d-7236-4094-b2af-0cec845a9d28.jpg


I wish I would have gotten more parts off the parts truck but I was on a time crunch so I got what I could. I got it all for $30 too, I cant wait to strip the explorer.

Just waiting on my new body mounts.


Don't forget that you can also ransack the Ranger AND the Aerostar!!! I have gotten some nice seats out of the Aerostars before, double foldable armrests, swivel seat mounts, things like that on them. I also have gotten ALOT of cool woodtrim things like overhead lights, maplights, different center consoles, and just flat out neat things, especially from the conversion package ones.


Got some new to me parts and I couldn't be happier.

awesome, good for you!

I'm also just starting to fix up my '84 B2.
here's a little video I recorded last week of me finally taking it out for a spin XD. please ignore the music (not exactly my taste). I just wanted to drown out my embarrassing hootin' and hollerin'
http://www.youtube.com/watch?v=yTUghgBgWH0
not bad for a truck that had been parked for the past 6 months :p


Got my torch from the farm so I started to "loosen" some tight bolts. The bumpers were stuck.

2b0eddd1-4694-4da5-a822-64e94bcefff6.jpg


865c96c8-da10-4c06-996a-702bb8bfd1ed.jpg


dd604343-0d69-4e48-af26-6ee4d8571051.jpg


In these pictures the right side of the body is jacked up so I could get to the core support bolts that I had to "loosen".

I picked my body mounts up from Jegs today.

2b1ff8ec-6241-483c-ac21-c5d41f01c1e5.jpg


They have a ring cast into them but I don't think it is to serve as a replacement for the factory sleeves.

d0630fa5-2667-4d18-ae79-7f4e0cbc99a9.jpg


Tomorrow I'll run a high power magnet over the inside to see how far it goes up. I will have to buy new bolts as mine are toast and I'm going to install a 1 inch body lift. Not hockey pucks but actual 1 inch lift blocks from Jegs. Only to help with the future engine swap.

Brought the welder up too but its 220v and the Garage is not wired for it. But I'll fix that soon.

97df5bd3-70ed-4bb4-b53a-96f9a0b312b6.jpg


Found these pieces in the back. Are they part of the removable windows?

13eaf2f5-34da-4f15-a178-d6d615d9440d.jpg


d8eac648-415c-47d2-ba07-e00fe3e12c53.jpg


Plans for this week are to buy the body lift parts and the bolts and washers. I will also be cutting out the frame patches and hopefully welding them in soon. After that the TTB comes out for some work.


Those pieces are for the original coathook ( one screwed to the window trim ) and the other is from a later model BII. The "curly" one is upside down in the picture, but, it goes over the "assist" handle, your choice as to which side. As far as I know, the broken one was a BII only item. I have not seen them in other Fords, but, I have seen the "curly" style in the 3rd Gen Rangers, and even in the "X"s before.


Long overdue update here.

Found these big washers at a local fab shop. They made me a good deal on them so I got 8 of them, ended up only using 7 as one mount on the passenger side was still good and both the core support mounts were good.

febec5a7-5477-4522-8c91-c9d1de63cdd4.jpg


These got welded to the frame to repair the rotten frame. They have a 1.5" hole in the middle, just a lil bigger than it needed to be but it worked.

Got some 3" body blocks, 5 of them and cut them in half. I only wanted a small lift to help with a future engine swap if I ever did it.

I used 3/4" emt as new sleeves and a washer on top and bottom. Worked out good.

Here is one finished, the welds look like ass because I haven't upgraded the service in the garage to use the Hobart so i had to use a cheapy harbor freight flux welder.

f68b713d-9720-4b4c-9c2d-14f4f14493e2.jpg


Its all bolted down and ready to go. Those are 3" lift blocks cut in half, didn't want all 3" of lift so i settled on this. Started scraping the rust off and painting with red oxide primer. I will go over it with black paint in the end. Ordering gas tank straps and a new sending unit now. I will have it back up and running soon. Still need to do some work on the front end or just replace it.

ccdee50c-3560-43f5-991a-ead48f1e1251.jpg


Lookin good! Nice job on those mounts.


Join the Elite Explorers for $20 each year.
Elite Explorer members see no advertisements, no banner ads, no double underlined links,.
Add an avatar, upload photo attachments, and more!
.


Did this over this weekend. Had to do something because Friday night I was about to scrap the damn thing. Got a bur up my ass (girlfriend) and started plugging away Saturday and finished up Today. She wants it to run for one because its in the way and two the taller I make it the more she likes it. Sitting at 35 inches to the wheel wells right now, and thats with bald 235's.


Back
Top