fastkurve
Member
- Joined
- October 20, 2005
- Messages
- 42
- Reaction score
- 1
- City, State
- Longueuil, Quebec, Canada
- Year, Model & Trim Level
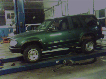
- 2004 XLT SOHC
So, it been a while since my first post but I finalized the whole thing today.
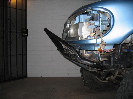
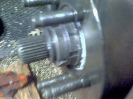
Ended up removing the halfshaft by using a drift against the back of the CV and hammered it out. Got the differential out from the truck, change the oil seals for the latest version ones and change the open unit for an Auburn LSD.
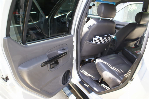
Get everything back in, road test it and worked Ok, no oil leak, no whinning, no nothing.
And I finally got a locked rear end
It been a quite straight forward job, but many tools were required, without them, I would probably ended up having the job finished by a shop.
To remove the old oil seals on the differential housing, you need a three legs puller, mines were totally stuck in their mating bore. To change the differential itself, I had a home made case spreader done. Even with the case spreaded by .030" (max allowed by the Ford manual), the differential was still tight. I pulled it from the housing with a knocker puller instead of using a pry bar against the aluminium housing. Also you need a puller to remove the halfshaft mating spline from wheel hub.
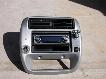
Also have to use a dial indicator to check the backlash before removal and after install. Had to use bearing and seals drivers to install them without damaging them.
At the end, it is a gratifying job for myself. I was told by a mechanic that replacing a differential into the IRS was a heck of a job. At the least, it is a job over the average on the difficulty meter.
I'm glad having tackling it down by myself.
Ended up removing the halfshaft by using a drift against the back of the CV and hammered it out. Got the differential out from the truck, change the oil seals for the latest version ones and change the open unit for an Auburn LSD.
Get everything back in, road test it and worked Ok, no oil leak, no whinning, no nothing.
And I finally got a locked rear end
It been a quite straight forward job, but many tools were required, without them, I would probably ended up having the job finished by a shop.
To remove the old oil seals on the differential housing, you need a three legs puller, mines were totally stuck in their mating bore. To change the differential itself, I had a home made case spreader done. Even with the case spreaded by .030" (max allowed by the Ford manual), the differential was still tight. I pulled it from the housing with a knocker puller instead of using a pry bar against the aluminium housing. Also you need a puller to remove the halfshaft mating spline from wheel hub.
Also have to use a dial indicator to check the backlash before removal and after install. Had to use bearing and seals drivers to install them without damaging them.
At the end, it is a gratifying job for myself. I was told by a mechanic that replacing a differential into the IRS was a heck of a job. At the least, it is a job over the average on the difficulty meter.
I'm glad having tackling it down by myself.