- Joined
- March 14, 2005
- Messages
- 1,668
- Reaction score
- 841
- Location
- Mesa AZ
- City, State
- Mesa
- Year, Model & Trim Level
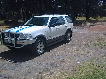
- 2000 EB Explorer 5.0
Installing a replacement 8.8 axle in a 2nd Gen Explorer
I recently upgraded the axles in my Explorer from 3.73s to 4.10s. I had several upgrades I wanted to do (still do) but this was the most cost effective. The 4.10s will make the truck better off-road, it will pull the camper better, and it may even get better gas mileage as it won’t have to work as hard to turn the 1.5” larger MT tires. I took a few pics along the way, and the rest I’ll just describe as best I can.
1) Jack up the truck and PLACE JACKSTANDS under the frame, right in front of the front leaf spring mounts. NEVER get under a vehicle while it is supported by just a jack. Particularly as you’re going to be sitting under this truck while it has NO springs, NO axle, nothing to even slow it down till it hits YOU. I went to Harbor Freight and picked up these 6-ton jack stands for under 50 bucks. The little 3-ton stands I’ve been using just aren’t tall enough.
EDIT: I've since replaced the Harbor Freight stands (Recall) with a good set of NAPA jack stands. With my Employee discount they cost about the same as the Harbor Freights
2) Remove the wheels (Yea, I know, it’s obvious but hey, not everyone is as smart as you and I. (Don’t need a pic for that do you?) Now is a good time to remove the spare as well. It frees up all kinds of room.
3) Now we get to the small, dirty parts. The best way to remember how to go about doing this is to start at the front and work your way back. So…
a. Unhook the driveshaft. There are 4 bolts holding it on, they are 12mm 12pt. Now if you are replacing the axle with the same axle mark the driveshaft with paint so you can re-attach it in the same position you removed it from. Once the bolts are removed it should just slide forward and off of the axle. If it’s never been pulled before, it may need a little convincing with a screwdriver or prybar, but not much. Once it’s free of the axle, just let it rest on the floor. Don’t pull it from the transmission as you’ll have a nice puddle of fluid on your floor by the time you’re done. Oh yea, replace the bolts where they came from so you’ll know where they are later.
b. Unplug the speedo/anti-lock brake sensor. Its right above where the driveshaft was mounted. It’s an electric plug with “grips” on both sides. Move the grips apart gently and pull the plug. Hang the wire up out of the way.
Edit: Forgotten Step. Unfasten the "5th shock". It runs from the pumpkin up to the frame to the right (passenger side). Just remove the bolt connecting it to the pumpkin. The nut is welded to the bracket so only one wrench is needed. As usual once the shock is unhooked, replace the bolt to keep track of its location.
c. Now we get to do the brakes. I lost sleep over this for no reason; it is much easier than I thought it would be. Climb under the truck behind the axle. Running Along the top of the axle you’ll see a hard brake line clipped to each side of the pumpkin and at the top of the pumpkin. Using a screwdriver open up the clips just enough to get the hard lines out. The clip on top of the pumpkin is attached with a 13mm bolt. Just remove the bolt, free the clip, and replace the bolt. At the back of the axle, above each leaf spring, is a clip holding the junction where the line goes from a hardline to a rubber line. The clip is bolted in, remove the bolt freeing up the clip then replace the bolt. Repeat for the other side. This should free up all the brake lines so let’s get started on the calipers. There are two 10mm bolts holding each caliper on, you have to look behind the caliper to see them. Loosen each of them (they should be very snug) and pull the long bolts out. Carefully grasp the caliper and pull it away from the rotor. If you do it right everything will stay in place and make it easier to put back later on. Have a wire handy and hang the caliper from the wire attached to the frame, up out of the way. Never leave the caliper hanging by the brake line. Once you have hung both calipers up out of the way, the brake line should follow and hang up out of the way as well. But it never hurts to make sure it’s up and clear of things that could cause damage. Now comes the cursing part. If you look at the back of the backing plate you’ll see a cable with a spring on it. This is for your parking brakes. You’ll need to take the oval shaped part off of the hook, and then slide the cable forward out of the round opening. The cable is held in that round opening by clips that have to be compressed to fit into the opening. Be prepared to curse. It helps if you remove the rotors, and loosen the adjuster wheel for the parking brake shoes.
d. If you have a 5.0, now is the time to loosen the Torque rods. (If you have a V6 move on to the next step) These are sturdy looking steel rods that run from the top of each end of your axle, to the frame. They are there to prevent spring windup. They are easy to remove, just get a big socket on the bolt (the nuts have an arm on them to keep them from turning) and loosen it. I used an impact wrench. Once the bolt is out, lift the bar up out of the way, no need to detach it from the frame (UNLESS you are replacing your axle with one from a V6 which didn’t come with the Torque rods and will not have the brackets for them)
e. Ok, next on our journey toward the rear of the truck is the Shock Absorbers. Get a floor jack, and place it under the pumpkin. The springs will want to come down a little further once the shocks are detached, and we don’t want any sudden jolts. Besides the weight of the axle can put a bind on the bolts and make them hard to pull out. Loosen the nuts from the bolts and see if they want to come out. If not raise or lower the jack holding the pumpkin until the feel free and can be pulled out. Once the bolts are out, slowly lower the jack until the springs are supporting the axle. We don’t have to remove the shocks, just take the bolts out that attach them to the axle, and let them hang. Of course if you are taking advantage of this opportunity to replace a set of worn out shocks, then yank those dudes out. I can’t tell you what size the bolts are as they vary from brand to brand probably. Mine were 18mm.
f. Moving right along we come to the sway bar. There are options here. You can remove them from the axles by loosening the four bolts that hold the two brackets to the axle. Or you can loosen the nuts that hold the sway bar to the links that hang from the frame. I’ll let you study it and decide which you think is easiest. I removed the sway bar from the links and took the sway bar out with the axle.
g. Now very carefully study the rear axle, looking for anything that may have been forgotten that would continue to hold it in when you try to take it out. Look for wires, brake lines... anything. I think I’m keeping up but I’m not infallible.
4) Now that all the small attachment points are dealt with, it’s time for the big stuff.
a. There are two U-Bolts on each side holding the axle to the leaf spring (I’m sure you’ve noticed them). Underneath are 18mm(?) nuts. Use an impact if you’ve got one and loosen them, 4 per side. When they are loose, lift off the U-Bolts and put the nuts back on the U-Bolts finger tight to make them easier to find. You’ll see all kinds of nastiness that had been lurking between the springs and the plate the U-Bolts went through. Take advantage of the chance to clean that up.
b. If you have a small square furniture dolly… get it. Place it under the pumpkin. Now if you have two floor jacks you’re in luck. Place one under each axle leaving room for the furniture dolly in between. (I have heard of people using creepers for this). Raise the jacks so they are just barely supporting the axles.
c. Move back to the Shackles, and carefully remove the lower bolts holding the springs in. If they are stubborn don’t force them. There may be tension on them from the springs causing them to be tight. Raise or lower the jack on the side you are working on by tiny degrees, until the bolt feels free indicating that the jack is supporting the axle, not the bolt. Once both sides are done, lower the jacks slowly till the axle resting on the Furniture dolly, with the pumpkin in the hole in the middle. Once the axle is stable on the dolly, it’s now safe to remove the Floor jacks.
d. The axle should be free from the truck at this point. Using the furniture dolly roll it out from under the truck and clear the area for the new axle. I had two furniture dollies so it was easy for me to roll the new axle into place and reverse the procedure I used to remove the old one.