-
Performance Upgrades - Maintenance - Modifications - Problem Solving - Off-Road - Street Trucks.
Covering the Explorer, ST, Sport, Lincoln Aviator, Sport Trac,
Mercury Mountaineer, Mazda Navajo, Ford Ranger, Mazda Pickups, and the Aerostar.
Featuring H.I. - Human Intelligence.
Register Today It's free!
the
-

The bottom is replaced after it's refilled.
- BrooklynBay
- Media item
- after bottom is it's refilled replaced the
- Comments: 0
- Category: General Photo Album
-
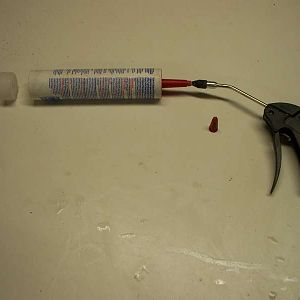
Compressed air pushed out the bottom.
- BrooklynBay
- Media item
- air bottom compressed out pushed the
- Comments: 0
- Category: General Photo Album
-
The terminals are connected.
- BrooklynBay
- Media item
- are connected terminals the
- Comments: 0
- Category: General Photo Album
-
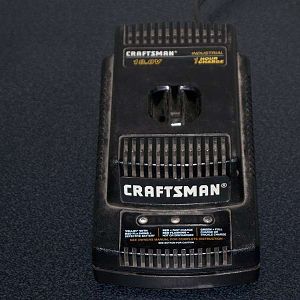
The power supply base.
This was the original power supply that burned out. It was converted into a charging base to be used with an external power supply.- BrooklynBay
- Media item
- base power supply the
- Comments: 0
- Category: General Photo Album
-
The old & new power plugs.
- BrooklynBay
- Media item
- & new old plugs power the
- Comments: 0
- Category: General Photo Album
-
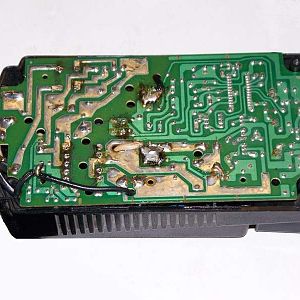
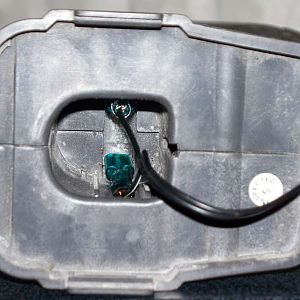
The circuit board.
This is an internal view of the modified battery charging base.- BrooklynBay
- Media item
- board circuit the
- Comments: 0
- Category: General Photo Album
-
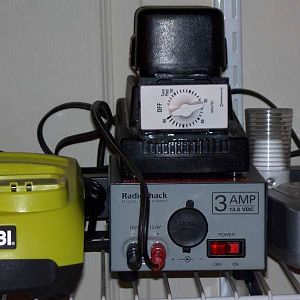
The base is connected to the power supply.
Power supply with the modified battery charging base.- BrooklynBay
- Media item
- base connected is power supply the to
- Comments: 0
- Category: General Photo Album
-
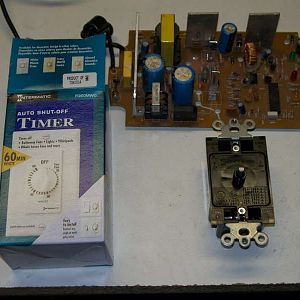
The 60 minute timer with the circuit board.
Mechanical charger modification.- BrooklynBay
- Media item
- 60 board circuit minute the timer with
- Comments: 0
- Category: General Photo Album
-

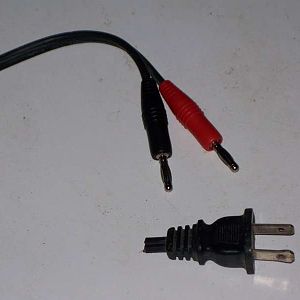
Close up view of the banana plugs.
- BrooklynBay
- Media item
- banana close of plugs the up view
- Comments: 0
- Category: General Photo Album
-
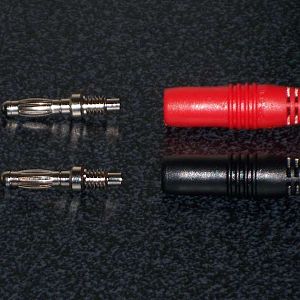
Break out view of the banana plugs.
- BrooklynBay
- Media item
- banana break of out plugs the view
- Comments: 0
- Category: General Photo Album
-
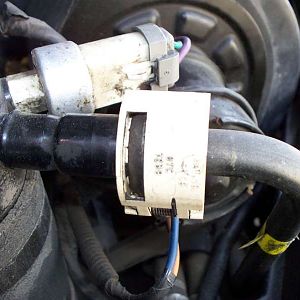
The pipe on the rear of the unit has three O rings.
- BrooklynBay
- Media item
- has o of on pipe rear rings the three unit
- Comments: 0
- Category: General Photo Album
-
The pipe is removed.
- BrooklynBay
- Media item
- is pipe removed the
- Comments: 0
- Category: General Photo Album
-
The accumulator is removed.
- BrooklynBay
- Media item
- accumulator is removed the
- Comments: 0
- Category: General Photo Album
-
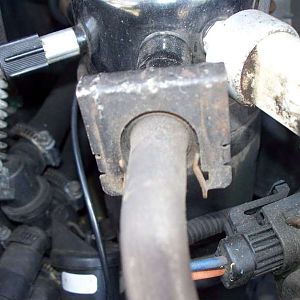
Remove the two bolts & clamps.
- BrooklynBay
- Media item
- & bolts clamps remove the two
- Comments: 0
- Category: General Photo Album
-
Remove the metal cover.
- BrooklynBay
- Media item
- cover remove the
- Comments: 0
- Category: General Photo Album
-
Removing the ignition module.
- BrooklynBay
- Media item
- ignition module removing the
- Comments: 0
- Category: General Photo Album
-
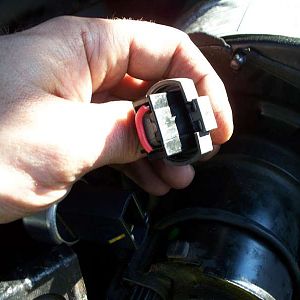
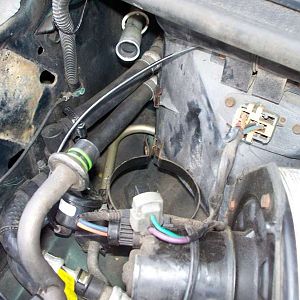
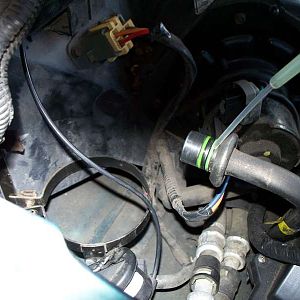
Jump the connector while freon is added.
- BrooklynBay
- Media item
- added connector freon is jump the while
- Comments: 0
- Category: General Photo Album
-
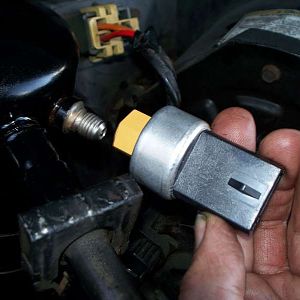
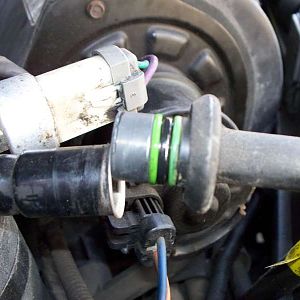
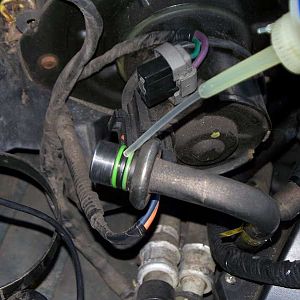
Install an O ring before you install the pressure switch.
- BrooklynBay
- Media item
- an before install o pressure ring switch the you
- Comments: 0
- Category: General Photo Album
-
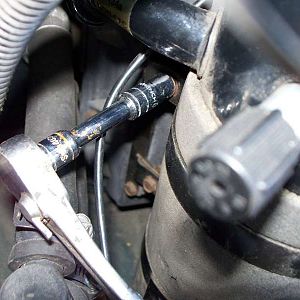
Insert the tool, and pull on the pipe to disconnect.
- BrooklynBay
- Media item
- and disconnect insert on pipe pull the to tool
- Comments: 0
- Category: General Photo Album
-
Close up view of the pipe with O rings.
- BrooklynBay
- Media item
- close o of pipe rings the up view with
- Comments: 0
- Category: General Photo Album
-
Always lubricate the O rings prior to installation.
- BrooklynBay
- Media item
- always installation lubricate o prior rings the to
- Comments: 0
- Category: General Photo Album
-
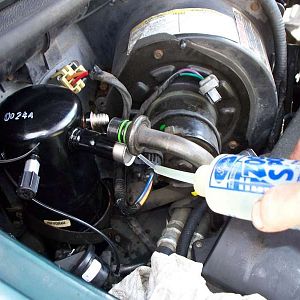
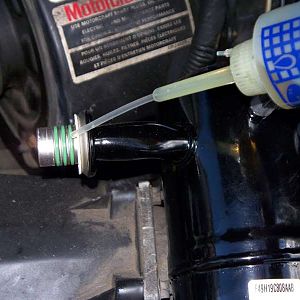
Add compressor oil before the system is closed.
- BrooklynBay
- Media item
- add before closed compressor is oil system the
- Comments: 0
- Category: General Photo Album
-
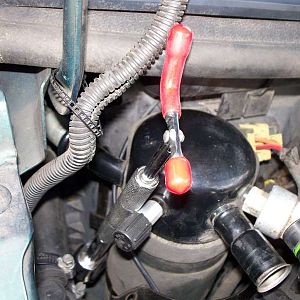
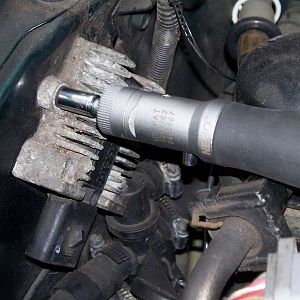
A Sidewinder ratchet easily removes the two bolts.
Accumulator removal in an Aerostar.- BrooklynBay
- Media item
- a bolts easily ratchet removes sidewinder the two
- Comments: 0
- Category: General Photo Album
-
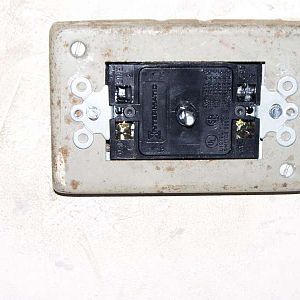
The timer is mounted to the extension box.
- BrooklynBay
- Media item
- box extension is mounted the timer to
- Comments: 0
- Category: General Photo Album
-

The timer is installed.
- BrooklynBay
- Media item
- installed is the timer
- Comments: 0
- Category: General Photo Album