-
Performance Upgrades - Maintenance - Modifications - Problem Solving - Off-Road - Street Trucks.
Covering the Explorer, ST, Sport, Lincoln Aviator, Sport Trac,
Mercury Mountaineer, Mazda Navajo, Ford Ranger, Mazda Pickups, and the Aerostar.
Featuring H.I. - Human Intelligence.
Register Today It's free!
- Forums
- Generation Specific Forums
- 1991 - 1994 Explorer Ranger Navajo 1st Generation
- Modified 1991-1994 Explorers
You are using an out of date browser. It may not display this or other websites correctly.
You should upgrade or use an alternative browser.
You should upgrade or use an alternative browser.
Trail Master 4" lift install and questions 1994 XLT
- Thread starter SBJ420
- Start date
Elite Explorer members see no advertisements, no banner ads, no double underlined links,.
Add an avatar, upload photo attachments, and more!.
SBJ420
Well-Known Member
- Joined
- June 12, 2006
- Messages
- 443
- Reaction score
- 0
- City, State
- Windsor NS
- Year, Model & Trim Level
- 95 XLT
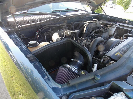
Alright so I live in Vancouver BC Canada, if you have been here in the winter its a 99% chance of rain on any day.... but not today!


First to come off is the shocks, brake lines, sway bar, and if you have them radius arm rivets.


I used a cut / grind wheel on a 4.5" angle grinder. Only took a few min. The rivets might not fall out right away, thats fine, just watch yourself so it does not fall on your legs!!!
Next I took off the I beam bolts, once both I beam bolts were out I just let them drop and then the radius arm bracket fell out of the cut rivets

First to come off is the shocks, brake lines, sway bar, and if you have them radius arm rivets.
I used a cut / grind wheel on a 4.5" angle grinder. Only took a few min. The rivets might not fall out right away, thats fine, just watch yourself so it does not fall on your legs!!!
Next I took off the I beam bolts, once both I beam bolts were out I just let them drop and then the radius arm bracket fell out of the cut rivets
SBJ420
Well-Known Member
- Joined
- June 12, 2006
- Messages
- 443
- Reaction score
- 0
- City, State
- Windsor NS
- Year, Model & Trim Level
- 95 XLT
before you drop the axle down take off the front drive shaft from the diff. also before you drop the axle take off the pit man arm, you will need a pit man arm puller for this, $30 and Canadian Tire, I tried to use a 3 arm gear puller but it would always slip off.
After everything from the axle is off the truck slide it back under the truck. I have placed jack stands under the front frame.


After everything from the axle is off the truck slide it back under the truck. I have placed jack stands under the front frame.
SBJ420
Well-Known Member
- Joined
- June 12, 2006
- Messages
- 443
- Reaction score
- 0
- City, State
- Windsor NS
- Year, Model & Trim Level
- 95 XLT
once the axle is pulled away I stated to take off the I beam brackets. The passanger side will unbolt, I used a 18mm and a 21mm


after that one is out go take the drivers side off. Mine was riveted on, so it needed to be cut out. Agian I used the angle grinder with a cut / grind disk, went easy, about 20min. The rivets stayed in the bracket, this was the biggest pain. I ended up using a small drill bit and drilling out the rivets and heating them up and punching them out with a hammer and punch. I did need to apply heat.


here is the drivers side bracket out

here is the new drop bracket that it goes on

after that one is out go take the drivers side off. Mine was riveted on, so it needed to be cut out. Agian I used the angle grinder with a cut / grind disk, went easy, about 20min. The rivets stayed in the bracket, this was the biggest pain. I ended up using a small drill bit and drilling out the rivets and heating them up and punching them out with a hammer and punch. I did need to apply heat.
here is the drivers side bracket out
here is the new drop bracket that it goes on
SBJ420
Well-Known Member
- Joined
- June 12, 2006
- Messages
- 443
- Reaction score
- 0
- City, State
- Windsor NS
- Year, Model & Trim Level
- 95 XLT
I put the passangers side bracket on and the radius arm brackets


now these might be the most shot radius arm bushings ever..... I did not bend or bang these up taking them off


now these might be the most shot radius arm bushings ever..... I did not bend or bang these up taking them off
SBJ420
Well-Known Member
- Joined
- June 12, 2006
- Messages
- 443
- Reaction score
- 0
- City, State
- Windsor NS
- Year, Model & Trim Level
- 95 XLT
after I got all the brackets on I put the new radius arm bushings on and then put the radius arm bracket back on the arms. I put the I beams back on the new brackets. Now this part can be tricky, when you try to line up the radius arms with the new drop brackets I used jack stands and a jack under the axle. Leave the I beam brackets loose until you get the brackets bolted on.

SBJ420
Well-Known Member
- Joined
- June 12, 2006
- Messages
- 443
- Reaction score
- 0
- City, State
- Windsor NS
- Year, Model & Trim Level
- 95 XLT
once everything was tightened down and loctite was applied I set up the brake lines and the coils, this agian can be alot of fun! Put on your new extended shocks, I went with the pro comp ES3000's, only $38 each


this is a good feeling once the coils are on and the front end is complete
I had to adjust my wheels once I got them on, the tires were pointing in so I loosened the tie rods and turned them until both tires were straight.

this is a good feeling once the coils are on and the front end is complete
I had to adjust my wheels once I got them on, the tires were pointing in so I loosened the tie rods and turned them until both tires were straight.
SBJ420
Well-Known Member
- Joined
- June 12, 2006
- Messages
- 443
- Reaction score
- 0
- City, State
- Windsor NS
- Year, Model & Trim Level
- 95 XLT
Now I did not take any pictures of the rear.
here is the difference in the leafs

Its very straight forward, the only thing I can say is make sure you put the leafs on the right way! I made the mistake of ASSuming that they were the same either way they went. I bolted everything down and put the tires on and noticed that the rear axle was about 1 foot extended toward the rear of the truck!!!!!!!!!!!!!!!!!!!!!!!!!! I went to pull the truck ahead a few feet and the drive shaft fell out,.... this set me back a good 4h's
all done and said it took me 22h's on a 3 day weekend with no help at all.. I did have a inpact gun witch was a HUGE help. And after the lift and shocks and brake lines it came too $1100 CDN
here it is done


I will post some better pics of after, and of some wheeling this weekend!
any questions or tips please add!
here is the difference in the leafs
Its very straight forward, the only thing I can say is make sure you put the leafs on the right way! I made the mistake of ASSuming that they were the same either way they went. I bolted everything down and put the tires on and noticed that the rear axle was about 1 foot extended toward the rear of the truck!!!!!!!!!!!!!!!!!!!!!!!!!! I went to pull the truck ahead a few feet and the drive shaft fell out,.... this set me back a good 4h's
all done and said it took me 22h's on a 3 day weekend with no help at all.. I did have a inpact gun witch was a HUGE help. And after the lift and shocks and brake lines it came too $1100 CDN
here it is done
I will post some better pics of after, and of some wheeling this weekend!
any questions or tips please add!
manaen
Explorer Addict
- Joined
- February 27, 2007
- Messages
- 2,701
- Reaction score
- 4
- City, State
- Clear Spring, MD
- Year, Model & Trim Level
- 2011 Xterra Pro-4X
Looks really good!!!
but I have one question, why did you drop the entire front end to do the install. when I did mine all I needed to do was remove the brackets and replace with the new ones?
but I have one question, why did you drop the entire front end to do the install. when I did mine all I needed to do was remove the brackets and replace with the new ones?
SBJ420
Well-Known Member
- Joined
- June 12, 2006
- Messages
- 443
- Reaction score
- 0
- City, State
- Windsor NS
- Year, Model & Trim Level
- 95 XLT
well the pit man arm needed to be changed for the drop arm, so there goes the steering, than the radius arms needed brackets so those came down, and the I beams...... anything that was connected to the truck needed either to be longer, like the shocks and coils, or it had drop brackets......... I think its way different in a IFS. than a TTB
91exploreron37
Explorer Addict
- Joined
- October 25, 2006
- Messages
- 1,637
- Reaction score
- 5
- City, State
- Bartlett Tn
- Year, Model & Trim Level
- 91 Eddie Bauer
No I think he was asking why did you remove the whole entire TTB assembly from the truck instead of just unbolting it from its brackets, replacing the brackets with drop brackets and then bolting it back up.
I guess it makes it easier to grind off the rivets? When I did my lift I left my TTB where it was and just replaced the brackets even though it was kinda hard to get to the rivets with the ttb still there.
Also did you relplace the radius arm mounts?
I guess it makes it easier to grind off the rivets? When I did my lift I left my TTB where it was and just replaced the brackets even though it was kinda hard to get to the rivets with the ttb still there.
Also did you relplace the radius arm mounts?
SBJ420
Well-Known Member
- Joined
- June 12, 2006
- Messages
- 443
- Reaction score
- 0
- City, State
- Windsor NS
- Year, Model & Trim Level
- 95 XLT
ahhhhh yeah it made it very easy to get under at the rivets. All of the rivets only took around 10min or so. And the radius arm mount you mean the whole bracket that runs from one side to the other? If so not at this point, I am going to do that soon.
lifeguard379
Explorer Addict
- Joined
- July 10, 2004
- Messages
- 1,298
- Reaction score
- 14
- City, State
- sacremento,ca
- Year, Model & Trim Level
- 93 eddie bauer 2 door
looks great! howdoseit ride?
manaen
Explorer Addict
- Joined
- February 27, 2007
- Messages
- 2,701
- Reaction score
- 4
- City, State
- Clear Spring, MD
- Year, Model & Trim Level
- 2011 Xterra Pro-4X
well the pit man arm needed to be changed for the drop arm, so there goes the steering, than the radius arms needed brackets so those came down, and the I beams...... anything that was connected to the truck needed either to be longer, like the shocks and coils, or it had drop brackets......... I think its way different in a IFS. than a TTB
I am sorry I should have made myself clear, I was talking about a 95 ranger that I did, with the TTB not my current 01 merc. I guess I just did everything in steps on mine and never really ended up dropping anything. I was also doing it by myself and was a bit worried about being able to balance the TTB on a jack and line things back up.
SBJ420
Well-Known Member
- Joined
- June 12, 2006
- Messages
- 443
- Reaction score
- 0
- City, State
- Windsor NS
- Year, Model & Trim Level
- 95 XLT
it rides very well. MUCH better than before. before it drove like **** due to the radius arm bushing being so shot.
I also had no help with this, its not so hard balancing the axle alone when you are putting it on, other than the radius arm brackets!
I also had no help with this, its not so hard balancing the axle alone when you are putting it on, other than the radius arm brackets!
SBJ420
Well-Known Member
- Joined
- June 12, 2006
- Messages
- 443
- Reaction score
- 0
- City, State
- Windsor NS
- Year, Model & Trim Level
- 95 XLT
I drove it on the ramps today to see if anything was getting in the way before I go wheeling tomorrow, seems ok. Body is nice and straight when its on the ramps, will take some pics of wheeling tomorrow ")


turbomustang
Member
- Joined
- December 31, 2006
- Messages
- 12
- Reaction score
- 0
- City, State
- canada b.c
- Year, Model & Trim Level
- n/a
looks good and where geting snow in abbotsford so stave or davis lake should have lots i went up there a couple weekends ago and there like like 2 feet of snow.
Elite Explorer members see no advertisements, no banner ads, no double underlined links,.
Add an avatar, upload photo attachments, and more!.
91exploreron37
Explorer Addict
- Joined
- October 25, 2006
- Messages
- 1,637
- Reaction score
- 5
- City, State
- Bartlett Tn
- Year, Model & Trim Level
- 91 Eddie Bauer
Was your front swaybar disconnected in those pics?
Featured images


Featured images
Similar Threads
- Replies
- 1
- Views
- 1,591
- Replies
- 12
- Views
- 4,413
- Replies
- 11
- Views
- 4,565
- Replies
- 9
- Views
- 1,403