410Custom's builds a 2007 Ranger V8 - custom truck build - Project "Ranger Premier" | Page 46 | Ford Explorer Forums - Serious Explorations

  • Register Today It's free!

410Custom's builds a 2007 Ranger V8 - custom truck build - Project "Ranger Premier"

44356F50-AEF6-4771-A055-3A2A2A507B75.jpeg

Taylor wires :)

10A6F223-41B9-4821-B90D-C040B3094F06.jpeg

84F9EC6E-07C8-4A0C-BB4A-E2B1F6E15A01.jpeg

F42BF67D-17C8-48CE-9291-4D4F8BDC9557.jpeg

E6AD7E98-7069-4730-BF7B-A912530FA5F5.jpeg

C61C3AF4-D494-41A1-9CFE-1422ECBBB9DB.jpeg

Holes marked fender removed and drilled
3BF94ABE-37B6-48BF-AF0E-FA7B8BC63C74.jpeg

EF9635ED-7E83-452F-850B-AC1CF74C3C8A.jpeg

81680C5A-8469-4AAD-983D-8DD7C8A9A076.jpeg

Bolt on, check fit align mark some more remove again
64842D00-01C5-459B-B214-B7CB1CF8B6D5.jpeg

99B11024-EBA1-40CE-80BE-8C9930A9593A.jpeg

B44F44E7-8376-4EF8-AFA0-799565E57281.jpeg

51D52EAC-D32D-4F80-81E6-5D597D30891F.jpeg

Marked drilled tested drilled larger
AE2DBD75-3B89-442C-B70D-BD62757D2B01.jpeg

Minor minor imperfections in finish
4B0D22CE-29EC-46DC-8168-6BE38D176D2E.jpeg

Good quality!!!

979F4A5B-C796-4AD2-B9DB-F80485F48ED6.jpeg

Clamped marked drilled all mounting holes and then final test fit
428D6627-4853-4E1E-AD54-C538A2A92D47.jpeg

B63CF341-1061-446D-9657-C47A1A3BB39B.jpeg

9B1C0B64-7278-4B56-8C0F-5AE1D5EB4B38.jpeg

Only two location so far need a little sanding
32DF2476-7F89-4E2C-A91C-520A1A77A8E1.jpeg

6514012F-4736-416C-80CE-1D324DD0B10F.jpeg

F0AEB747-D90D-4C27-AD93-5F904226F01F.jpeg

Shimmed perfect
0514637E-14CE-47C5-930B-5C38FFB207F4.jpeg

23F295DD-9175-4256-978B-2DAD878E30D8.jpeg


2EF08A48-6E29-453B-8202-014D16294DBD.jpeg


Join the Elite Explorers for $20 each year.
Elite Explorer members see no advertisements, no banner ads, no double underlined links,.
Add an avatar, upload photo attachments, and more!
.


Tire clearance, Clarence
6B7C972C-AFEC-4301-ACA4-6B8C12C643AD.jpeg

2ADC08B5-35C7-4A66-9F16-56E4CD4DC8D3.jpeg

04DEE86E-F609-4F76-A810-F1B3F5DED65A.jpeg

Tire coverage
0D96CD72-3B51-4144-9394-CD229ECFE5A8.jpeg

41831FB9-D427-4A13-9777-0859DB621561.jpeg

6EECC438-DFA3-4FAC-9D79-45BF68EE46B3.jpeg

6A582700-D264-4965-8515-84C104B218DB.jpeg

Glass was the right choice for this truck! She’s standing tall ;) hood is several inches higher then my bronco that is for sure

More to come


Happy thanksgiving indeed! I have been busy!

If you look at this thread you think Geesh this is moving slow
If you sleep in my bed you would know Geesh someday I’ll get a day off lol

We have 3 shops running right now, it’s been a crazy adventure moving up here, I have been plugged into a group of dudes who live breathe trucks and off roading. The connections I have made will last for generations I hope. Anyways I’ve been busy! I wrapped up all other projects so I can focus on this truck until completion. I have probably said that about 22 times in this thread… but life happens and we are building a future here. Also my income was cut in half last year, I am part owner of the elevator consulting business so we get paid for using our name, however actually drawing and designing elevators, being a project manager I only do a few hours a month anymore. Thank goodness!! I cannot sit at a desk and draw elevators for 40-60 hours a week like I used to, it take a toll on you. Anyways I have had to find ways to make more money then I spend, so I have been building a lot of trucks and making a lot of repairs for others.

So all that has settled and is sorted out. I have a team of close friends working together now on these trucks. The result is 3 separate shop locations and a ton of projects. The nice part is we are flipping rangers and I am not even there! Everyone knows I have to focus on the 07, it has been in the works for some time

Okay enough with the boring business business side of things let’s get this truck done
We have a body shop all setup and we have been doing g lots of body work and paint. My buddy has been painting cars for over 50 years and my other buddy/neighbor/ helper is a body shop master tech so…. We had setup heat and air and all things needed for this. The dudes are all practiced up (painted about 4 white rangers and a white sport trac, and a 49 Chevy pickup this summer)
Now they are all setup and prepped to spray some blue

My job was to get the fiberglass bits fitted and prepped for paint. That is done and the parts are off to the body shop now
The “louvered”’sections of the rear bedsides are being professionally patched/covered… we don’t want the louveres

So here we go… many things have been accomplished here let’s get you guys up to speed


First up we needed a donor ranger bed. Do I cut up the nice blue one?
Pros: less bodywork, this bed is flawless no dents and it’s already blue.
Cons: it’s a perfect 07 bed with high end linex . Cutting into it would be a shame! But it would have saved me/us some work…well lots of work.. but it would have also created other problems like cutting through linex and perfect paint, and leaving linex exposed at the cuts not optimum, edges and part of box would Likely still need paint when all is said and done etc etc.
eventually it was decided no way am I cutting up the 07 bed. I was back and forth on this until the time came to actually modify

In comes the donor bed. I have a black bed from a 2002 ranger we put back on the road. We scored a “less” dented bed from the junk yard to use on that truck… red and we have to paint that truck anyways so…

This Black bed had a huge dent in the side, otherwise very good shape… perfect donor
Getting my hands on a good ranger bed is not easy, they are valuable around here. It looks like this one was destined to be ours for this truck… so we make it so

Once decided the bed was brought into the shop so it could thaw, get stripped and cleaned up, then finally cut for fiberglass

D6727F77-3F7C-469B-B95F-DC411528AB4F.jpeg


The 07 bed has been put in storage lol
Turns out picnic tables are perfect for holding ranger beds
477F323C-B2C7-4A0A-9A4E-FD221782C1AB.jpeg

D3718314-B739-4A9C-BB78-80DEAB866B24.jpeg

I am able to easily move these with the forks on my tractor, I’ve gotten quite good at it!

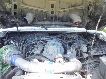
The black bed sat outside for 4 months before finally coming in… had to melt the ice and remove all forest debris
4BF867DA-8D92-4B17-A3E5-49AF6B409512.jpeg

Really good shape! On this side
9E0115B8-138B-4BCD-82CE-B88EB07FCE62.jpeg

Huge dent over here
The box is still straight as an arrow
C31AB3E7-D21F-4A17-BB3B-E0C1E76C454A.jpeg

Dent city
4F980796-52A9-4C0C-B738-987DCBE98622.jpeg

Time to clean it and strip all 02 hardware. Of course one fastener had to strip
DDD1DECF-69D5-4168-AAE0-DFB312C8A253.jpeg

Grinder made short work
6B80C181-BF45-4E97-BD53-754216C9FFB9.jpeg

The box is straight!
03642BCC-F9DD-4158-9E70-68FDD104B2E4.jpeg

CAE755B6-3217-41C2-8249-8C5CD968FED7.jpeg

Couple of dents and some metal repairs to be made, these would be the only “cons”
Of using this bed vs the blue one. It needs some fixing to be perfect for the new linex and some Blue paint

I scraped all the goop out and did an initial clean and wipe, I was very happy with the results this bed will work great, better than expected.
42709110-9F4E-4A60-BF84-2DC3CAEE95D6.jpeg

Couple of dents
C535E5BA-D587-4A49-B4E8-6CBA0D886129.jpeg


Metal will be straightened
5CCE3545-79C0-4A01-8B9D-09CCFE9B3EFD.jpeg

Lucky for me I have the best metal body paint dudes around on my team!
C857B97C-3EAC-4805-832E-237214B10BCE.jpeg

This is the only real rust spot on this bed, it has already been cleaned and treated with rust oleum rust treatment that stuff is amazing! More on that later


It was time to plan our initial cuts, the goal is to leave the bed sun structure in tact and only remove the bedside… without the tedious drilling of all the spot welds. Plus doing it the way I am, leaves much structure behind which makes the new glass bits and the remaining metal box much stronger the. If we had cut all the spots welds.
As Mentioned before glass bedsides going onto a ranger has been a thing since 1983, so no need to reinvent the wheel
A945C0A4-0AD3-4210-B971-AC0D88C4F5E0.jpeg

6F598EE1-63A0-420B-8D06-8A0D24AE0AA6.jpeg

1F4BAD82-DD87-460F-AD1B-CB0F2D29882A.jpeg

Cuts were made freehand with my 220v plasma torch. I used a magnet and straightedge just like I was taught in art school. The plasma is just like a pencil

9B072095-DD6C-488A-8216-5714115CE824.jpeg


Did I mention not only did we get a 1940s Quincy air compressor and set it all up we also scored a used Alladin diesel 220v Hotsy for $500 and got it running. The Hotsy is soo good at stripping all these parts in prep for paint

C81D386B-6FFD-453F-900C-2A0F46F8D7A2.jpeg

Only pic I have of the Hotsy? Our buddy Earl getting ready to clean his old skid steer we fixed an huge hydraulic leak…Earl is 78 and works harder than any 20 something I have ever met. They make ‘em tough up here in north Idaho that is for sure


C2411BB4-7C4D-4239-802E-99F856ABA16B.jpeg

New igniter and some various parts now works like new
4C3B0EBB-6690-485C-B425-028D91DE3C6B.jpeg

E14BC8ED-5C21-4DC1-B629-C4993B3B8D0E.jpeg

FBCDB075-8C48-4422-8BA9-DA6F72AD62DD.jpeg

C4226E75-4F4B-459D-B1E9-018D2A03B3E4.jpeg

D60D0764-560D-492E-B303-B1E603093708.jpeg

D4277C36-B2B1-44C3-B8DD-9A198202309D.jpeg

Some of the work they have been doing

White ranger has like 265k miles on it,but runs great and was clean so they did a quick repair of the huge gash in the cab
Good practice
49 Chevy took month of prep work
Body shop(s) up and running!
This has all been in prep to get setup for painting the glass and bed bits on this 07


64586F85-4F4A-4786-8498-44AE360B8EF9.jpeg


Bolted a strip magnet to the straight edge
483DCBA5-02B6-4174-B440-CBB012D8CC29.jpeg

A903650B-3B23-4BB5-AC78-233BF80A0E9E.jpeg

4FA95218-6A98-43BC-988C-8AAAD2D77564.jpeg

First initial cuts
ED49DE2C-0182-4FF5-A72B-555F6BD189AF.jpeg

Don’t forget the inner support structure in the wheel well and under the tail light
AEE56968-80D0-434A-8D26-12C03CB8A476.jpeg


Departure angle is greatly increased w the glass bedsides, the result is much of the factory structure gets hacked away

I cut large and then refine
Eventually ending with factory edges similar to cutting the bedsides off via the spot welds.
A combo of plasma, grinder and sawzall was used here
5AADCE3F-84EF-4A1D-9994-D3D461EFF828.jpeg

First cuts, this will get trimmed a great deal
BC43F505-9B46-4407-B7AC-046CD6DAF927.jpeg

82D06023-4B16-42A8-9EC5-3599AF73ACD2.jpeg

F073846B-8196-42F7-9819-51FBA64EAB38.jpeg

5A32D1D3-532E-4B51-BE73-0FC56DD98DD9.jpeg

Must leave enough structure for tailgate hinges, but not much more
2FA394C6-3644-49F3-9533-73BAC820D5C4.jpeg

Bedside was test fit a few times and then more refined cuts and trimming
DD07D77C-36B0-478B-BA27-2CF0C146580D.jpeg

87197F2F-CEE0-48A5-8FFF-928847A11010.jpeg

Inner structure tucks into glass
001429BE-811F-4117-A455-D09F5ACE729A.jpeg

Getting there, once completed this factory metal bedside support will fit be wrapped by the glass material is removed from the tail light section until it reaches


A370294D-FAAF-4E19-BFC1-EEAB85DC0BBF.jpeg

More cuts / refinements m
3A02A49D-A45A-45F0-9B94-EB9950AC8A67.jpeg

9B6CB21D-24AE-482A-B7AF-7809BDE3EE9C.jpeg

2C604695-D52C-4722-902E-8D3E9835D585.jpeg

7758E1D5-3031-4FA7-AD3D-6149377B5E91.jpeg

0E16A425-807E-4DE9-9B1A-D507EFD1EC7D.jpeg

Better! Rough cuts and initial fitment almost complete
C248518F-040F-4916-8873-6E765BD8B3B2.jpeg

38D4A285-CB25-427E-8F80-5E88BD443119.jpeg

EAC6165A-8816-4CBB-9113-1EF5984712A2.jpeg

Really close now!

I cannot imagine doing this to that beautiful blue bed

9EC7A3EF-E2F0-4D7D-A769-70F4F2BFF16F.jpeg

32310BE5-0314-460E-A195-48E0C1047B1D.jpeg

881D1820-7A0B-432E-A3FF-2BE1ED1036A4.jpeg

2EAE6A0B-4258-4259-B9E9-D3EAA11BFD84.jpeg

Almost fit
647577FE-213C-4380-B10C-9D33C6DDECF1.jpeg

Remove side one more time make final rough cuts. Edges starting to smooth
And finally
BFD906B4-1576-4FB1-9818-92064C3A2E46.jpeg

8685A722-364C-4596-831B-3D476F60C28E.jpeg

Factory metal tucked perfectly
3685FAD0-5BD4-467C-811D-55E97241D7C3.jpeg

Small amount of trimming still needed here
E9965BB4-1AD6-42DF-B3E6-9503F7592B14.jpeg

Bedside finally wraps factory support structure
BF4C08CD-0FFA-4F85-A73C-B38C8A935ABC.jpeg

From underneath
D4967F92-FF0F-4371-B5B6-D6FD87DA17E1.jpeg

22A30A84-BAC4-4185-A227-F13E9794280F.jpeg

FF353EB4-613F-4060-9DB4-AC59720D783D.jpeg

Glass departure vs factory
D86A1586-6728-4E97-AB7D-20FE28E00C1D.jpeg

Boom!

Take what we learned and use it to fit the pass side


Beautiful, great work. I love the way those are made to fit the original steel closely and mate to them.

How much do you know about fiberglass body parts? I have a scarce body kit for my Mark VII, it was called a GTC model(like a Saleen or Roush etc) from a dealer in the late 80's. The pieces are fiberglass and don't have any obvious flanges to be against the stock body and drill holes through, to attach. I haven't asked anyone yet, or found someone who has owned or installed one of these kits. Without removing the old trim pieces so all of the fiberglass bits push up to the old body, I'm not sure whether it'll be a simple drilling of holes etc, or I'll have to create flanges on the stock lower body parts to build attachment points.

How much force can the fiberglass take with a bolt/washer/nut locking it to the sheet metal? Door glass have rivets or bolts holding them to steel braces with quite a bit of torque, you don't want to break anything. I'm wondering if typical 8mm fender bolts would work(or similar sized fasteners(button head etc)), to bolt the body kit pieces on with mild force, and a drop of loctite.


Thank you!

I enjoy working with these aftermarket panels when they fit properly like these do

Fiberglass likes to be sandwiched but not pinched too hard. Many fiberglass panels should be attached with a rubber or plastic bushings and the bushing gets bolted to the vehicle (or metal tabs)

I have an assortment of autofab urethane fiberglass panel Mounting pucks, stainless hardware, and weld on tabs. However I did not need them for this project, instead the ranger glass gets installed “smooth” with no visible fasteners

11FFE9F7-0FE3-4AD0-A4D5-1FA06A4395A5.jpeg

Those are how I mounted the bedsides on my bronco ii
Very good product, it protects the fiberglass from cracking around your Bolt or washer by acting as a buffer and also increasing the size of the mounting hole
C8B21B8A-0794-4D5F-AD78-0E3B33CEC6A8.jpeg

5BEB1BD3-FC0E-47FC-BA89-C8A22C7D14AC.jpeg

F23B91D8-5C8A-4004-8A60-DC1438195A74.jpeg


Are we there yet?


Very nice, I'll yell at you when I get to that fiberglass body kit and can understand what's possible.


The “louvered”’sections of the rear bedsides are being professionally patched/covered… we don’t want the louveres
Sweet. Thanks for the insight how the glass goes on. Ever since learning I don't have a knack for bodywork/paint my buddy in Spokane Valley has done the work


If there is any part of this truck that hadn't been touched with mods, they should be marked, perhaps blue to match the body.

But then that part would be modified.

Ok, I'm going nuts reading all this. Your life is intense.


Self induced!!! I’m so thankful to be here doing this
I have a group of dudes around me you guys would be proud of, we barter, we trade, and they are relentless. Each day new puzzles and projects. Now we have been invited to be a part of the havok racing family up here in the panhandle
Oh man the future is bright!
07 center of my universe right now
Snow is coming… we’ll rain snow mix we are predicted a mild winter
I love snow but a mild one may be a blessing this year
With my Luck spring will be brutal and mud season last until may


Join the Elite Explorers for $20 each year.
Elite Explorer members see no advertisements, no banner ads, no double underlined links,.
Add an avatar, upload photo attachments, and more!
.


Time to do the other side. I used a scribe mostly to transfer the same pattern from drivers to passenger side
BA613F87-31A9-460C-8C4A-C745FA5BFE4A.jpeg

97B8F885-78BF-4622-8E9E-E53848E7E145.jpeg

1B6165FA-DFF6-48AB-8379-E4B6ED7798A0.jpeg

186A63F5-D9C4-47D6-90B5-E4F4D8225415.jpeg

9BA212C9-45AC-4CA1-8AC7-3067740B0014.jpeg

CF99241F-EFF4-4CAE-9E53-3819D2AFBC00.jpeg

447EA3C7-A675-4EC3-8765-CFC44E1177F5.jpeg

3793E5C8-FEA4-4903-9628-C5B349B66CF9.jpeg


Time to cut
DC029237-9747-493F-B877-83CC57427BEE.jpeg

Note to self next time put the tape on the side that gets cut off
Was a pain to peel off after I melted it
8733486D-0BB3-4EF7-8FAC-73D9833F2E10.jpeg

Don’t forget a good solid ground

2C635A94-2534-4885-A5E1-33D4B4A104A4.jpeg


Much of the pattern is cut freehand. I use one hand to steady the other
168DA86A-0990-4B00-8821-E1394FAE0202.jpeg

40B89406-6CFB-489C-B8D3-DCB192DE2045.jpeg


Boom! Perfect bedside cut
To get through all this lower support I finish up with grinder / sawzall
8F508A49-4A71-47DB-A944-EA54BC05F8DB.jpeg

F9C583E1-160B-4B30-B140-A75ABD653790.jpeg


Back
Top