95exploderboy
Locked and Loaded
- Joined
- August 12, 2002
- Messages
- 908
- Reaction score
- 3
- City, State
- Annapolis, MD and Lebanon, PA
- Year, Model & Trim Level
- 1995 Sport
Here is a short write up about the instalation of a York compressor on my 95 Explorer. First I'll apologize abou the lack of build up pics because I was doing all this the day before my trip to Rausch Creek.
The cost tally:
York 210R Tube-O Compressor $30
~ 5 gallon tank $45
3 Hoses w/clamped on fittings $35
Serpentine Clutch Pulley $100
Steel for the mount $6
Serp. Belt and intake mods $25
Fittings/gauges/switches $80
Wiring kit $10
------------------------------------
Total approx $330
The Build:
- A shot of my nice clean York

- Next thing I did was to remove my stock AC compressor

The hardest part is making sure that the York's pulley lines up with the other ones on the engine. To do this, I measured the distance from the left backmost bolt on the stock AC to the first groove on its pulley. Then I measured this distance on the York compressor. I used these measurements to get the correct offset for the new compressor. It actually came out nearly perfect, I really can't see any misalignment between the new pulley and the ones on the engine.
To mount the York I got a piece of 2"X6"X.25" rectangle steel tube. Would have liked a thinner wall, but this is what the shop had sitting around. I then proceded to lay out the engine mount holes on the bottom, and the York's hole pattern on the top Kilby has the dimensions for the York on their website. You will have to measure the stock AC holes as I forgot to record them when I did it. After laying out the holes I used a drill press to make them.
- Pics of my mount ( sorry for no shots of just the mount )


I used the appropiate bolts and lock washers to attach the bracket and compressor.
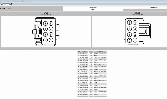
I used a setup like the one pictured here for my components and hoses etc.
- Oveall shot of the system under the hood

- Check valve / pressure gauge/ safety valve / pressure switch

- Another shot

- Shot of the hose running along the body mounts to the tank (I now my rockers look like he!!, the hose was red, but it looks grey in the pic)

- Shots of the tank


-The rear quick connect fitting

To use the serpentine setup I had to come up with a different belt path, but it wasn't too hard. All I basically did was eliminate the stock idler pulley. However this caused an issue with the stock intake. I used a piece of exhause pipe and rubber intake adapeters to correct this.
- Intake mod

- Modified temp sensor location

This probally wouldn't have fit under the hood without the 3" BL i have, even with that ther was a slight clearence issue I corrected with BFH
- My hood

To wire up the clutch I used a driving light wiring kit from WalMart that I just stripped down becasue I didn't need all the extra wires they had. I used this becasue it had a nice switch and relay built into it.
To avoid buying the compressor fittings from Kilby, I alse used a 3/8" NPT tap to tap the inside of the original fitting homes on the head of the compressor. Sorry for the lack of pics for this part.
As far as performance, it filled up my tires with no problem at about 3K RPMs after my trail ride. Didn't get a chance to run any tools of it yet, but i'm sure it will be able to handle it.
Thats about the long and short of it, sorry for the mediocre write up, but I really don't know what to say about it. At some point will come back and revise this page. You can check out more pics in my user gallery. If anyone has questions about the setup, feel free to ask.
Jake
The cost tally:
York 210R Tube-O Compressor $30
~ 5 gallon tank $45
3 Hoses w/clamped on fittings $35
Serpentine Clutch Pulley $100
Steel for the mount $6
Serp. Belt and intake mods $25
Fittings/gauges/switches $80
Wiring kit $10
------------------------------------
Total approx $330
The Build:
- A shot of my nice clean York
- Next thing I did was to remove my stock AC compressor
The hardest part is making sure that the York's pulley lines up with the other ones on the engine. To do this, I measured the distance from the left backmost bolt on the stock AC to the first groove on its pulley. Then I measured this distance on the York compressor. I used these measurements to get the correct offset for the new compressor. It actually came out nearly perfect, I really can't see any misalignment between the new pulley and the ones on the engine.
To mount the York I got a piece of 2"X6"X.25" rectangle steel tube. Would have liked a thinner wall, but this is what the shop had sitting around. I then proceded to lay out the engine mount holes on the bottom, and the York's hole pattern on the top Kilby has the dimensions for the York on their website. You will have to measure the stock AC holes as I forgot to record them when I did it. After laying out the holes I used a drill press to make them.
- Pics of my mount ( sorry for no shots of just the mount )
I used the appropiate bolts and lock washers to attach the bracket and compressor.
I used a setup like the one pictured here for my components and hoses etc.
- Oveall shot of the system under the hood
- Check valve / pressure gauge/ safety valve / pressure switch
- Another shot
- Shot of the hose running along the body mounts to the tank (I now my rockers look like he!!, the hose was red, but it looks grey in the pic)
- Shots of the tank
-The rear quick connect fitting
To use the serpentine setup I had to come up with a different belt path, but it wasn't too hard. All I basically did was eliminate the stock idler pulley. However this caused an issue with the stock intake. I used a piece of exhause pipe and rubber intake adapeters to correct this.
- Intake mod
- Modified temp sensor location
This probally wouldn't have fit under the hood without the 3" BL i have, even with that ther was a slight clearence issue I corrected with BFH
- My hood
To wire up the clutch I used a driving light wiring kit from WalMart that I just stripped down becasue I didn't need all the extra wires they had. I used this becasue it had a nice switch and relay built into it.
To avoid buying the compressor fittings from Kilby, I alse used a 3/8" NPT tap to tap the inside of the original fitting homes on the head of the compressor. Sorry for the lack of pics for this part.
As far as performance, it filled up my tires with no problem at about 3K RPMs after my trail ride. Didn't get a chance to run any tools of it yet, but i'm sure it will be able to handle it.
Thats about the long and short of it, sorry for the mediocre write up, but I really don't know what to say about it. At some point will come back and revise this page. You can check out more pics in my user gallery. If anyone has questions about the setup, feel free to ask.
Jake