broken rear sway bar endlinks question | Ford Explorer Forums - Serious Explorations

  • Register Today It's free!

broken rear sway bar endlinks question

mtrExplorer

Member
Joined
December 3, 2008
Messages
26
Reaction score
0
City, State
saint clair shores ,michigan
Year, Model & Trim Level
2006 Eddie Bauer
does anybody know if the fronts are the same as the rears?
cant seem to find rear sway bar endlinks online for sale.
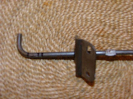
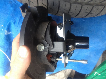
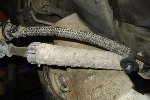
i have a broke rear pass. side endlink.


Join the Elite Explorers for $20 each year.
Elite Explorer members see no advertisements, no banner ads, no double underlined links,.
Add an avatar, upload photo attachments, and more!
.


got it.
thank you.


Take note that Motorcraft doesn't always include the nuts in their links. Moog does include them. Take a close look at the pictures. Be safe and try not to damage your hardware just in case.

Bought some Motorcraft front sway bar links for my Mustang because they were stripped due to using an impact wrench to get them off when I changed my struts. Defeated purpose of buying new ones if the nuts are stripped too. They don't sell them separate anywhere.

Make sure your vehicle is at ride height when you torque them down.


im going to go with the Moog endlinks.
the top nut on the rear pass. side endlink is completey snapped off. kinda strange.
im thinking of replacing the rear driver side rear also, while im at it
seems like it should be a somewhat easy fix i hope.
so the explorer has to be lifted to install the new enlinks correct?
then lowered when tighen down the nut.
thanks for
the input guys


stupid question. but what is top and bottom when installing those Moog poly bushing ?


Bolt from the bottom (Permanent bolt head on the bottom, screw nut on the top). I think that's what you were asking?

Berny


yeah. so you slide the long bolt into the sway bar from the bottom and then the bolt nut goes on top of sway bar. correct?
does anybody know what the torque spec is ?


tighten it down till the rubber bushings start to bulge a bit,, but not too much,,

good idea is to coat the whole rod with a grease when installing so it slides better,

it sounds funny, but it helps


... Tighten with tires on the ground, and only until you can barely turn the center sleeves by hand.

The bushings should barely bulge, otherwise you risk blowing the top nut off again.

Sorry, can't find exact torque specs anywhere.

Two drops of lock tight on the top nut will help eliminate any worries of the nut backing off if it's too loose. Be sure to readjust "torque" as soon as possible (if not just right) if you do. I know this may be a little vague.


These poly bushings will not bulge, so you can't go by that technique. I went by the torque spec in Chilton magazine, and both of my fronts are now somewhere on the highway. I have lifetime replacements ready to go on. The Moog technical rep said to tighten until the center sleeve will no longer turn by hand, and then turn another 2 complete revolutions. This would be considered a "torque + angle" type of spec, which is actually much better than a final torque alone.

But I am considering going less angle than that. I suppose you only want it tight enough so that it won't rattle, and won't back off. I may only go 1 revolution.


i looked on some videos on utube on sway bar endlinks install on explorers
and they are putting the long endlink bolt in from the top of sway bar,
and the small nut on bottom.
is this correct way ?


Ford didn't install them that way. It's easier to have the bolt hang by the head instead of having to hold it up. Bolt end on top frees up a hand. It's up to you.


Ford didn't install them that way. It's easier to have the bolt hang by the head instead of having to hold it up. Bolt end on top frees up a hand. It's up to you.

Also, if you do lose the nut when on the road the bolt won't drop out of the sleeve and allow the whole assembly to clang about as it exits from underneath your vehicle.


By the way, I did get my new fronts installed (re-installed). I went with the bolt from the top down. Yes, it's easier, and functionally, I don't think it matters at all.

I only took the nut to the point that the center sleeve could not be turned by hand, plus 1 revolution. The nice thing about the nut being on the bottom is that I could see there was about 1 thread exposed. I am able to take peak under periodically, to be sure that 1 thread is still peaking out.

About 6 weeks on them, and so far so good.


Thanks brakeman for contacting Moog for the correct procedure. OEM specs don't work, stock neoprene bushings are very hard.
Moog technical service said that they use the same recommendation for either version (blue thermoplastic, or white polyurethane):
1. Tighten until you can no longer turn the center sleeve by hand.
2. Continue tightening for 2 more full revolutions.

Post #21
http://www.explorerforum.com/forums/showthread.php?t=414822


Join the Elite Explorers for $20 each year.
Elite Explorer members see no advertisements, no banner ads, no double underlined links,.
Add an avatar, upload photo attachments, and more!
.


This still seems a bit confusing to me. With road vibration and such, it seems to me that there should be something to lock that bolt in place. Does anyone use Loctite, or does it just stay in place by itself?


Back
Top