How I changed my front struts | Ford Explorer Forums - Serious Explorations

  • Register Today It's free!

How I changed my front struts

Huskerbob

Well-Known Member
Joined
July 8, 2012
Messages
123
Reaction score
1
City, State
Concord, NC
Year, Model & Trim Level
2003 Explorer Eddie Bauer
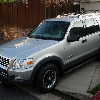
2003 Eddie Bauer, 118,000 miles, 4.0 V6, totally stock.

Jack truck up and remove a front wheel.

Place jack stand under frame.

Remove stabilizer bar link from stabilizer bar and lower "A" arm.

Remove lower strut bolt. Punch it out if you have to. I didn't, just backed it out.

Remove 3 upper nuts on the top of the strut tower.

Hit the assembly with a dead blow hammer and it will fall down.

Grab ahold of the assembly and wiggle it out.

Pull the top out first and then pull the bottom through the hole in the lower frame. You do not need to compress the spring to do this.

Reassemble in reverse order. :)

Put the new assembly bottom down through the frame hole and then push it up so that the top 3 bolts go through the tower. Put nuts on these bolts finger tight. Tighten the nuts from above with a long extension to 22 ft. lbs.

You can't do it backward since the upper bolts are spaced so that 2 are closer together and one is off all by itself.

You may have to turn the lower end or move it back and forth to get it in the right spot. Jacking up on the brake rotor helps get the top nuts tight and then pushing down on the brake rotor helps and a long screwdriver put throught the lower hole to help line it up also helps.

Tap the lower bolt in carefully until you can get the nut started. Tighten this bolt to 280 ft. lb. if you can. I used a 250 ft. lb. wrench and gave it a couple of extra pulls.

Put in a new sway bar link or make sure the old one is good. If the rubber bushings are hard go ahead and replace the whole deal. Moog makes some good ones.

Put the wheel back on and drop it off the jack stand and the jack.

There you go. Repeat on the other side. Easy.:D

I used the Struttech complete assemblies and they are nice and inexpensive.:thumbsup:


Join the Elite Explorers for $20 each year.
Elite Explorer members see no advertisements, no banner ads, no double underlined links,.
Add an avatar, upload photo attachments, and more!
.


FRont struts

We all know how to do this and there are plenty of threads on it. Thanks Newb

Yes there are tons of threads and all of them I could find were mostly stories of misery, torches, grinders, sledge hammers, pry bars, jacks, cussing and busted knuckles etc. etc.

I was prepared for a challenge and it turned out to be a piece of cake.:D


Thanks for the post, even if we have seen various versions before. I am getting in the mood for struts and this has encouraged me to take it on, again. First time at 60K miles I did them, Monroes, except they took the whole weekend to do. I had to reuse the springs and use one of those spring compressor tools. I did not drop the lower control arm so I beat, fought, jacked them things out and back in. After that, I surrendered the rears to the dealer.

With Quickstruts and your directions, the job sounds so much simpler. Just confirm, these instructions work for 4x4, right?

Thanks,
FordFool2 (HuskerKevin)


Glad it worked out for you, always good to hear success stories and how someone got it done as it helps others.


Yes there are tons of threads and all of them I could find were mostly stories of misery, torches, grinders, sledge hammers, pry bars, jacks, cussing and busted knuckles etc. etc.

I was prepared for a challenge and it turned out to be a piece of cake.:D

I haven't seem anyone mention torches or grinders to disassemble a 3rd/4th gen suspension, and I sure hope that it's not true lol.

But yea, some people have given great instruction but mentioned tools that were not only necessary, but I had to google what they were to know if I really needed them or not. And I didn't need them.

Just confirm, these instructions work for 4x4, right?

Thanks,
FordFool2 (HuskerKevin)

Doesn't matter if it's 2WD, 4WD or AWD.


Front struts

Thanks for the post, even if we have seen various versions before. I am getting in the mood for struts and this has encouraged me to take it on, again. First time at 60K miles I did them, Monroes, except they took the whole weekend to do. I had to reuse the springs and use one of those spring compressor tools. I did not drop the lower control arm so I beat, fought, jacked them things out and back in. After that, I surrendered the rears to the dealer.

With Quickstruts and your directions, the job sounds so much simpler. Just confirm, these instructions work for 4x4, right?

Thanks,
FordFool2 (HuskerKevin)

Yes these work for a 4x4 which is what I have. Make sure you disconnect that sway bar link. Makes it easy. I did not disconnect the steering nor the upper control arm. I thought about using the old springs but the Quickstruts were cheaper as a complete unit than the replacement cartridges so I got the whole deal.

The rears are a tad bit more work but certainly a job most of us shade tree mechanics can handle. I di mine last weekend. The only tool I bought for those was an offset 13mm self ratcheting wrench at Harbor Freight. It was part of a kit of 4 for $9.99

Go Big Red!:thumbsup:


tip for getting the big bolt back in

I am posting on this thread because it is the one with the most comprehensive, detailed, coherent, succint and understandable instructions for this repair. If you are having trouble pushing the lower control arm down far enough to get the bottom of the new strut to line up with the holes in the lower control arm for the bolt, and you don't have anybody to help you with a prybar while you attempt to insert the bolt, here is one way to do it (if you have some free weights available): [Before you start this procedure be sure you have completely disconnected the stabilizer bar end link, not just loosened it. That step provides the extra play in the lower control arm that is necessary to install the bolt through the bottom of the new strut.] I used a warren prybar #02709 . It is 2 feet long. One end is tapered down to a point. The other end is a wider, flat chisel end that curves up slightly. Push down with your body on the top of the steering knuckle/rotor area until the hole in the bottom of the new strut lines up at least partially with the rear hole in the lower control arm (LCA) (the hole the big bolt is supposed to go through where it will attach to the flag nut). Shove the pointed end of the prybar through the LCA hole and on into the hole in the new strut. You can now stop pushing down on the knuckle/rotor for a while. Rotate the prybar so that the chisel end is pointing upwards. Push down on the prybar to lower the LCA and raise the new strut a little at the same time. Start sliding the free weights onto the prybar. I put 4 ca. 15-pound weights on it--that turned out to be enough to free my leg so that I did not have to use it to push down on the prybar while I did the rest of the procedure. Now throw your chest over the rotor/knuckle area, but turn your body so that your head and hands are toward the front side of the LCA. Hold a hammer in one hand and the big bolt in the other. Push down with your body on the rotor/knuckle area. The front hole of the LCA will line up with the hole in the bottom of the new strut, and you can drive in the big bolt.


this job is not that bad (it's not a STRUT it's a COIL-OVER, they are completely different design), I even re-used the coil for my new shock absorber. I ran into an issue when the driver side lower bolt (the one that goes to lower control arm) was seized. That's where the torches, grinder, sawzall came in. Took us 3 days to completely pull it out. Have to cut that $40 bolt. Instead of paying the dealership for the bolt, went to a local junkyard and found a bolt for free, no issue getting this one out. As I mentioned in my other posts, never underestimate or assume that's it's a piece of cake when working on this truck.


Back
Top