Completed Project - Superchargered 347 Stroker Build | Ford Explorer Forums - Serious Explorations

  • Register Today It's free!

Completed Project Superchargered 347 Stroker Build

Use this prefix for completed projects that are not "How to" articles or threads asking for help.
This isn't for a truck but for my 1994 Cobra. What started this build is when I broke another rocker arm and bent another pushrod. It was the second time that it happened. The first time was about 20,000 miles prior. With 90,000 hard miles I figured the cause was weak valve springs. So I pulled the heads and and while I had them off ported them. I then took them to Pacific Engine and had them machined and a valve job done. While doing so they discovered that AFR had way too much spring pressure and that some of the springs only had .500 lift before going into coil bind. My cam with 1.7 rockers has .530 lift so it's surprising they lasted 90,000 miles.

Here's the broken rocker.

P1020025.jpg


Here are some of the porting work I did on the heads and lower intake manifold.

2012-07-10_21_27_50.jpg

2012-07-10_21_28_27.jpg

2012-07-10_21_29_14.jpg

2012-07-10_21_29_47.jpg


After.

P1020105.jpg

P1020106.jpg

P1020117.jpg

P1020118.jpg

P1020119.jpg

P1020120.jpg

P1020122.jpg

P1020124.jpg

P1020125.jpg

P1020116.jpg

P1020114.jpg

P1020104.jpg


Intake manifold.

P1020112.jpg

P1020113.jpg

P1020111.jpg


While the heads were being machined I started cleaning the carbon off the tops of the pistons and noticed a nick in one of the cylinder walls. With that discovery I really didn't want to just slap the heads back on so I started looking into the cost difference of rebuilding the 302 compared to buidling a 347. The cost diference was going to be very little so I'm building a 347.

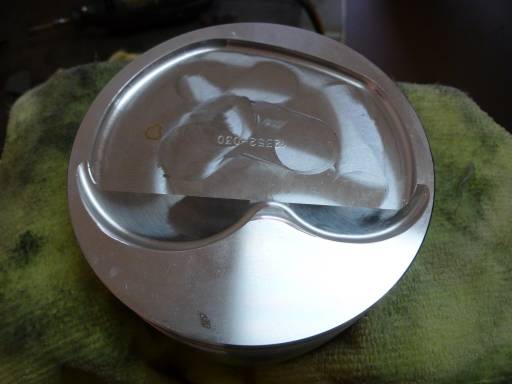
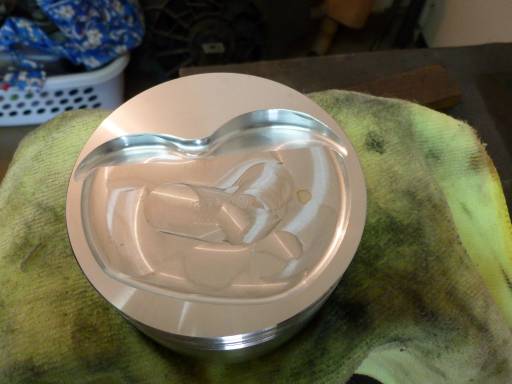
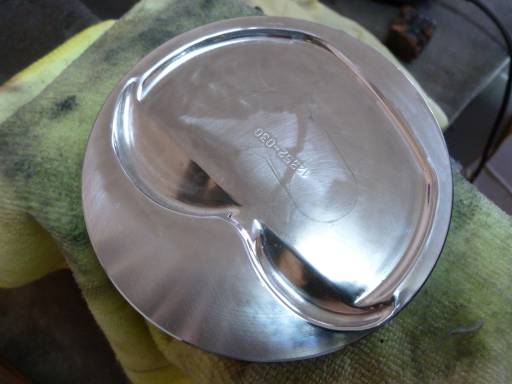
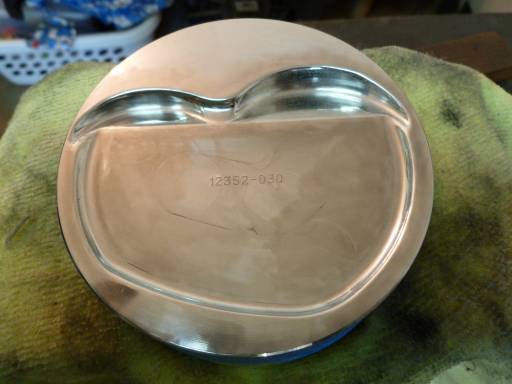
When I pulled the shortblock from the Cobra and disassembled it I discovered what caused the nick. I found that two studs that hold a splash shield on the intake manifold had come out and fell into the pan. They must have been in there for a long time. There were nicks on the bottom of the pistons, cylinder walls, crank, rods and one lobe on the cam. Here are some pictures of the worst piston.

20121009_083200.jpg

20121009_083208.jpg

20121009_083244.jpg


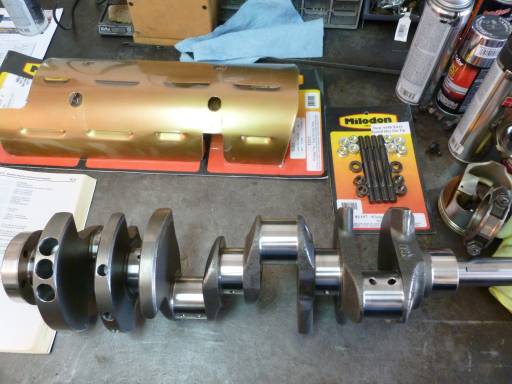
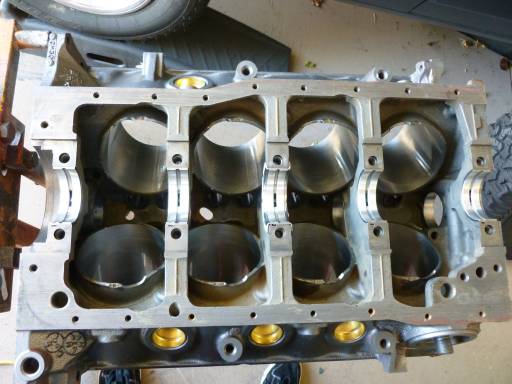
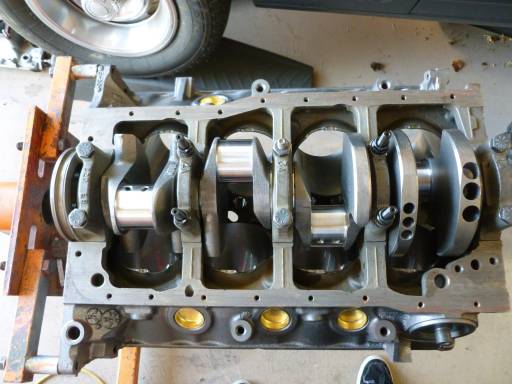
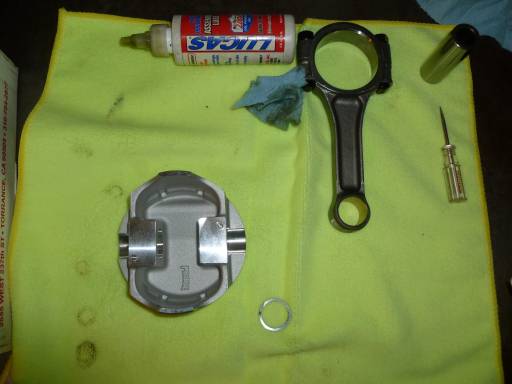
I ordered a short rod stroker kit from Coast High Performance a couple of weeks ago and picked it up on Friday. Over the weekend I clearanced the cylinders and today I dropped the block off at Pacific Engine. Of course I forgot the pistons so I'll be making another trip out there so they can machine the block for .004 piston to wall clearance.

20121029_130059.jpg

20121029_130048.jpg


Join the Elite Explorers for $20 each year.
Elite Explorer members see no advertisements, no banner ads, no double underlined links,.
Add an avatar, upload photo attachments, and more!
.


Nice polish job on the heads!
Motors just don't like loose metal pieces banging around in them, do they?

The block looks like its just begging for that stroker kit. This will be fun.


Thanks. The car actually ran really good even with rivets bouncing around but I'm glad I discovered it and didn't just slap the heads back on. It should be a lot of fun when it's done.


I dropped the new pistons off at Pacific Engine today and he had already bored half the block. We measured the bore on the other side as well as the old pistons and the clearance was .005 which worked well. I didn't have piston slap with the old combo and there weren't scuff marks on the skirts besides where the rivet hit. So we are clearancing this build at the same. Hopefully I'll be able to start assembling it this weekend.


Fast, really fast. At that rate, you might be done before me. I have my completed short block already in the garage.


Looking at your heads, I think I might pick up some cartridge rolls and polish my combustion chamber some more. I didn't want to take too much off last time since it lowers compression a bit. But, less chance of detonation with smooth surfaces in that chamber.


I didn't touch my combustion chambers. The heads are AFR 165 and already have CNC chambers. I just cleaned the carbon off them.


They are amazing. Lucky they weren't damaged with the spring coil bind issue. That would have made me cry.


I wouldn't have been too upset if they had to be replaced because it would have given me an excuse to buy a set of Trick Flow TW 205 heads.


I picked up my block and cam today. The new Probe pistons measured 4.026 so the block was finished honed to 4.031 for .005 clearance. Cam specs for my American Custom Cams cam are .555 lift with my 1.7 rockers, 218 at .050 with a 114 LSA. Tomorrow I'm going to start building.


Make some progress today?


Not really. I ended helping my neighbor install the trans in his Chevy 1500 P/U.

I started on the pistons after though but only got 4 done. I'm smoothing out all the sharp edges. Believe it or not,
it took about an hour per piston.
Before.

P1030368.JPG

P1030367.JPG


After.

P1030366.JPG

P1030365.JPG


Nice work, I can see why that takes time.
Porpose to reduce hot spots in the combustion chamber? Just making sre, as I'm always learning


Yes, to eliminate any potential hot spots on the pistons. I run 11-12 psi without an intercooler and we only have 91 octane so I need all the help I can get. The reason it takes me so long is I use a cartridge roll first, then hand sand with 320, then 600, then 800 and then polish it to get rid of any scratches. I probably don't need to go that far but that's what I'm doing.


I worked more on Sunday. I started by washing the block. Then I chamfered the oil holes on the new crank and washed it. After that I measured all the journals. I then moved back to the block and installed the main bearings and then the crank. Main bearing clearance is .0025. I'm also using a Milodon windage tray so I had to tap the threads for 2 and 4 main caps and then installed the studs for the kit.

After I finished installing the crank I started assembling the pistons and rods. Just an FYI I hate polylocks! So I got all the rods and pistons assembled and then start file fitting the rings. The CHP kit came with prefit Mahle rings (Perfect Circle) and I must say I'm glad that I don't just slap them on and install the pistons. They ranged from .008 up to .016 gap. There instruction sheet recommends .024 - .026 for both the top and second compression rings. So I set the top rings at .026 and the second at .024.

I didn't have much time tonight but I did finish file fitting the last four rings and then installed them onto the pistons. I also measured the side clearance which was .002.

Here are the only pictures I took.

P1030375.JPG

P1030372.JPG

P1030371.JPG

P1030376.JPG

P1030379.JPG


I started installing the pistons tonight and was having a tough time keeping the rings in my cheap adjustable ring compressor. Then it happened, while installing the third piston I broke the lip on the second compression ring. F___!!!!!! I'm usually pretty calm and wouldn't let something like this bother me but I haven't been feeling well the past couple days and this just pissed me off. My wife calmed me down and told me to just order new rings and a better ring compressor so I did. She said it must have been a sign to get different rings because I was complaining about the fit of the Mahle rings that came with the kit. I'm a lucky man.


Just keep telling yourself what you are saving in labour.
You already fixed the problem, just a bit of a delay while you wait for the rings to show up.

Have a well earned beer, and relax.


I received the adjustable timing set, new rocker arm and Summit cam degreeing kit yesterday. The new rings, ring file, ring pliers and ring compressor jarrive today so I should be able to get a lot done this weekend.

Tonight I was able to file fit the new rings, install them on the pistons and the install the pistons in the block. The instructions that came with the new Total Seal rings show to set the top ring at .0055 x bore, the second ring at .0035 x bore and the oil ring at a minimum of .015. for supercharged engines. So I set the top rings at .023, the second rings at .016 and the oil rings were .016 out of the box.


Join the Elite Explorers for $20 each year.
Elite Explorer members see no advertisements, no banner ads, no double underlined links,.
Add an avatar, upload photo attachments, and more!
.


I'm sure I will unless it doesn't make any more power than my previous combo with the 302. The only things that are changing besides the additional 45ci is the head porting I did, going from the E303 cam to a custom grind that will pass smog and possibly a little more compression. The old 302 made 436rwhp on 91 and 471rwhp on 100. I'm hoping 475-485 on 91 and 515-525 on 100 but we'll see.


Back
Top