Completed Project - Superchargered 347 Stroker Build | Page 2 | Ford Explorer Forums

  • Register Today It's free!

Completed Project Superchargered 347 Stroker Build

Use this prefix for completed projects that are not "How to" articles or threads asking for help.
You'll see some positive number changes from the porting and the extra stroke for sure. I'm jealous!


Join the Elite Explorers for $20 each year or try it out for $5 a month.

Elite Explorer members see no advertisements, no banner ads, no double underlined links,.
Add an avatar, upload photo attachments, and more!
.


Thanks, your old fox sounded great! That's how my Chevelle sounds at idle.

http://www.youtube.com/watch?v=ahlN8c3jIMM&feature=BFa&list=LL0NtpfHii73hzmN9uIuvBPQ

I'd love to be able to run a bigger cam in my Cobra but even with the old E303 I just barely passed smog and CARB dropped the limits another 30% this year. That's why I changed the cam. However, the new cam should make more power than the E303 anyways.

Here's my Cobra.

http://www.youtube.com/watch?v=aK1Em6fkiWI&feature=BFa&list=LL0NtpfHii73hzmN9uIuvBPQ


I finished measuring the side clearance on the rods and they were .016 for 1/5, .017 for 2/6, .018 for 3/7 and .016 for 4/8. Then I worked on fitting the windage tray which was a nightmare. The one I ordered apparently is not designed for a dual sump pan. After that I installed the cam and timing chain which took a little while to fit as well. The adjustable timing chain come with a roller thrust bearing which requires modification to the cam retainer. Once that was done I started degreeing the cam which was a bigger nightmare. The cam is not ground to the specs and not even ground well. With the dial indicator set to .000 at TDC the back side of the intake lobe drops .002 at about 12* ATDC. The exhaust lobe stays at .000 until it opens which is good but after it is supposed to be closed it stays open .001 until about 7-8* BTDC.


Well done, I like the details and your patience. Keep at it slowly, and make sure the valve geometry is right.

I'd call the cam maker to discuss those measured specs. It doesn't sound good, but hopefully they know how to communicate with you on what should be going on with the cam timing.


The cam grinder is American Custom Cams and my buddy's family has been using them for years. My buddy is the one who worked with them on my cam and he is going to call them tomorrow about it since it was done under his account. They just ground the cam for his supercharged 306 build ,which is using similar specs as mine, about three months ago and his was spot on.

The specs for my cam were supposed to be:

Intake Lift - .327
Exhaust Lift - .327
ICL - 114*
LSA - 114*
IO - (-5*)
IC - 43*
EO - 43*
EC - 5*
Duration at .050 In 218* / Ex 218*

Joey (ACC) said to install it on a 110* ICL but I couldn't because the cam is ground on a 118* ICL. Below are the specs with the cam install 2* advanced.

Intake Lift - .328
Exhaust Lift - .327
Intake CL - 116*
LSA 115*
IO - (-5*)
IC - 47*
EO - 43*
EC - 1*
Duration at .050 In 222* / Ex 224*

I pulled the cam and installed the stock Cobra cam just to check and make sure that the funky .002 on the intake and .001 issues weren.t because of the lifters or dial indicator acting up. However, the stock cam stayed at 0 until the lobe started lifting it and once closed it stayed at 0. The exhaust lobe was the same. Then I installed the ACC cam and it still did the same thing that it did the first time.


That is curious, which is why I'd defer to a cam expert since they have heard hundreds of stories.

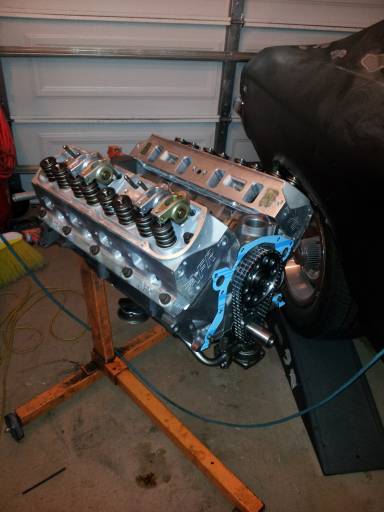
My 347 has yet to be installed, so I can't make claims etc. I know that the billet custom cams are supposed to be produced and result in perfect specs, or they are rejected and another is made. The lift numbers for mine are a little higher on the intake, both near .6, and the exhaust duration is more, say 219/230.

There are so many variables and tiny cam changes make big changes, so I leave it to the pros to build the magic.

Hopefully your friend and the designer can help to make your combination work right.


Apparently the incorrect master plates (they were for an LS cam) were used which is why everything was off. The LS has a larger base circle which is why the lobe had the .002 dip. The new grind is completed and I'll pick it up tomorrow. I'm not sure what the final specs are but I'll post them after I degree it this weekend.


Wow, Im impressed you went thru the exercise of finding this. I wouldnt have had the tools or ability to check.
I'd have trusted, and just installed the cam. Then not be happy with the performance.


I actually just bought the degree wheel only because I was going with the custom grind. I've always run off the shelf cams and installed them straight up and they have always performed great. I was going to run a comp XE266 but they are $300 and I paid a lot less than that for this grind because of my buddy. I have an off the shelf Comp solid roller in my Chevelle installed straight up and it's best time so far has been 10.01 at 133.


So I picked the cam up and found out that I mixed up what my buddy told me had happened. Joey accidently grabbed the masters for a cam he did for an LT4/LT1. That 's why none of the numbers matched. So the cam is now correct and I got it installed and degreed tonight. Joey told me to install it 6* advanced and that the intake centerline should come in around 112-113. After degreeing it I came up with 112.75*. I also came up with a .325 intake lift (.552 with my 1.7 rockers) and .324 (.550) lift on the exhaust. For the duration I came up with 215* on the intake and 220* on the exhaust. The LSA is 114.

After finishing the cam I bolted on a head with one of the old head gaskets and then check the piston to valve clearance. The intake valve had .306 clearance and the exhaust had .318. Plenty of room.

Tomorrow I'll finish up the bottom end and get the timing cover bolted on. I should also have the new head gaskets tomorrow so I'll get the heads bolted on as well.

Here are the only pictures I took from tonight.

20121116_181859.jpg

20121116_183852.jpg

20121116_205357.jpg

20121116_205434.jpg
 

Attachments

  • 20121116_205434.jpg
    20121116_205434.jpg
    28 KB · Views: 82


Excellent, good work. That extra attention to detail in testing and rechecking things helps dramatically to identify problems, before or after the project is done.


Very nice attention to detail bud.

It appeals to my OCD side.


Thanks guys. I received my head gaskets today and got the heads installed. I had to repair 4 stripped bolt holes (1 intake and 3 exhaust) so it took a while. I went with a .038 compressed gasket and with the 61cc combustion chamber, 14.2 dish and .015 deck it gives me a 9.24:1 compression.

The only pictures from today.

20121117_19275811.jpg

20121117_1928181.jpg
 

Attachments

  • 20121117_1928181.jpg
    20121117_1928181.jpg
    28.4 KB · Views: 82


Almost done. I should be able to finish cleaning everything up at night during this week and have it ready to drop in on Friday. I ended up porting the intake manifold more today because I didn't take enough off the bottom of the runners. They now match the heads nicely although I could get a picture of them.

Pictures from today.

20121118_160204.jpg

20121118_160224.jpg

20121118_160249.jpg

20121118_160311.jpg

20121118_211151.jpg

20121118_211217.jpg
 

Attachments

  • 20121118_211217.jpg
    20121118_211217.jpg
    34.2 KB · Views: 84


Did a little more tonight. First I took a couple pictures of the intake ports. They're not great pictures but good enough. They don't match perfectly but close enough.

20121120_175802.jpg

20121120_175835.jpg


Next I installed the thermostat housing and then the headers. While doing the passenger side I discovered another bolt hole that needed repair so I pulled the header back off and fixed it.

Drilled
20121120_182841.jpg


Tapped
20121120_183157.jpg

20121120_183647.jpg


Insert
20121120_183721.jpg


Completed
20121120_184249.jpg


A couple with the headers installed. These are Bassani 1 5/8 equal length shorties.

20121120_190714.jpg

20121120_190703.jpg


And here is the secret to making a Ford 302 last.

20121120_190521.jpg


You have to have something from a Chevy.
 

Attachments

  • 20121120_190521.jpg
    20121120_190521.jpg
    17.1 KB · Views: 78


I picked up new motor mounts today and was planning on trying to drop the engine in the car but as luck would have it as I was torqueing the last bolt down it snapped. At the time I thought no big deal, I have easy outs so I'll just drill a hole down the center and use the easy out to pull it out. I've done it many times so I'm accustomed to pulling broken bolts. So I drill the center and then run the easy out in using my 1/4 ratchet. As it starts to get some resistance, snap! The easy out breaks. Now I've had that happen once before and the hardened easy outs are a pain to get out because my drill bits won't cut them. So I spent about 2 and a half hours getting to the point in the pictures below. I used all the stones and bits in the second picture plus some not pictured to slowly grind away at the easy out so that I can drill the rest of the bolt out and then retap the hole. Hopefully I haven't messed up the threads but if I did then I'll have to helicoil it. I'm hoping it won't ake too long and that I'll be able to drop the engine in the Cobra before heading to my brothers for Thanks Giving dinner.

20121121_205710.jpg

20121121_205629.jpg

20121121_205647.jpg
 

Attachments

  • 20121121_205647.jpg
    20121121_205647.jpg
    28.3 KB · Views: 83


yea, its this stuff that takes all the time.
Hope you get it without the helicoil.


That is a big bolt, those are tough. I hate breaking the easy outs, so I typically don't use them.

You have to drill a hole centered in the broken bolt, so try very hard to start it straight. If you can make it dead center, then you can just drill it bigger and bigger until basically only the thread material is left, and a pick or screw driver will twist it out easily.

Below is a rear seat belt bolt that I had to drill through to remove. It took a good hour of drilling with a 1/2" chucked big drill, and big bits.
 

Attachments

  • Projectthread093.JPG
    Projectthread093.JPG
    79.9 KB · Views: 464


Blue point ( Snapoff) has A tool set to remove broken taps and easyouts.


Join the Elite Explorers for $20 each year or try it out for $5 a month.

Elite Explorer members see no advertisements, no banner ads, no double underlined links,.
Add an avatar, upload photo attachments, and more!
.


I was able to get the broken bolt out and got the motor mount on. After that I put the engine on the hoist and installed the rear main seal and then the new flywheel. When I went to install the clutch I realized the new one didn't come with dowels and I already recycled the old one. The new flywheel also uses a 5/16 - 16 bolt where as the stock one used an 8mm - 1.25. So I'll go to the local Ford dealer tomorrow (if they're open) and pick up the dowels and bolts.

Broken bolt removed.

20121122_104602.jpg


Engine sitting on the hoist almost ready to go in the car.

20121122_120846.jpg
 

Attachments

  • 20121122_120846.jpg
    20121122_120846.jpg
    17.3 KB · Views: 77


Featured Content

Back
Top