Fuel Filter Replacement 1994 4x4 XLT | Ford Explorer Forums - Serious Explorations

  • Register Today It's free!

Fuel Filter Replacement 1994 4x4 XLT

FixingDaily

Active Member
Joined
September 17, 2010
Messages
52
Reaction score
1
City, State
Boise, Idaho
Year, Model & Trim Level
94 Explorer XLT
OK, Easy question, but I am at a loss for how to change the fuel filter:

Background:

Needed to change the Radius Arm Bushings. This is the second time and someone had already done it by using the Rivit Removal Method, so I opted to go that way.

While removing the bolts that replaced the rivits on the drivers side, I had to move the fuel filter out of the way too, so I thought, might as well replace that. Bought a Fram at Autozone.

While engine was running, I pulled the fuel pump relay, car ran a few seconds then quit (as expected). For the benefit of those who don't know, you do this to relieve the fuel system pressure.

I then took off the fuel line retainer clips and tried to pull the connectors off. Try as i might, I cannot get them off. On advice of neighbor, I even tried to pry them apart using two wrenches and wedging them in there. Still no dice. The fuel filter spins easily within the fuel line, and the connectors can be pushed in toward the fuel filter about 3/32". I saw something that said they were quick connects in the manual, but no instructions on how to activate them.

I know I am missing something simple and am looking for the good advice I have received many times from this forum.

Thank you in advance for any advice you can give me.

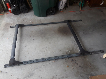
BTW, if not for this fuel filter issue, I could have had the radius arm job done in about 3 hours. It takes at least two jacks and 3 Jack stands to do it (without removing the springs). You do have to do both sides at once and also seperate the two sections of the radius arm rear connection bracket. The only big issue was that freaking fuel filter and shield assembly. Not one of the threads I read on doing this job using the rivit removal method said anything about that, so be aware. Also, be prepared to use a combination of Metric and Imperial sized tools. You will need both sockets and box end wrenches to get at all the connections.


Join the Elite Explorers for $20 each year.
Elite Explorer members see no advertisements, no banner ads, no double underlined links,.
Add an avatar, upload photo attachments, and more!
.


You need to get a Ford fuel filter removal tool. I got one from Napa for a few bucks. Just push it away from the filter and it pops right off.


Thank you,

I will give it a try.

John


Need Help BIG TIME

OK, I have now bought 3 different quick release tools.

With considerable effort I have got one side undone. The other side refuses to release.

Anybody have a similar experiance with not being able to get the fuel filter quick connect off. This is really sucking. I have attached a pic so you know exactly what type I am talking about.

Thank you for anyone who can give me a hint on how to get this quick connect to be a quick release.

Image014%20-%20Copy.jpg


Hey man, put your tool in there and push it in as you push the filter tip further into the connection. Rotate and wiggle it while pushing in as well, almost need three hands to do it but it will come if you keep at it.


Penetrating oil may help.


the loose end of the filter, find which tool fits over the lip, not just meets it. use that one.


It will work, you just have to keep at it. If one side came off, then the other should come off with the same tool.


OK, I have now bought 3 different quick release tools.

Which kind? I've had mixed success with different kinds of fuel line disconnect tools. The cheap plastic ring sets (usually the cheapest form of these tools) have always been a challenge for me.

The scissor kind were hit and miss, but generally not much better.

The easiest ones I've found to work with were the angled kind like this: http://www.amazon.com/Lisle-39400-Angled-Disconnect-Tool/dp/B000W0UZHG

MrShorty,

Thank you for the reply. I tried the cheap plastic one (which is the one that was able to get one end to disconnect, but it ruined the plastic), the scissor kind (went in, but maybe not long enough), and a nice all metal one, which was just a little too long in its body to easily fit between the connetor and the filter. I did see the angled ones, but did not buy one of those.

On another subject. Are you a member of the Chevy forums? I remember that you also own a K1500. Seems that there are fewer persons helping out over there. I have a fast idle problem that I am trying to fix. If you are on that forum, look at my post there and see if you have a thought about what is going on. See http://chevyforum.org/chevy-forums/showthread.php?t=28829 (Hope a chevy link doesn't get me kicked off this forum).

John


I sometimes find Youtube to be helpful in repairs and it's a champ for this one.

Just click on this link and watch the video: www.youtube.com/watch?v=DKgQJ-RinXc

Then on the right side of the above Youtube page you can select a few more videos on this same topic.

SAFETY TIP: After depressurizing the fuel line by pulling the fuel pump relay and cranking the engine for 15 to 20 seconds, remove the negative battery cable from the battery to eliminate accidental electrical ignition of the spilled fuel when the filter is removed.


Thank you,

I will take a look and see if I can move forward on this (still haven't changed it yet).

John


I sometimes find Youtube to be helpful in repairs and it's a champ for this one.

Just click on this link and watch the video: www.youtube.com/watch?v=DKgQJ-RinXc

Then on the right side of the above Youtube page you can select a few more videos on this same topic.

SAFETY TIP: After depressurizing the fuel line by pulling the fuel pump relay and cranking the engine for 15 to 20 seconds, remove the negative battery cable from the battery to eliminate accidental electrical ignition of the spilled fuel when the filter is removed.

Prince,

Checked out the video. His example went easy. I already have and have tried the same tool he is showing. With a lot of effort I was able to get one side undone. The other side refuses to let loose. I have not had time to get back in and try some of the other suggestions above, but will do as I get time. The only reason I tried to change it as I did not know when the last time was and I was in the process of changing the R-Arm bushings and it was convienient to do so at the time.

As always, I admire those who take the time to respond on this web site. Everyone has great ideas and allows us to keep our good ole Explorers running for a long time into the future.

John


i took a small pick and broke off all the tabs on the inside of the quick connect line. the line will pop right out. then i used the same pick to remove the retainers. at oriellys they have in the fuel line section new retaining clips. i bought mine before i broke them off. they were like 5-10 bucks.


i took a small pick and broke off all the tabs on the inside of the quick connect line. the line will pop right out. then i used the same pick to remove the retainers. at oriellys they have in the fuel line section new retaining clips. i bought mine before i broke them off. they were like 5-10 bucks.

Thats good to know. I would hate to have to replace that whole fuel line section in case that one connector went bad.

Edit: Oops, lets back up the bus and make sure we are talking about the same connector. Please verify that the one pictured above matches the one you worked on. I know later ones used a system with a device that clipped the fuel line into place.

Thank you,

John


the line i worked on was the fuel pump. but, it is the same style connector that is on the fuel filter. and it is the same line. just the other side. if you look with a flash light into the fuel line where it meets the filter, you will see little prongs sticking up holding the big part of the filter line. that is where all the trouble comes from. they try to make a one size fits all tool, and it isnt separating the tabs enough. but since you can replace the retainer, just take it out. oh, and there is a little seal/washer in the line, behind the retainer. i reused mine. i know its there because mine landed on the floor. also, the line on my truck isnt leaking. and its been about a month now. i have seen those style lines your talking about, with the plastic retainer. and i have never had trouble with those style. but as far as i know, our trucks dont use them anywhere.


the line i worked on was the fuel pump. but, it is the same style connector that is on the fuel filter. and it is the same line. just the other side. if you look with a flash light into the fuel line where it meets the filter, you will see little prongs sticking up holding the big part of the filter line. that is where all the trouble comes from. they try to make a one size fits all tool, and it isnt separating the tabs enough. but since you can replace the retainer, just take it out. oh, and there is a little seal/washer in the line, behind the retainer. i reused mine. i know its there because mine landed on the floor. also, the line on my truck isnt leaking. and its been about a month now. i have seen those style lines your talking about, with the plastic retainer. and i have never had trouble with those style. but as far as i know, our trucks dont use them anywhere.

Well, I know that I am in good company after looking at this thread:

http://www.explorerforum.com/forums/showthread.php?t=333089&highlight=break+noise


I just replaced my fuel filter a couple weeks ago for the first time after 220k on the odometer, hah. It was somewhat of a PITA to get off, but it only took about 15-20 mins of fighting it for me. The side facing the front came off pretty easy for me, but the side facing the rear I had to wrestle with for at least 10-15 mins. I eventually got to the point where I shoved the release tool (I had the cheap plastic kind that looked exactly like this) in as far as I could, then resorted in grabbing the filter with both my hands and pulling on it harder and harder up until I was almost at full strength/leverage and it finally gave way. I was afraid of hurting the connector or fuel line, but I was so frustrated at that point, I just wanted it off no matter what, lol. I got the new filter on and haven't had any issue, so you may try that out.

Are you still fighting this over a month later? I also didn't have a problem getting that filter bracket off, so I'm not sure what you're talking about with the "rivet removal method". Mine was just held on with two bolts.


:)
I just replaced my fuel filter a couple weeks ago for the first time after 220k on the odometer, hah. It was somewhat of a PITA to get off, but it only took about 15-20 mins of fighting it for me. The side facing the front came off pretty easy for me, but the side facing the rear I had to wrestle with for at least 10-15 mins. I eventually got to the point where I shoved the release tool (I had the cheap plastic kind that looked exactly like this) in as far as I could, then resorted in grabbing the filter with both my hands and pulling on it harder and harder up until I was almost at full strength/leverage and it finally gave way. I was afraid of hurting the connector or fuel line, but I was so frustrated at that point, I just wanted it off no matter what, lol. I got the new filter on and haven't had any issue, so you may try that out.

Are you still fighting this over a month later? I also didn't have a problem getting that filter bracket off, so I'm not sure what you're talking about with the "rivet removal method". Mine was just held on with two bolts.

Well, Not fighting it now, kind of gave up for the time being. The rivit removal method actually refers to changing out the Radius Arm Bushings. Because the radius arm attachment bracket on the drivers side is next to the fuel filter, I was going to remove the fuel filter and bracket while working on the bushings. The bushing change was a success and it makes it seem like you are driving a new car again. This was the second time they have been changed since 1994. Now that the weather is warming up, I am getting back to looking at the fuel filter and will probably give it a go again in the next couple of weeks. Between this thread and the one I referenced above, there have been a lot of good ideas. It also helps to know that if you break the retaining prongs in the connector, I am seeing posts that say they are replaceable.

John


Join the Elite Explorers for $20 each year.
Elite Explorer members see no advertisements, no banner ads, no double underlined links,.
Add an avatar, upload photo attachments, and more!
.


ok so i was curious today and went out and took my filter off. i used the lyle brand white nylon removal set that i already had, it is a 3/8 line. so i used the 3/8 tool. i sprayed it with electrical cleaner and popped my removal tool in. spun it around a few times. and pushed EXTRA hard on the tool.... nothing... so i pushed EVEN harder on the tool and pulled the line in towards the filter, then i heard a click. i pulled the line off. repeated on other side. dark brown gas came out, so i too need a new filter. i used dielectric grease on the outside of the filter lines before i reinstalled it hoping it will make it easier to take out this weekend again when i actually change it lol. hope that helps a little bit.


Back
Top