-
Performance Upgrades - Maintenance - Modifications - Problem Solving - Off-Road - Street Trucks.
Covering the Explorer, ST, Sport, Lincoln Aviator, Sport Trac,
Mercury Mountaineer, Mazda Navajo, Ford Ranger, Mazda Pickups, and the Aerostar.
Featuring H.I. - Human Intelligence.
Register Today It's free!
You are using an out of date browser. It may not display this or other websites correctly.
You should upgrade or use an alternative browser.
You should upgrade or use an alternative browser.
Got this any tips
- Thread starter mersberg
- Start date
Elite Explorer members see no advertisements, no banner ads, no double underlined links,.
Add an avatar, upload photo attachments, and more!.
- Joined
- February 2, 2006
- Messages
- 7,476
- Reaction score
- 53
- City, State
- North East Arkansas
- Year, Model & Trim Level
- 2012 F150 4x4
mail it to me!
 Looks like a fun weekend, good luck!
- Joined
- March 3, 2002
- Messages
- 13,876
- Reaction score
- 50
- City, State
- Elkridge, MD
- Year, Model & Trim Level
- 04 4Runner, 22 Silverado
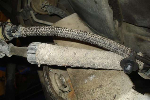
Get PB Blaster and start spraying the hell out of the bolts now.. Front & rear leaf spring mounts, shackles, U-bolts, shock mounts, front axle mounts, etc.. If you don't have air tools, invest in it.
- Joined
- February 2, 2006
- Messages
- 7,476
- Reaction score
- 53
- City, State
- North East Arkansas
- Year, Model & Trim Level
- 2012 F150 4x4
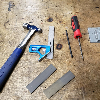
Get a good floor jack and jackstands, plenty of tools including -
18mm deep well socket
21mm socket
15mm socket
breaker bar
locktite (blue)
jackstands
Obviously you will need other tools besides what I listed, but I used the crap out of the metric sockets on the suspension parts. They are a must.
Be careful and support your vehicle at all times while you are under it, don't trust your jack alone!
mersberg
Member
- Joined
- June 25, 2006
- Messages
- 34
- Reaction score
- 0
- City, State
- Honolulu,Hi
- Year, Model & Trim Level
- 00 EB 4WD
Going to have my Jeepers buddy to help me out with the install and maybe another helper. What is the hardest part of the whole install? Is there a particular area I should take a note about? Also if any what parts should I have on hand just in case? And finally besides the 2 jaw puller and 32mm socket for the torsion bar and hub respectively what other tools should I have on hand? I'll have air tools welder and other things but this is a Jeep guy/guys and not real sure on their Ford experience, once again thanks for the advice.
- Joined
- February 2, 2006
- Messages
- 7,476
- Reaction score
- 53
- City, State
- North East Arkansas
- Year, Model & Trim Level
- 2012 F150 4x4
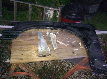
For me the the hardest part was loading the tortion bars. The smallish puller I had sucked, one stripped out and the other one barely did it. Make sure you have a good puller.
mersberg
Member
- Joined
- June 25, 2006
- Messages
- 34
- Reaction score
- 0
- City, State
- Honolulu,Hi
- Year, Model & Trim Level
- 00 EB 4WD
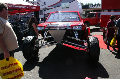
Put it on
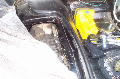
Got it done on Saturday, started at 930 and finished at 120 in the morning . 3 jaw puller utilizing only 2 jaws worked awesome, wrapped a strap around the bar for safety. Everything else was straight foward. I used 2 post from the useful post section on hub replacement and ball joint replacement for extra info. Use of air tools came in handy. The bolts SL supplied for the LCA 2 were cross threaded so I had to get new ones. Also on the Cam bolt for the passenger side my buddy had bent it a little but feel it was still good, but I don't have experience in those to be sure, he tightened them down without having them fully seated in the keyway(channel) not sure what its called , but got it back in there and seems to work fine.


Impressions: Ride is bouncy but alot better then at stock. Back sits higher then the front. Could be the new rear springs need to break in. I had 9 threads on each side to the bottom of the torsion bar bolt on both sides so I set it back to the same 9 threads when I put the torsion bars back in. Do I need to raise it more to match the rear or should I leave it and wait for the rear to settle? I have a problem with the passenger side. When I turn to the left it seems that the outer cv boot clamp is rubbing up on the shock, is there a way to fix that or do i live with it? It only happens when I turn left , the drivers side is fine. By the way I have 255r60 and 87k miles.I am saving for 33x12.50 swampers and 15x10 Classic II's.


Got it done on Saturday, started at 930 and finished at 120 in the morning . 3 jaw puller utilizing only 2 jaws worked awesome, wrapped a strap around the bar for safety. Everything else was straight foward. I used 2 post from the useful post section on hub replacement and ball joint replacement for extra info. Use of air tools came in handy. The bolts SL supplied for the LCA 2 were cross threaded so I had to get new ones. Also on the Cam bolt for the passenger side my buddy had bent it a little but feel it was still good, but I don't have experience in those to be sure, he tightened them down without having them fully seated in the keyway(channel) not sure what its called , but got it back in there and seems to work fine.
Impressions: Ride is bouncy but alot better then at stock. Back sits higher then the front. Could be the new rear springs need to break in. I had 9 threads on each side to the bottom of the torsion bar bolt on both sides so I set it back to the same 9 threads when I put the torsion bars back in. Do I need to raise it more to match the rear or should I leave it and wait for the rear to settle? I have a problem with the passenger side. When I turn to the left it seems that the outer cv boot clamp is rubbing up on the shock, is there a way to fix that or do i live with it? It only happens when I turn left , the drivers side is fine. By the way I have 255r60 and 87k miles.I am saving for 33x12.50 swampers and 15x10 Classic II's.
- Joined
- February 2, 2006
- Messages
- 7,476
- Reaction score
- 53
- City, State
- North East Arkansas
- Year, Model & Trim Level
- 2012 F150 4x4
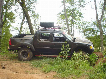
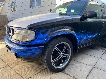
Nice work. I was thinking man, that thing looks huge, then I saw you have a BL as well. Looks great.
I would let the springs settle in some, and not worry about lifting the front any more. I personally like a little bit of rake. What I did to get the front level was measure at the center of the wheel to the lip of the fender or in your case flare. I got both sides within 1/4" of each other. Counting threads on the bolts is not an accurate way to level the front, the spring bar rates may vary slightly. Once its level, drive it a few days to let the bars settle in and re measure and adjust if necessary. Then get an alignment.
Looks really good, your paint and body look to be in good shape. Be certain to post pics when you get the tires.
EDIT: Also go back in a few days and check the torque on your bolts, especially the hub assembly bolts and caliper bolts.

mersberg
Member
- Joined
- June 25, 2006
- Messages
- 34
- Reaction score
- 0
- City, State
- Honolulu,Hi
- Year, Model & Trim Level
- 00 EB 4WD
I was going to wait to put the lift on when I got the tires but I couldn't handle it and the ride and handling sucked . Some of the little noises and minor problems were taken care of with the lift and tightening all bolts down to spec's. Figured out how to fix my pass. outer cv boot rubbing my shocks, I put a couple washers on each bolt to space it higher and problem solved.
- Joined
- March 3, 2002
- Messages
- 13,876
- Reaction score
- 50
- City, State
- Elkridge, MD
- Year, Model & Trim Level
- 04 4Runner, 22 Silverado
The shock problem is common, if you search for ExplorerEb96's truck you'll see a remedy I believe which is to get a different shock. Here's a brief shot of the shock comparison between stock & the one supplied. http://www.explorerforum.com/forums/showpost.php?p=673646&postcount=18
mersberg
Member
- Joined
- June 25, 2006
- Messages
- 34
- Reaction score
- 0
- City, State
- Honolulu,Hi
- Year, Model & Trim Level
- 00 EB 4WD
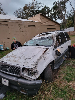
Used 33x12.50 on 15x10
Cranked the torsion bars , drivers side maxed out and pass. stil has an inch to go. Cut the plastic fender trim on back side of well but still rubs a little on full turns with a slight lean . Should I buy a longer bolt for the drivers side and go higher? Oh forgot drivers side is still lower then the Passenger. Ground to fender DF= 43 3/4 PF= 44 3/8 DB = 43 1/8 PB = 42 1/2. Also why the difference in the back? No load or sound system, pretty much empty.


Cranked the torsion bars , drivers side maxed out and pass. stil has an inch to go. Cut the plastic fender trim on back side of well but still rubs a little on full turns with a slight lean . Should I buy a longer bolt for the drivers side and go higher? Oh forgot drivers side is still lower then the Passenger. Ground to fender DF= 43 3/4 PF= 44 3/8 DB = 43 1/8 PB = 42 1/2. Also why the difference in the back? No load or sound system, pretty much empty.
white96x
Explorer Addict
- Joined
- September 4, 2002
- Messages
- 1,204
- Reaction score
- 0
- City, State
- Rancho Cuc,Ca(home) SLO,Ca(school)
- Year, Model & Trim Level
- 1997 E.B.
looks good....i have the same problem with the height difference between pass and drivers side...pass side is about 3/4" higher both front and rear it can be attributed to the fact that the gas tank is on the same side that the drivers seat is..at least thats my reasoning...nothing to worry about
explorermatt001
Well-Known Member
- Joined
- December 4, 2004
- Messages
- 164
- Reaction score
- 0
- City, State
- Mission Viejo, CA
- Year, Model & Trim Level
- 97 XLT 4x4
white96x is right, the gas tank and a few other components are all on the driver side and mine is about 3/4" to an inch higher on the pass side
mersberg
Member
- Joined
- June 25, 2006
- Messages
- 34
- Reaction score
- 0
- City, State
- Honolulu,Hi
- Year, Model & Trim Level
- 00 EB 4WD
I wanna lift it an inch or a little more so I don't rub any more, Passenger side bolt has 1/2 inch of thread on the bolt while the driverside is maxed out . I would like to put Warrior shackles for the back but don't know what to do about the front.
white96x
Explorer Addict
- Joined
- September 4, 2002
- Messages
- 1,204
- Reaction score
- 0
- City, State
- Rancho Cuc,Ca(home) SLO,Ca(school)
- Year, Model & Trim Level
- 1997 E.B.
you could get longer t-bar adjuster bolts...and crank them for a little extra but depending on how much you've cranked them already, you run the risk of damaging you CV's...
Featured images
Featured images
Similar Threads
- Replies
- 3
- Views
- 823
- Replies
- 2
- Views
- 956
- Replies
- 0
- Views
- 908
- Replies
- 12
- Views
- 1,925