Solved - 2007 Explorer ac switch to defrost vents | Ford Explorer Forums - Serious Explorations

  • Register Today It's free!

Solved 2007 Explorer ac switch to defrost vents

Prefix for threads that contain problems that have been resolved, and there is an answer within the thread.

Rene44

Member
Joined
September 22, 2017
Messages
19
Reaction score
5
City, State
Natchez, MS
Year, Model & Trim Level
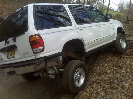
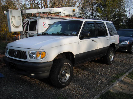
2007 Ford Explorer XLT
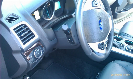
We have been trying to track down this problem for a few weeks now. So any suggestions would be appreciated. When going up a hill and giving it just a bit more juice (from 70 to like 75) it changes from the front/direct vents that cool the driver and the passenger to the defrost vents up by the windshield. Once you get down the hill, then it instantly kicks back in. The very first thing we did was changed the vacuum check valve. Test drove the next day - no dice. Ran a smoke test using the line that goes to the brake booster and it only showed a leak around the throttle body so we tighten up that area yesterday. Went to work today and tested - no dice. So will probably run another smoke test.

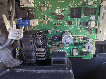
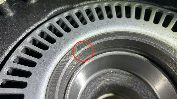
We have been trying to find the vacuum reservoir ball that other posts suggest but could not find anything under the passenger fender side after removing all the black pieces. We see a black, football-looking part underneath the passenger footing area but can't get google to pull what that part is. We also see several canister-looking parts and did a unplug and re-plug. One has a metal piece that moves in and out and you turn the ac on and off. Looked at all the lines and don't see cracks or breaks anywhere.

When the air is in, it is nice and crisp. Maybe just not blowing as hard on three as it use to but...

This has got us stumped.


Join the Elite Explorers for $20 each year.
Elite Explorer members see no advertisements, no banner ads, no double underlined links,.
Add an avatar, upload photo attachments, and more!
.


It sounds like the same problem I had a couple of years ago. There is a vacuum reservoir in the dash (passenger side) that keeps the HVAC system operating properly when the engine is no longer producing a decent vacuum. This occurs when the engine is under a load (i.e. going up a hill, accelerating etc.). The HVAC system defaults to the defrost vents when vacuum is lost as a safety precaution to keep driver visibility available. Once the engine is no longer under load the system sees a vacuum again and will work properly until the next loss of vacuum. Sometimes you can hear a slight hissing sound coming from the passenger side dash when this happens.

There is a one way valve in the engine compartment that keeps the reservoir from losing its vacuum when the engine is under load. It is called the Air Conditioner Control Valve (Part XR3Z-19A563-AA) and costs $12 on Amazon. It takes less than a minute to replace but make sure it is oriented properly since it is a one way valve. The valve is located near the passenger side firewall and should be easy to spot.


If you have the electronic digital HVAC control, the vacuum leak may be inside the control unit.
We do not have the electronic digital HVAC control in our SUV, we have the turn dial.


It sounds like the same problem I had a couple of years ago. There is a vacuum reservoir in the dash (passenger side) that keeps the HVAC system operating properly when the engine is no longer producing a decent vacuum. This occurs when the engine is under a load (i.e. going up a hill, accelerating etc.). The HVAC system defaults to the defrost vents when vacuum is lost as a safety precaution to keep driver visibility available. Once the engine is no longer under load the system sees a vacuum again and will work properly until the next loss of vacuum. Sometimes you can hear a slight hissing sound coming from the passenger side dash when this happens.

There is a one way valve in the engine compartment that keeps the reservoir from losing its vacuum when the engine is under load. It is called the Air Conditioner Control Valve (Part XR3Z-19A563-AA) and costs $12 on Amazon. It takes less than a minute to replace but make sure it is oriented properly since it is a one way valve. The valve is located near the passenger side firewall and should be easy to spot.
We changed out the one-way valve. That was the first thing we did, no dice. I just got a break at work and went outside and rechecked, it appears to be in the right direction according to this link but will ask hubby to double check once home.


I think the big, black capsule-looking thing under the passenger side foot area is the reservoir. No lines appear to be cracked. Should we remove it to see if it is cracked on the backside?


If the valve is working and oriented properly then I would suggest doing a smoke test at where the valve connects and runs to the reservoir. The valve will prevent smoke from going past it and into the lines after it so it is likely the previous smoke test did not get smoke in these areas. I think there is a vacuum leak that is after the valve and might be in the control unit, a cracked reservoir (I doubt this), a loose line connection and/or cracks in the lines running in the dash. Doing a smoke test by attaching the machine to the line coming out of the valve should show where it is leaking. In some places the source of the leak might be hard to spot.

If your HVAC head unit looks like the one shown below then it doesn't have vacuum lines attached to it and the O-rings aren't an issue.


s-l1600.jpg


This is a picture of our HVAC head unit. We have the turn-dial version. We have two lines running from the reservoir (hoping that is the black, capsule-looking thing underneath the passenger floorboard shown in the picture). The black vacuum line ran to the vacuum check, in which we tested and saw no smoke (hoping we tested the right line). The gray one I believe hubby said ran to the heater control valve. Underneath the EGR is where we saw smoke when connected to the brake booster. We also hear a clicking sound when we crank the vehicle or cut off the vehicle that sounds like the vacuum actuator motor. When we look underneath the dash, nothing looks cracked and the arm goes in and out when you cut the ac on and off.

IMG_20220911_115817836_HDR.jpg IMG_20220909_144636412.jpg IMG_20220911_140838308_HDR.jpg IMG_20220911_140848004_HDR.jpg


If the valve is working and oriented properly then I would suggest doing a smoke test at where the valve connects and runs to the reservoir. The valve will prevent smoke from going past it and into the lines after it so it is likely the previous smoke test did not get smoke in these areas. I think there is a vacuum leak that is after the valve and might be in the control unit, a cracked reservoir (I doubt this), a loose line connection and/or cracks in the lines running in the dash. Doing a smoke test by attaching the machine to the line coming out of the valve should show where it is leaking. In some places the source of the leak might be hard to spot.

If your HVAC head unit looks like the one shown below then it doesn't have vacuum lines attached to it and the O-rings aren't an issue.


View attachment 434081


Bumping the post to make sure we are checking the correct items suggested before taking loose the dash area where the radio is to check the silver canisters and whatever else we can find.

Thanks for helping! Still searching the forum. I see other posts. I can't believe this seems simple but the problem is not solved.


Another way to test is to draw a vacuum in the lines and see if it holds. This will definitively tell you if there is a leak. It won't tell you were it is located.


We have four of the silver vacuum actuators or whatever they are called (so many different names) for them online. We have one to the left connected to a yellow vacuum line. Then we have one with a leveler that operates the vents and did that perfectly attached to a red vacuum line. Then one silver vacuum actuator is attached to the blower that is connected to a white vacuum line. Then one that looks like it operates the control for heat or cool controls is attached to a blue vacuum line.

Not one of these lines visually appears to have cracks or damage.

We are going back through all the steps previously mentioned. Do you think we should start trying to replace the little silver actuators one by one, especially the one we did hear a vacuum sound from? It will be a bugger to get out and replace.


I would test to see if the system after the check valve holds a vacuum while it is operated. This would eliminate a vacuum leak as a cause.


Wow. I am finally able to update this post. Could not log back in for months even with requesting a password reset. However, it finally worked today.

In the end, it was the check valve. But just replacing it did not work until we added some shrink tubing to get a better seal.


Thanks for reporting back. Doing this will definitely help others in the future with the same issue.


Back
Top