Hi all
Trying to identify a part
The explorer logo that is like a silver foil/plastic of the raised EXPLORER name that is across the liftgate on my 2013 Limited is starting to peel off ! Anyone know if this is covered by warranty and if not what is the part number for one of these chrome looking plastic pieces (the long one that goes across the back of the tailgate) and how easy/difficult is it to replace ?
Thanks
Not my car in the pic but this is the EXPLORER piece I was referring too
http://www.carpages.ca/blog/wp-content/uploads/2011/08/IMG_6258.jpg
Wildcat, the part is called the LICENSE LAMP SHIELD. It can be found here
http://www.fordparts.com/Commerce/P...earch=true&year=2014&make=Ford&model=Explorer
Installation is quite easy if you plan on keeping your original camera.
1) Open the liftgate and remove two 11mm acorn nuts. Each nut will be located next to the liftgate strut (shock) mounting point.
2) Close the liftgate and remove the four 10mm bolts beneath the shield. Two of the bolts will be on both sides of the license plate lights, while one more bolt on each side (for an additional two bolts) is a few inches further down the line.
3) Using a plastic pry tool (do not use anything extremely sharp or anything metal to avoid scratching or denting the body), pry the shield off of the body starting from the outer-most part of the shield and working towards the center of the vehicle. It will take a little bit of force, but it should pop out as you pry underneath the shield and pull it out.
4) Once the shield is popped out completely (or as you pop out a section at a time), it would be wise to completely wrap the shield in blue painters tape or any material. Because the shield will dangle by the rear-view camera wire, it will swing back and forth and likely scratch the paint. Use the tape to cushion the deceptively sharp edges of all parts of the shield to prevent this.
5) Look carefully at the camera and how it is mounted. Take pictures if you have to because re-installation can be tricky--it can often be easier to take things apart than put them back together.
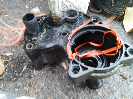
6) The camera sits inside in a housing that mounts at three points. A small plate holds the back of the camera in place, and a Torx screw is attached to the housing. Take out the Torx screw (sorry I forgot the size). Then push the clips on both sides of the housing towards each other. you should be able to push the camera case through the shield frame.
7) At this point the license lamp shield should be free, and can be replaced/painted/whatever.
8) Be advised that the shield has other wires for the lights, etc. They are zip tied, wrapped, and fed through certain areas to prevent wire-pinching, etc. Try not to loosen or move these wires.
Note: If for some reason you want/need to change your camera too, follow the steps above. But you will also need to remove the interior liftgate panels/trim in order to disconnect the camera wire.


 Inspected the rest of the car, hood, doors, roof, no rust there. Just the tailgate. Due for inspection before end of the month. Wouldn't expect my car to be rusting when it just turned 2! It's a 2013.