Joe Dirt
Explorer Addict
- Joined
- October 4, 2007
- Messages
- 13,325
- Reaction score
- 28
- Year, Model & Trim Level
- 07 Camry
Ok, here is the long awaited writeup... It's not earth-shattering, but seems to get a LOT of questions, so here goes...
This is a series of pics taken with 2 trucks, Shamrock (1997) and Wedgie (2000), as I swapped the system from one to the other, but the procedure is the same as if you're adding one, since Wedgie didn't have one, and Shamrock didn't when I started either. If colors change, it's not your brain, I moved from one truck to the other depending on which had a better picture to show...
Assume you're an audiophile, and love tunes. The Ford system has no real low end, so you'd like to add some bass, but don't want to sacrifice your cargo space with a box, which I hate to do as well- I haul stuff, so a box isn't practical for me at all. I also don't want to pay good $$ to impress people I don't know, for opinions I can't hear since I'm driving past them, so my sound is really just for me and my passengers. Andrew loves Depeche Mode... Or, as he says, 'peche Mode.
Tools needed:
T50 Torx bit socket to remove seat belt
8mm socket for sub enclosure bolts
7mm socket and small extension for factory amp removal
Phillips screwdriver
Flat head screwdriver (Large) or trim puller (or both!)
Flat head screwdriver (small ( to remove factory cubby storage thingy)
Wire strippers or knife if you're skilled
Shrink tubing, electrical tape, or the like if you're so inclined
Something to poke hole in rubber grommet, (I used a small awl)
Amp install wiring kit- I used Planet Audio's PAK8 kit, $20 from onlinecarstereo.com
Self-tapping screw or drill to make ground site
Bag of poly-fil for sub enclosure
Zip ties to clean things up
You have this: (or the non-net hard case in the '98+)

You need tunes. Here we go...
Pop off your plastic trim at the tailgate, showing the edge of the carpet, and remove these 2 buttons. Yes you can rip them through, but why?

I was swapping carpet, so I removed the entire thing. If you want to, you can do that too, lower your rear seats, flip the covers back, and there are 5 small bolts holding it in. Remove those and you can pull your carpet if you wish.
Anyway, back to the fun. Next remove the following fasteners:
(1) T50 Torx Bit for the seat belt bolt. (Red)
(9) Push Pins. (Green)
...Start with a long flathead and do the ones farthest back by the tailgate. Slide the flathead in between the weatherstrip and body and you can work them out if you don't have a trim puller. Once in there, you can work your hand back to help with the smaller ones around the window.
(2) Phillips screws (Yellow)

Once those are removed, you can pull the panel off, and then you see this (or something like it...)

You need to remove the factory cubby- if you have a '91-'97 Ex, you have these- you MUST remove them from the backside of the trim panel. (You can see the '98+ tabs in the picture above)

If you have a '98+ you have tabs, but still remove it from the back for ease of use if you want to keep it to reinstall if you might sell and remove your sub.
Remove the metal bracket holding your amp if you have a '95-'97 Ex/Mounty. My 2000 has no bracket because '98+ has no amp back there unless you have a factory subwoofer. (More on that later)

You should now have a bare panel.
Grab your factory enclosure that you've obtained from a trusted seller, junkyard, or Santa.
I have installed an 8" JL Audio 8W1v2-4 subwoofer that I got from onlinecarstereo.com for $69, it fits the factory hole perfectly. Remember- if you have to remove a factory sub first, there is a bolt holding it from the back as well as the bolts on front... From experiencs, stuff the sub full of polyfill before installing your sub. It sounds a LOT better, and 'hits' quite hard. **Make sure you run speaker wires from the sub out, and leave yourself enough lead to go to where your amp will be. Mine will be under my back seat...
Before anyone tells me my sub is crooked- I know. I turned it so I could make my own holes when mounting. The factory ones were very close, but some would have just elongated the existing holes, and I didn't want that.
This is the poly I used, it's at Wal-Mart, a couple of bucks for a bag. I used 1-1/2 bags.

Ok- you've got your sub mounted, now if you have a '95-'97 Ex, and you're using a harness for your aftermarket radio, you will still need your factory radio amp. So, I just used some screws and mounted it to the enclosure where it would fit.
If you're working with a '98+ Ex/Mounty, you will not need the factory amp. The spot on the sub enclosure would have been for the amp that powered it.
If you look the pre '98 sub enclosure (that also only had a 6" sub) had 2 slots for amps- one for the factory radio amp, one for the factory sub amp:

The '98+ enclosure only has one. That did 2 things- eliminate one amp since the amp was now in the factory head unit, and free up space so that the sub could be increased to 8".
If my amp would have fit on it, I would have mounted it there, but I needed my factory amp on Shamrock ('97). I will mount it on the enclosure when I reinstall after cleaning my carpet in Wedgie ('00).
Anyway, this is what you will have (This is the '98+ 8" sub enclosure):

You can now grab the make-a-nut clips (from your amp bracket, or hopefully some with your sub enclosure (or hardware store if not)...

...and install them on the body to correspond to where the bolts will go. The holes are all there already.
Now hang your sub enclosure. There are some tabs on the back that hook to some cutouts in the body. The amp on there is my factory radio amp since this pic was from my '97. It won't be on there in my 2000.

Bolts go here... There is also a small L-bracket that you could use if you want. It is circled in Red... I used it on Wedgie, didn't use it on Shamrock, no ill effects or rattling.

Done mounting.
This is in the '97, (note factory radio amp, bolts to the same holes though)

Ok- you're bolted in, now on to the easy part- the wiring...
I'm assuming that either
1.) You have an aftermarket stereo and you've got RCA cables and a remote amp turn on wire.
-or-
2.) You have a factory stereo, (yes you can do this) and you're running a line-level convertor and now have RCA's and have a remote on wire as well.
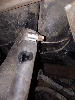
First, I ran my RCA and remote wires back on the passenger side of the truck:
Behind the glove box

Zip-tied to the inertia switch harness, and under the carpet below the door sill panel. It pulls up and off to get under there. There are also a couple of clips on the front and rear of the trim on the b-pillar, but you'll see them when youre pulling the sill trim up. They just pull off.

Run your wires back, I'm just wiring mine to under the rear seat.
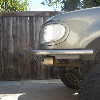
Next, run your power wire back. I went through here:

Pull the wire to the front of the truck and leave it unhooked for now.

Next, run your power wire back the same way you ran the RCA's/remote on back but on the driver's side.

You should have almost all of your wires there now, with the exception of the ground. So, make a ground wire with a ring terminal and prep your ground. I ran it next to the amp about 8" away.

You should now have all of your connectors. Hook everything to your amp...
This is my amp, it is a SoundStorm 2F400 that I got from onlinecarstereo.com for $59. It performs flawlessly, and drives the sub well. I have my input level at about 55% or it's too loud. Seriously- this cleap system sounds great.

This is how I have it now until I can mount it to the sub enclosure when I do my carpet. I wanted tunes in the meantime...

After hooking everything up to the amp and double checking your connectors to make sure the wires aren't loose (I had one loose on the initial installation on Shamrock) head to the front of the truck.
Now install your fuseable link and hook to your battery.

Only thing left to do is toss your sub trim cover on, but I am still looking for one to match Wedgie's interior, Dark Graphite. But this is how it sits:

Not a bad mod, definitely fits the truck, and sounds awesome- and it looks just like stock and you lose no floor space in your truck...
***NEW INFO 5/2011***
Since this system has been installed in 3 different Ex's now, I thought I'dd add pics of the install now that the amp has been mounted to the sub enclosure behind the trim panel.
This is what I have now:


It is completely hidden, and I have a remote level adjuster for the input level, so I have no need to get to the amp anyway. All the cargo space, all the sound.
This is a series of pics taken with 2 trucks, Shamrock (1997) and Wedgie (2000), as I swapped the system from one to the other, but the procedure is the same as if you're adding one, since Wedgie didn't have one, and Shamrock didn't when I started either. If colors change, it's not your brain, I moved from one truck to the other depending on which had a better picture to show...
Assume you're an audiophile, and love tunes. The Ford system has no real low end, so you'd like to add some bass, but don't want to sacrifice your cargo space with a box, which I hate to do as well- I haul stuff, so a box isn't practical for me at all. I also don't want to pay good $$ to impress people I don't know, for opinions I can't hear since I'm driving past them, so my sound is really just for me and my passengers. Andrew loves Depeche Mode... Or, as he says, 'peche Mode.
Tools needed:
T50 Torx bit socket to remove seat belt
8mm socket for sub enclosure bolts
7mm socket and small extension for factory amp removal
Phillips screwdriver
Flat head screwdriver (Large) or trim puller (or both!)
Flat head screwdriver (small ( to remove factory cubby storage thingy)
Wire strippers or knife if you're skilled
Shrink tubing, electrical tape, or the like if you're so inclined
Something to poke hole in rubber grommet, (I used a small awl)
Amp install wiring kit- I used Planet Audio's PAK8 kit, $20 from onlinecarstereo.com
Self-tapping screw or drill to make ground site
Bag of poly-fil for sub enclosure
Zip ties to clean things up
You have this: (or the non-net hard case in the '98+)
You need tunes. Here we go...
Pop off your plastic trim at the tailgate, showing the edge of the carpet, and remove these 2 buttons. Yes you can rip them through, but why?
I was swapping carpet, so I removed the entire thing. If you want to, you can do that too, lower your rear seats, flip the covers back, and there are 5 small bolts holding it in. Remove those and you can pull your carpet if you wish.
Anyway, back to the fun. Next remove the following fasteners:
(1) T50 Torx Bit for the seat belt bolt. (Red)
(9) Push Pins. (Green)
...Start with a long flathead and do the ones farthest back by the tailgate. Slide the flathead in between the weatherstrip and body and you can work them out if you don't have a trim puller. Once in there, you can work your hand back to help with the smaller ones around the window.
(2) Phillips screws (Yellow)
Once those are removed, you can pull the panel off, and then you see this (or something like it...)
You need to remove the factory cubby- if you have a '91-'97 Ex, you have these- you MUST remove them from the backside of the trim panel. (You can see the '98+ tabs in the picture above)
If you have a '98+ you have tabs, but still remove it from the back for ease of use if you want to keep it to reinstall if you might sell and remove your sub.
Remove the metal bracket holding your amp if you have a '95-'97 Ex/Mounty. My 2000 has no bracket because '98+ has no amp back there unless you have a factory subwoofer. (More on that later)
You should now have a bare panel.
Grab your factory enclosure that you've obtained from a trusted seller, junkyard, or Santa.
I have installed an 8" JL Audio 8W1v2-4 subwoofer that I got from onlinecarstereo.com for $69, it fits the factory hole perfectly. Remember- if you have to remove a factory sub first, there is a bolt holding it from the back as well as the bolts on front... From experiencs, stuff the sub full of polyfill before installing your sub. It sounds a LOT better, and 'hits' quite hard. **Make sure you run speaker wires from the sub out, and leave yourself enough lead to go to where your amp will be. Mine will be under my back seat...
Before anyone tells me my sub is crooked- I know. I turned it so I could make my own holes when mounting. The factory ones were very close, but some would have just elongated the existing holes, and I didn't want that.
This is the poly I used, it's at Wal-Mart, a couple of bucks for a bag. I used 1-1/2 bags.
Ok- you've got your sub mounted, now if you have a '95-'97 Ex, and you're using a harness for your aftermarket radio, you will still need your factory radio amp. So, I just used some screws and mounted it to the enclosure where it would fit.
If you're working with a '98+ Ex/Mounty, you will not need the factory amp. The spot on the sub enclosure would have been for the amp that powered it.
If you look the pre '98 sub enclosure (that also only had a 6" sub) had 2 slots for amps- one for the factory radio amp, one for the factory sub amp:
The '98+ enclosure only has one. That did 2 things- eliminate one amp since the amp was now in the factory head unit, and free up space so that the sub could be increased to 8".
If my amp would have fit on it, I would have mounted it there, but I needed my factory amp on Shamrock ('97). I will mount it on the enclosure when I reinstall after cleaning my carpet in Wedgie ('00).
Anyway, this is what you will have (This is the '98+ 8" sub enclosure):
You can now grab the make-a-nut clips (from your amp bracket, or hopefully some with your sub enclosure (or hardware store if not)...
...and install them on the body to correspond to where the bolts will go. The holes are all there already.
Now hang your sub enclosure. There are some tabs on the back that hook to some cutouts in the body. The amp on there is my factory radio amp since this pic was from my '97. It won't be on there in my 2000.
Bolts go here... There is also a small L-bracket that you could use if you want. It is circled in Red... I used it on Wedgie, didn't use it on Shamrock, no ill effects or rattling.
Done mounting.
This is in the '97, (note factory radio amp, bolts to the same holes though)
Ok- you're bolted in, now on to the easy part- the wiring...
I'm assuming that either
1.) You have an aftermarket stereo and you've got RCA cables and a remote amp turn on wire.
-or-
2.) You have a factory stereo, (yes you can do this) and you're running a line-level convertor and now have RCA's and have a remote on wire as well.
First, I ran my RCA and remote wires back on the passenger side of the truck:
Behind the glove box
Zip-tied to the inertia switch harness, and under the carpet below the door sill panel. It pulls up and off to get under there. There are also a couple of clips on the front and rear of the trim on the b-pillar, but you'll see them when youre pulling the sill trim up. They just pull off.
Run your wires back, I'm just wiring mine to under the rear seat.
Next, run your power wire back. I went through here:
Pull the wire to the front of the truck and leave it unhooked for now.
Next, run your power wire back the same way you ran the RCA's/remote on back but on the driver's side.
You should have almost all of your wires there now, with the exception of the ground. So, make a ground wire with a ring terminal and prep your ground. I ran it next to the amp about 8" away.
You should now have all of your connectors. Hook everything to your amp...
This is my amp, it is a SoundStorm 2F400 that I got from onlinecarstereo.com for $59. It performs flawlessly, and drives the sub well. I have my input level at about 55% or it's too loud. Seriously- this cleap system sounds great.
This is how I have it now until I can mount it to the sub enclosure when I do my carpet. I wanted tunes in the meantime...
After hooking everything up to the amp and double checking your connectors to make sure the wires aren't loose (I had one loose on the initial installation on Shamrock) head to the front of the truck.
Now install your fuseable link and hook to your battery.
Only thing left to do is toss your sub trim cover on, but I am still looking for one to match Wedgie's interior, Dark Graphite. But this is how it sits:
Not a bad mod, definitely fits the truck, and sounds awesome- and it looks just like stock and you lose no floor space in your truck...
***NEW INFO 5/2011***
Since this system has been installed in 3 different Ex's now, I thought I'dd add pics of the install now that the amp has been mounted to the sub enclosure behind the trim panel.
This is what I have now:
It is completely hidden, and I have a remote level adjuster for the input level, so I have no need to get to the amp anyway. All the cargo space, all the sound.