redneckin
Member
- Joined
- September 19, 2011
- Messages
- 39
- Reaction score
- 0
- City, State
- Cape Coral, Florida
- Year, Model & Trim Level
- 1994 Mazda Navajo 4x4
ok, i have been battling this problem with my '94 Navajo and i have finally fixed this issue. this is a how to on resealing the flip up style sunroof.
Approx. Time: 1 to 2 hours
Tools Required:
-standard putty knife
-philips screwdriver
-torx female sockets
-1/4 inch drive ratchet
-sandpaper
-adhesive
-caulk gun (depending on adhesive)
Step 1: Removing the glass.
most people think of glass handling as a very complicated area and are affraid of it. removing the flip up glass in a first gen is super simple and very light, anyone can do it. wind the sunroof all the way to its most upward position. there should be a red button. all you do is push it and the sunroof comes all the way up. dont have a pic for this step because its super simple. pull the glass out of the two front clips and set it aside.
Step 2: Removing the inner weatherstripping.
no picture for this one either, all you do is grab the weather stripping where its cut in the middle and give it a tug. it comes out extremely simple and just toss is aside with the glass.
Step 3: Getting ready for frame removal.
this is probably one of the most time consuming part of the resealing process. you have to scrape the outside of the frame on the roof with your standard putty knife, to loosen up the stubborn old adhesive holding the frame in. if you have a $9,000 paint job, you're gonna need some touch up paint or a redo of a small section that got scratched. be careful with the frame, its probably gonna be extremely fragile for being over 15 years old, and can break extremely easy.

Step 4: Frame Removal.
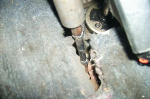
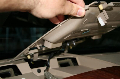
once you get all the old adhesive loosen up, its time to remove the frame. this step is easier to do if you pull the headliner, but i opted out of this step as time and daylight were getting smaller. underneath the headliner on the inside of the vehicle there are (4) strips of metal holding the frame to the roof of your first gen. some female style torx sockets and a 1/4 inch drive ratched would be the tools needed. loosen all the screw, but dont take them all the way out, the metal strips slide out of the screws. once you've done that, you can take the (4) drain tubes out of the frame. after the drain tubes are disconnected (also be careful, those are fragile too!), take the flip up knob off with a philips screwdriver and remove the trim piece. you can now successfully pull the frame, which should come out pretty easy.


Step 5: Cleaning the frame.
once the frame is out, clean it up rear good, with a piece of sandpaper or lightly grind it with a wire wheel. we used the wire wheel.


Step 6: Frame installation.
the frame is clean and you are now ready to reinstall. prior to installation of the frame, you have choices in what you can use to seal the frame back in. you can use any type of household caulking, adhesive, etc. i used some clean silicone adhesive on mine with a foam padding underneath in between the frame and the roof. ahesive goes on the padding and on the roof. place the frame on the roof where it goes and connect all the drain tubes. once all the drain tubes are connected, start tightening down the metal retainers and getting the frame of the sunroof into position. after the frame is all snug, you can reinstall the weather stripping, handle trim and knob for the flip up mechanism. reinstall the glass with care, tighten all the way into the down position and let it sit overnight, or however long the adhesive you chose takes to cure. enjoy your sunroof, and stay dry on rainy days.


Thanks,
Eric
Approx. Time: 1 to 2 hours
Tools Required:
-standard putty knife
-philips screwdriver
-torx female sockets
-1/4 inch drive ratchet
-sandpaper
-adhesive
-caulk gun (depending on adhesive)
Step 1: Removing the glass.
most people think of glass handling as a very complicated area and are affraid of it. removing the flip up glass in a first gen is super simple and very light, anyone can do it. wind the sunroof all the way to its most upward position. there should be a red button. all you do is push it and the sunroof comes all the way up. dont have a pic for this step because its super simple. pull the glass out of the two front clips and set it aside.
Step 2: Removing the inner weatherstripping.
no picture for this one either, all you do is grab the weather stripping where its cut in the middle and give it a tug. it comes out extremely simple and just toss is aside with the glass.
Step 3: Getting ready for frame removal.
this is probably one of the most time consuming part of the resealing process. you have to scrape the outside of the frame on the roof with your standard putty knife, to loosen up the stubborn old adhesive holding the frame in. if you have a $9,000 paint job, you're gonna need some touch up paint or a redo of a small section that got scratched. be careful with the frame, its probably gonna be extremely fragile for being over 15 years old, and can break extremely easy.
Step 4: Frame Removal.
once you get all the old adhesive loosen up, its time to remove the frame. this step is easier to do if you pull the headliner, but i opted out of this step as time and daylight were getting smaller. underneath the headliner on the inside of the vehicle there are (4) strips of metal holding the frame to the roof of your first gen. some female style torx sockets and a 1/4 inch drive ratched would be the tools needed. loosen all the screw, but dont take them all the way out, the metal strips slide out of the screws. once you've done that, you can take the (4) drain tubes out of the frame. after the drain tubes are disconnected (also be careful, those are fragile too!), take the flip up knob off with a philips screwdriver and remove the trim piece. you can now successfully pull the frame, which should come out pretty easy.
Step 5: Cleaning the frame.
once the frame is out, clean it up rear good, with a piece of sandpaper or lightly grind it with a wire wheel. we used the wire wheel.
Step 6: Frame installation.
the frame is clean and you are now ready to reinstall. prior to installation of the frame, you have choices in what you can use to seal the frame back in. you can use any type of household caulking, adhesive, etc. i used some clean silicone adhesive on mine with a foam padding underneath in between the frame and the roof. ahesive goes on the padding and on the roof. place the frame on the roof where it goes and connect all the drain tubes. once all the drain tubes are connected, start tightening down the metal retainers and getting the frame of the sunroof into position. after the frame is all snug, you can reinstall the weather stripping, handle trim and knob for the flip up mechanism. reinstall the glass with care, tighten all the way into the down position and let it sit overnight, or however long the adhesive you chose takes to cure. enjoy your sunroof, and stay dry on rainy days.
Thanks,
Eric