Need input/advice whether I should attempt Timing Chain Replacement | Page 2 | Ford Explorer Forums - Serious Explorations

  • Register Today It's free!

Need input/advice whether I should attempt Timing Chain Replacement

remove the cover or the pan first

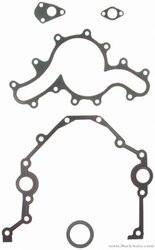
I suggest that you remove the valve cover or the oil pan before removing the front cover. If the right cassette guide is broken then the engine will have to come out. It's much easier to work on the engine with it out of the vehicle. You usually can't tell if the lower "finger" of the front cassette guide is broken without removing the front cover.


Join the Elite Explorers for $20 each year.
Elite Explorer members see no advertisements, no banner ads, no double underlined links,.
Add an avatar, upload photo attachments, and more!
.


...

Or should I take off the passenger valve cover and get a look at the rear camshaft chain and guide? Like I said in the above post, I probably will change the valve cover gasket too since I have this all apart right now.

Pull the right valve cover and get a good look at the rear cassette--its the weak link IMHO. Then you'll know for sure whether or not you need to pull the engine. If its intact, leave the engine in and proceed to check the primary.

If its not intact, then no need to pull the harmonic balancer (which you will need to do in order to pull the front timing cover), a hassle, b/c you can do it after you pull the engine (much easier).

[edit] oops, did not see that streetrod had already answered this . . .


Explorer 1, Me 0

Thanks for the feedback StreetRod; and no worries Drew, I appreciate all input, thank you.

Removing the right valve cover was kind of the route I thought would be best, but I still wanted to get some opinions.

So after another tool run, I was able to loosen the right valve cover. Unfortunately, the EGR pipe is preventing me from lifting the cover over the timing chain/sprocket in the rear.

In an attempt to make more room to move and possibly be able to lift the cover off, I removed the fuel rail. Unfortunately that did not work, and I now believe I made more work for myself reassembling that when the time comes.

Anyway, my problem now it the EGR pipe (the nut that attaches to the Exhaust Manifold). It's soaking in PB Blaster (since yesterday, and I added more today), but even then, there's little room for leverage in that area. I had a pipe wrench in there, but it was much too big. The crescent wrench I have is too small. Any ideas?

Tomorrow I have a full day and won't be able to work on the truck (maybe that's a good thing ;) ). Hopefully I'll be able to revisit it on Sunday.

At least the chilli I had on the stove turned out damn good while I was working on the truck. Time to eat, drink, and be merry... :chug:

Thank you gentlemen for your help. Enjoy your Friday evening.

Chris


Try to use impact where you can. In many cases it can prevent the head from stripping due to the pounding force.

I only have one impact and it's big daddy on loan from my brother. And, I'm pretty sure my little compressor won't even have enough airflow to power it to max output. I figured I'd give it a try should I need to remove the Harmonic Balancer.

But as the project goes along, if I absolutely need a tool, I'm not opposed to buying it. At the rate I'm going, I might have a new air compressor by the time I'm done. :D

Probably still cheaper than going the dealer! lol

I appreciate the suggestion, thank you.

Chris


EGR tube nut

I have a 15 inch crescent wrench that I use on my upper and lower EGR tube nuts but there may not be enough room in your vehicle for one. I also have an inexpensive set of large open end wrenches I purchased from Harbor Freight Tools: 15 Pc Metric Service Wrench Set . They fit in a much tighter space and if there is room I use a pipe for more leverage.


I have a 15 inch crescent wrench that I use on my upper and lower EGR tube nuts but there may not be enough room in your vehicle for one. I also have an inexpensive set of large open end wrenches I purchased from Harbor Freight Tools: 15 Pc Metric Service Wrench Set . They fit in a much tighter space and if there is room I use a pipe for more leverage.

Thanks StreetRod.

I'll take a day off and get a good look at it Sunday. I believe there is access for a pipe for leverage through the wheelwell, as I was reaching through there with the pipe wrench; there was just very little room to maneuver it. I'll give it another soaking of PB Blaster too before I head out tomorrow.

Chris


I don't know how tight it is in the area of the EGR valve but if you can tap on it some it might help loosen some of the corrosion up. I don't mean hammer hard on it. Just enough the help the PB Blaster get in there.
Bob T
:usa:


I don't know how tight it is in the area of the EGR valve but if you can tap on it some it might help loosen some of the corrosion up. I don't mean hammer hard on it. Just enough the help the PB Blaster get in there.
Bob T
:usa:

Thank you for the suggestion Bob. I gave her a few taps this morning and soaked it down again with the PB Blaster. I'll give it another go Sunday hopefully.

Chris


Sunday Update

After another trip to Menards and Home Depot for tools, I attempted the removal of the lower nut on the EGR pipe. NO-GO. At this point, I was pretty sure without heat or some more room to wrench, it just wasn't going to happen for me. So, after stumbling upon a thread here, I read some members simply bent the EGR pipe out of the way. So I proceeded to reluctantly but gingerly bend the EGR pipe. I was able to do so enough that I was able to remove the passenger side valve cover. (On a side note, I doubt I would've been able to do that with the fuel-rail in place, so me removing that may have worked out anyway.)

From everything I have seen and read in StreedRod's repair threads, it appears to me the rear timing chain and guides are intact. I removed the upper guide mounting bolt and tried to pull upward on the traction side of the guide and it didn't really move. In addition, there is little, to no slack in the timing chain. Pictures below.

So, time to disassemble the front?

Should I reassemble the passenger side valve cover area before getting further into the engine?

Input appreciated. :)

On an additional side note. I'm still working on the fan clutch removal. A: it appears to be very tight. B: None of the loaner tool sets (specifically the wrenches) work (they are too big). I replaced this a couple years ago when I did the radiator. I can't believe I put it on so tight, especially since I used the tool set from Advance Auto and the wrench is clearly too big. I did find a thread here where members have had the same problem. So, I'm off to get a wrench the actual size of the fan clutch nut. I don't see any other way.

Thank you in advance for everyone's help.

Chris
 

Attachments

  • IMG_4470.jpg
    IMG_4470.jpg
    56.9 KB · Views: 253
  • IMG_4454.jpg
    IMG_4454.jpg
    48.7 KB · Views: 232
  • IMG_4458.jpg
    IMG_4458.jpg
    43.4 KB · Views: 235
  • IMG_4431.jpg
    IMG_4431.jpg
    57.2 KB · Views: 234


I have a 776-9242 from NAPA, I don't like that the tool that goes over the pulley bolts requires a ratchet (as space is tight) but it works.
There are a couple versions of the Ford tool. I used to use O'Reilly's loaner tool program as theirs was a complete set for multiple makes.

It's awkward no matter what, but the nut isn't on super tight. As the belt is counter clock wise in rotation, it's always tightening the nut.
 

Attachments

  • image.jpg
    image.jpg
    135.3 KB · Views: 259


I have a 776-9242 from NAPA, I don't like that the tool that goes over the pulley bolts requires a ratchet (as space is tight) but it works.
There are a couple versions of the Ford tool. I used to use O'Reilly's loaner tool program as theirs was a complete set for multiple makes.

It's awkward no matter what, but the nut isn't on super tight. As the belt is counter clock wise in rotation, it's always tightening the nut.

The wrench in the NAPA set, is it a pretty snug fit over the nut?

Because that's the main problem I'm having is that the wrench is not the exact or really even close to the size of the nut, and it just keeps slipping off. They are either worn out or just china junk (or both).

The Autozone loaner tool (OEM tools, a wrench and the fork for holding the pully) was closer in size to the Advance Auto one (Powerbuilt, a complete set for multiple makes like yours from O'Reilly), but eventually it failed me too. I have an O'Reilly about 35 minutes from me, so maybe I'll have to try them.

I've also been soaking that in PB Blaster too.

Chris

edit: The NAPA website says the wrench is 36 mm. On this thread: http://www.explorerforum.com/forums/showthread.php?t=209262 it looks as though it's probably closer to 35mm.


good news!

From the photos and your explanation I agree that the rear cassette guide is good. I suggest that you wait until you know if you have to time the camshafts before reinstalling the passenger side valve cover. Rotate the crankshaft until piston 1 is at TDC on the compression stroke before removing the harmonic balancer and make sure it is still in that position before loosening the jackshaft front sprocket or driver side camshaft sprocket retaining bolts. That way you will avoid interference issues if you have to time the camshafts. You don't know for sure that the "finger" on the driver side cassette guide isn't broken. Make sure you understand how to remove the harmonic balancer. Many members break the puller side bolts because the puller center bolt is pressing against the balancer hub instead of the crankshaft end. The standard puller center bolt is larger in diameter than the crankshaft opening in the balancer. Don't forget to pull the lower oil pan and remove pieces from the pan and the oil pump pickup tube screen.


From the photos and your explanation I agree that the rear cassette guide is good. I suggest that you wait until you know if you have to time the camshafts before reinstalling the passenger side valve cover. Rotate the crankshaft until piston 1 is at TDC on the compression stroke before removing the harmonic balancer and make sure it is still in that position before loosening the jackshaft front sprocket or driver side camshaft sprocket retaining bolts. That way you will avoid interference issues if you have to time the camshafts. You don't know for sure that the "finger" on the driver side cassette guide isn't broken. Make sure you understand how to remove the harmonic balancer. Many members break the puller side bolts because the puller center bolt is pressing against the balancer hub instead of the crankshaft end. The standard puller center bolt is larger in diameter than the crankshaft opening in the balancer. Don't forget to pull the lower oil pan and remove pieces from the pan and the oil pump pickup tube screen.

Thanks StreetRod. Sounds like I've got a full schedule now. Once I get the friggin fan off, I can keep moving.

The harmonic balancer is going to be a chore, I know. And I'm going to TRY and do it without removing the radiator. I remember the radiator being an absolute pain taking out and putting back in and I'd like to avoid that part if at all possible.

I did borrow a harmonic balancer puller from Advance Auto, but I will review first and make sure I'm doing it right when I get to that point.

I'll also revisit the section on finding TDC.

Hopefully tomorrow I can make some progress. I'll keep everyone posted.

Chris


I think I am looking at having to do the same thing with my Explorer. just not sure if its worth it. 165000 miles also need front end work and a clutch. since mine is a 4 door 5 spd, ford says the clutch assembly is different.

I will be watching this thread... Thanks for all of your advice guys.


26 spline clutch?

. . . mine is a 4 door 5 spd, ford says the clutch assembly is different. . .

If the vehicle has the 26 spline clutch and needs replacement it will be expensive to replace. Ford only made 1,000 of them in production and there are no OEM units available. There is only one aftermarket source that I'm aware of: Southland Clutch in Calif. Cost is $700 plus shipping and handling. See this thread for more information: Blown engine... need recommendations


If the vehicle has the 26 spline clutch and needs replacement it will be expensive to replace. Ford only made 1,000 of them in production and there are no OEM units available. There is only one aftermarket source that I'm aware of: Southland Clutch in Calif. Cost is $700 plus shipping and handling. See this thread for more information: Blown engine... need recommendations

Thats the Clutch assembly... Local Ford dealer Quoted me a price of roughly $650.00 several months ago when I went through the rear end and suspension. they said it would be an aftermarket one and not a FoMoCo part. Looks like I may try to part the Explorer out and scrap the rest. not sure if it is worth putting much more money into.


A little progress today...

I was able FINALLY remove the fan clutch today after getting the loaner tool kit from NAPA. Evercraft was the brand I think, and it was a full blown kit like the one from Advance Auto, but the wrench fit much better. The nut actually wasn't that tight; I just needed a wrench that fit properly.

Not much to report today, but I did decide to remove the radiator. I didn't want to because I replaced it a few years ago, and I remember how much of a pain in the butt it was getting it in and out. TERRIBLE design. Anyway, it's out, because I know having that extra room will make a world of difference (plus I might be able to use the impact to remove the harmonic balancer bolt if I can get enough airflow to the impact).

I removed the alternator and it's mount, the thermostat housing, etc (picture attached).

I have to work early tomorrow, but with a little luck, we'll see what I have inside tomorrow.

Question though: Is it possible to remove the timing cover without removing the power steering pump and AC compressor? It looked to me that I could work around those without removing them, but I thought I'd get some input on that.

Chris
 

Attachments

  • IMG_4481.jpg
    IMG_4481.jpg
    79.7 KB · Views: 217


not removing the accessory bracket

I've never tried leaving the accessory bracket in place because I had my engine on a stand instead in the vehicle. My 2000 and 2002 shop manuals say to remove it and position aside. Usually Ford doesn't do anything unless it's necessary.

Do you plan to replace the front seal? I reused mine but was very careful not to damage the seal when removing the cover and put the cover back in the original position. So far I have no front cover leaks. However, I should have used some sealant when reusing my valve cover gaskets because they have started leaking. The gaskets were hard from age and heat.

If I'm able to work on it tomorrow, I'll look closer to see if I can work on it without removing the accessory bracket. I know it would probably be easier without them, but I was figuring with the power steering hoses and A/C lines, there wouldn't be much room for me to maneuver it anywhere.

I hadn't thought about the front seal yet. I know in your writeups that you said you reused yours. Looking at RockAuto, they are cheap enough to replace. I've already ordered valve cover and intake manifold gaskets, and injector o-rings from them (just trying to get a jump on parts). I'll probably just replace it since I'm there.

I was also planning on doing plugs and wires since I'm in there. 13 years old and 160k, and I don't think any of that has been done.

Chris


Join the Elite Explorers for $20 each year.
Elite Explorer members see no advertisements, no banner ads, no double underlined links,.
Add an avatar, upload photo attachments, and more!
.


Timing cover seal

Looking at the gasket set for the timing cover, it looks as though it comes with a front seal? Or is that something else?
 

Attachments

  • TCS45986_P04_TOP__ra_p.jpg
    TCS45986_P04_TOP__ra_p.jpg
    16.6 KB · Views: 214


Back
Top