RockRangerII Refresh | Page 9 | Ford Explorer Forums

  • Register Today It's free!

RockRangerII Refresh

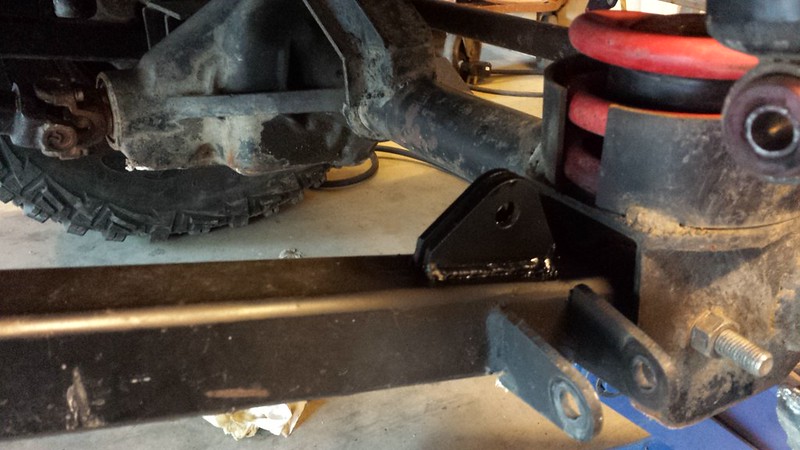
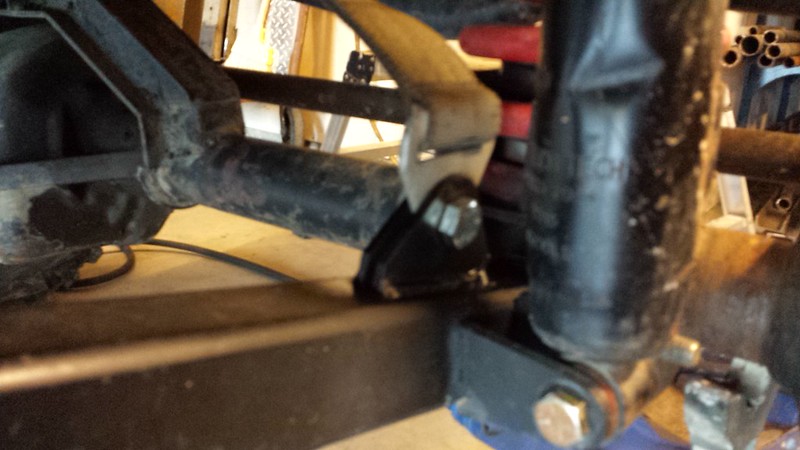
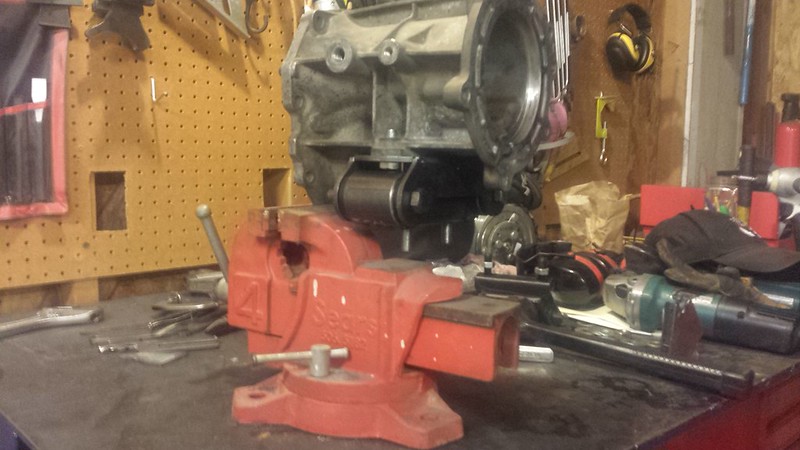
Started building a new trans mount. I have been running a similar style one for years. It just isn't as pretty so I decided to build a new one. When I had installed my doubler the stock style mounts kept breaking with the extra gearing added. Ever sense I went to this style I have never had another problem. I tacked it all together and will test fit before I do the final welds. I built it to match the factory dimensions so it will bolt in place of a stock mount.

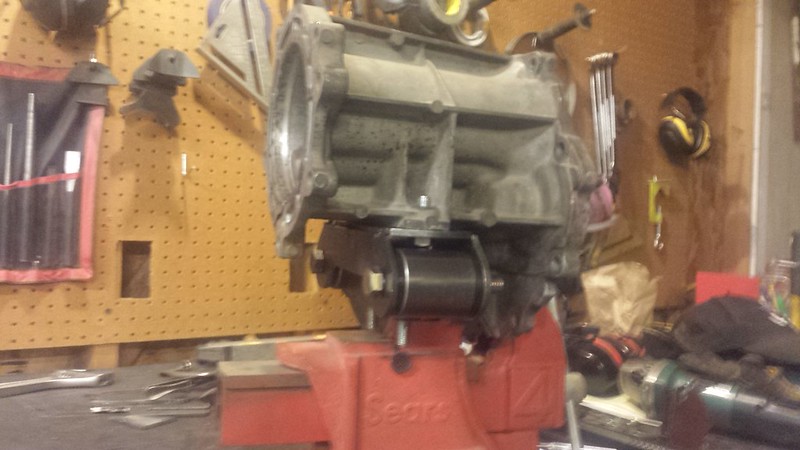
Here it is attached to a 5speed tailhousing like what my truck has in it. Going to test fit it with an auto in a 95 ranger as my parents have one to make sure it fits the autos as well.

20141221_171628 by dresselhausfc, on Flickr

20141221_171649 by dresselhausfc, on Flickr

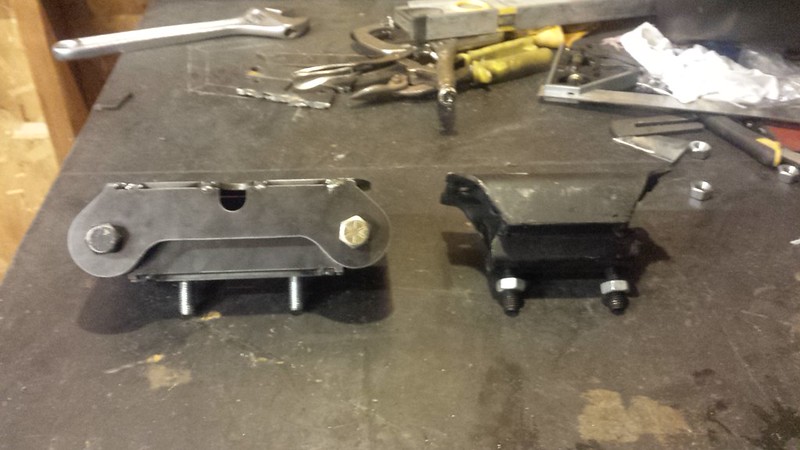
Here it is next to a factory transmission mount.

20141221_171946 by dresselhausfc, on Flickr

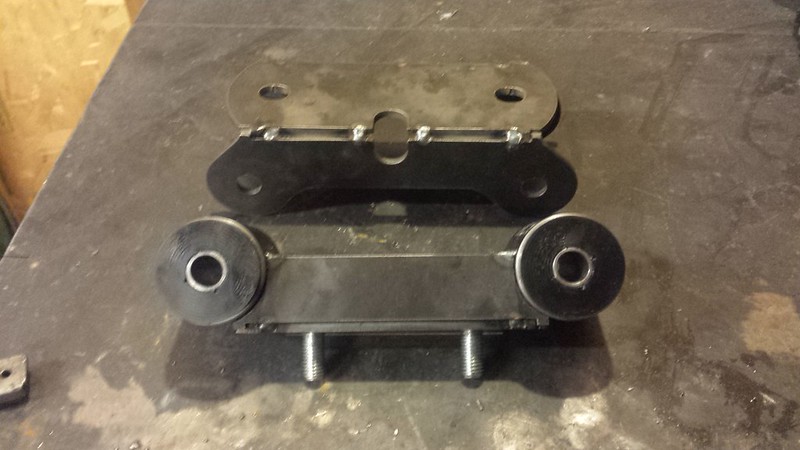
Here are the two parts of it.

20141221_172036 by dresselhausfc, on Flickr


Join the Elite Explorers for $20 each year or try it out for $5 a month.

Elite Explorer members see no advertisements, no banner ads, no double underlined links,.
Add an avatar, upload photo attachments, and more!
.


So sick. I had the prob with my doubler too. Are you going to sell these?


So sick. I had the prob with my doubler too. Are you going to sell these?

Once I test fit it and make sure it fits right I will. I will need to pickup some more bushings. I could sell it welded or unwelded. Next project is a york compressor mount.


I read somewhere you are supposed to run similar style bushings and materials in the motor mounts and the tranny mounts. Seems like a good reason to make all 3 and sell them as a set ;)


I read somewhere you are supposed to run similar style bushings and materials in the motor mounts and the tranny mounts. Seems like a good reason to make all 3 and sell them as a set ;)

So far I haven't broke anything running stock motor mounts with the upgraded trans mount. Motor mounts are on the list of items to build. I checked the trans mount on a stock 95 and forgot about the exhaust hanger that bolts to the transmission mount hole. Ran into some clearance issues with it but have adjusted it a bit and think it will work now. Still need to cut it and check though.


I lost a mudflap last trip out. The old ones were cracked and not really big enough anyway. I cut up a semi mud flap to make them bigger. New one on the left old on the right.

20141229_141431 by dresselhausfc, on Flickr

Both the new flaps

20141229_141808 by dresselhausfc, on Flickr

I had never put handles on my tcase and doubler shifters. The shifters were a bit short and needed some extra length. I couldn't find any small knobs that would work with the clearance issues I had. So I took a 3/8" coupling nut tack welded it to a 9/16 deep socket then threaded it on my shifters with a jam nut.

20141229_151116 by dresselhausfc, on Flickr

20141229_151126 by dresselhausfc, on Flickr


[MENTION][/MENTION]You could always use a extension if you need longer shift linkage. :p:

How much for the un-welded Trans mount? I get the bro discount right? ;)


Any taller and the inside one hits the transmission shifter in second.

Meh....just probably the most used gear, who needs it.;) looks good.


Started working on mounting the York compressor in the place of a factory compressor. My truck never had AC so easy choice in mounting a york. It is tight to make it fit. I will have to notch a support under the hood to make it clear. I bet a 1/2" body lift and the hood would clear. It is that close.

Here is the York mounted on my bracket. I had to add two more idler pulleys. One allows the belt to clear the air intake and the second allows for more pulley wrap on the power steering pump. I might have been able to get away without the second one but I didn't want to worry about the power steering pump slipping.

20141230_180802 by dresselhausfc, on Flickr

Here it is temporarily bolted in the truck.

20141230_175106 by dresselhausfc, on Flickr

Clears the intake by that much.

20141230_175635 by dresselhausfc, on Flickr

The picture makes it look better then it is but the power steering cap barely clears the bolt and bracket.

20141230_175712 by dresselhausfc, on Flickr

The other nice feature is that even with it all bolted in I can run my non A/C serpentine belt if there is ever an issue with the york without unbolting it.


In the above pictures I have the idler pulleys mounted with a spare 1/2"bolt. I need to find an 11/16" x 2" bolt. When I was looking for pulleys and you pull up an entire manufactures chart of pulleys and 75% of them use an 11/16 bolt you would think it would be easy to find one. No luck so far unless anyone has a hookup. Fastenal doesn't list one and neither does Mcmaster Carr. Can't find a metal bushing that is 11/16" OD either. Might have to getto fab a reducer up using a piece of tube and drill for a poor mans lathe.


Took the ranger out wheeling new years day. It was cold with the highs maybe hitting the upper 20's with a good wind. A welded rear diff and iced up paved roads made for a fun adventure getting to the trail involving a few good fish tails. The trail was very icy and required a lot of momentum to get up in certain spots. Overall we had a good time.

20150101_092102 by dresselhausfc, on Flickr

20150101_094934 by dresselhausfc, on Flickr

20150101_095030 by dresselhausfc, on Flickr

20150101_095111 by dresselhausfc, on Flickr

20150101_112620 by dresselhausfc, on Flickr


The york is mounted in the truck.

15603045503_33deebee7a_c.jpg
20150106_155749 by dresselhausfc, on Flickr

More info on it can be found here:

http://www.explorerforum.com/forums/showthread.php?t=420110


Went to Hollister Hills OHV area yesterday for the day. I kept it pretty calm because I was there by myself and was mostly just seeing what was there sense I haven't been in at least 12 years. Good day run place but don't think I could go very often till I would get bored with it.

20150110_101200 by dresselhausfc, on Flickr

20150110_105414 by dresselhausfc, on Flickr

20150110_113115 by dresselhausfc, on Flickr

20150110_113143 by dresselhausfc, on Flickr

I did find that when I flex up the truck hard the hood hits the York pulley. Going to have to redesign the bracket and try to get it a bit lower. Here are the spots it was rubbing.

20150110_101327 by dresselhausfc, on Flickr


Looks like your ready for a new passenger door. Does it even still open?:eek:


Yeah l leaned into it pretty hard. Yes it still opens. Getting it to stay closed is a different story. The window wont go down either. I plan on trying to beat it strait and hopefully it will work again.


Yeah l leaned into it pretty hard. Yes it still opens. Getting it to stay closed is a different story. The window wont go down either. I plan on trying to beat it strait and hopefully it will work again.

Worse case you have to go grab one from the JY. At least your truck is probably the easiest color to find.:thumbsup:


Need the interior door panels as well. Mine were cut for the interior cage. Actually I need a lot of interior pieces. Dash is cracked, headliner falling off, carpet needs to be replaced. My seats are falling apart. Trying to find a decent parts truck cause it will be cheaper then buying it by the piece.


Join the Elite Explorers for $20 each year or try it out for $5 a month.

Elite Explorer members see no advertisements, no banner ads, no double underlined links,.
Add an avatar, upload photo attachments, and more!
.


Added front limit straps to keep the shocks from being the limits.

20150131_164946 by dresselhausfc, on Flickr

20150131_165210 by dresselhausfc, on Flickr

Then went to KOH to watch the madness. Did a little wheeling.

ranger1 by dresselhausfc, on Flickr

ranger by dresselhausfc, on Flickr

the truck needs some stiffer springs bad in the front. I can bottom out in the whoops at about 20 mph. Also the tires rub the inner fenderwells. I need to either trim the metal or limit the travel. Haven't decided which way to go.


Back
Top