I start this after my truck's first batch of "major" work, as I figured that it was fitting. I bought Midnight back in January of 2008 for $1500, and boy was she a find. A diamond in the rough, the truck was in damn near immaculate condition for her age and location. She only had 97,000 miles on her, and she had/has no body rust. That is amazing, considering she is a Jersey shore truck, and our salty/watery/near-the-ocean air loves to rust metal.
Midnight and I started our 'relationship' rather relaxed, being nothing more than a to school, from school, to work, from work vehicle and myself having virtually NO mechanical knowledge. It was only after a few months that I started to entertain the idea of off roading with her. My first off roading run was a lot more unsuccessful than I would've preffered, running with virtually bald Goodyear Wrangler RT/S's and a transfer case that wouldn't quite engage, I got stuck what seemed like every other patch of sand. By the end of the day, however, I was hooked. I retreated home with a very dirty Ford Explorer that was nursing a borked windshield (the Grand Cherokee infront of me threw up some stones >.<).
My first obstacle that needed tackling was:
WHY WOULDNT THE 4x4 WORK!?
After searching around on google, I found this amazing site, and after a couple weeks of talking with my uncle (who had owned a first generation explorer and LOVED it) I decided to toy around with it. Only now, looking back and analyzing what I did and how I fixed it, can I accurately guess at what was truly wrong:
The damn thing was gunked up.
After looking at it funny for a few minutes, poking here, prodding here, looking at the haynes manual for a few minutes and then resuming my poking and prodding, I took the truck for a test drive and got up to about 50 mph before hitting the 4x4 button. To my amazment and joy there was a loud clank and you could audibly hear the front driveshaft spining up to speed.
I had accidentally fixed my own four wheel drive.
Armed with working 4x4, I began tackling some little trails by my house for some fun. To the parent's dismay, of course.
Alas, here comes the first infusion of money and parts to the truck: One of my old as hell RT/S's blew out on the road, and a few weeks later my truck was clad in new BFG TA/KO's, unfortunately stock sized but what the hell they were better than street slicks! Around the same time my first "off road parts" were acquired, two Marchal Magnum lights. I have no idea how old they are, what they were originally for, all I know is that they light the hell up out of everything in front of them.

The only thing I was lacking, in my mind, was the ability to communicate with the other guys on the trail. Which brings my little Sony Sport CB into play. I had it sitting in a closet for like...three years, with no antenna! So, after talking to that same Explorer-lover uncle, I got myself a big old magnet mount antenna and plopped it right in the middle of the roof. Yeah, every time you hit a nasty bump it falls over, or every time you drive under branches, or every time you look at it wrong. But it works, and that is just how I roll.
I was set. So, after talking to some of the guys on here, I went on my second "real" off roading run.

I handled my own. Dished out more than I took, that's for sure.

So I think we went on two of these trips before I ripped out the carpet and the next part was ordered and put on the truck (Remember, High school/College student with no real access to money...) which was....!

This sexy grille guard! It serves no other purpose than to protect my old as hell lights from idiots in the parking lot. So more offroading ensues, until the first "No turning back" modification came to my truck. It was scary. It was sometimes un-nerving. But...we did it. Midnight could now effectively breathe underwater.

Of course the engine computer is still down in the passenger side kick pannel, and yeah the breather lines need to be extended, but the snorkel was deffinitely a big step in the right direction. I had gotten too close to getting water in my truck too many times, and I wanted some sort of security.
And then came what I call "The Build".
The build was the result of myself comming into some money that wasn't needed for paying bills or anything. Money that I could use for what I wanted. Holy ****. Money you can actually spend on the things you want. You'd never imagine it. Anyway. I thought for a few weeks on how best to use that money on Midnight...and came up with this plan:
3" Body Lift.
2" Suspension Lift consisting of:
2" Coil Spacers
New Custom Fabbed Shackles
F-150 Leaf Springs
33x12.50x15 Tires
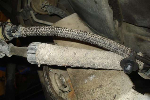
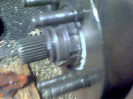
Torq-Masters "Aussie Locker".
I ordered the parts, and we were under way. I got myself some used LT285/75/16 BFG TA/KM's and had them mounted on 1996 Eddie Bauer 16" rims (Thanks Jack!). The body lift took me and 2 buddies about 3 days of a few hours a day work. The suspension lift went on in about 5 hours, and after a NIGHTMARE at 3 different alignment shops, Midnight was back on the road. I've got some minor rubbing at full wheel lock as the tire sidewall rubs against the radius arm. Going to have to be careful driving her until I can invest in brand new tires/rims with better backspacing. Around this time I decided to take the "Family Protectors" off, as I call them. The running boards. Underneath, most Explorers around here have HORRID rust problems. But as obvious in the pictures, Midnight is perfectly intact complete with all the little drain holes for the body.
And here she is, "finished":

She's my valiant steed, and as Alleizonme can attest to she takes me through things that I shouldnt be able to get through. More is obviously on the way, as I find better pics of little details like how I mounted my CB and how we built the snorkel and whatnot. For any newbie explorers who want to drastically increase their offroading potential with minimal money, my build has MORE than worked for me. Total, not counting the alignment, this was a $600 job. 5" of lift and a locker for $600 sounds pretty damn good to me.
-Will
Midnight and I started our 'relationship' rather relaxed, being nothing more than a to school, from school, to work, from work vehicle and myself having virtually NO mechanical knowledge. It was only after a few months that I started to entertain the idea of off roading with her. My first off roading run was a lot more unsuccessful than I would've preffered, running with virtually bald Goodyear Wrangler RT/S's and a transfer case that wouldn't quite engage, I got stuck what seemed like every other patch of sand. By the end of the day, however, I was hooked. I retreated home with a very dirty Ford Explorer that was nursing a borked windshield (the Grand Cherokee infront of me threw up some stones >.<).
My first obstacle that needed tackling was:
WHY WOULDNT THE 4x4 WORK!?
After searching around on google, I found this amazing site, and after a couple weeks of talking with my uncle (who had owned a first generation explorer and LOVED it) I decided to toy around with it. Only now, looking back and analyzing what I did and how I fixed it, can I accurately guess at what was truly wrong:
The damn thing was gunked up.
After looking at it funny for a few minutes, poking here, prodding here, looking at the haynes manual for a few minutes and then resuming my poking and prodding, I took the truck for a test drive and got up to about 50 mph before hitting the 4x4 button. To my amazment and joy there was a loud clank and you could audibly hear the front driveshaft spining up to speed.
I had accidentally fixed my own four wheel drive.
Armed with working 4x4, I began tackling some little trails by my house for some fun. To the parent's dismay, of course.
Alas, here comes the first infusion of money and parts to the truck: One of my old as hell RT/S's blew out on the road, and a few weeks later my truck was clad in new BFG TA/KO's, unfortunately stock sized but what the hell they were better than street slicks! Around the same time my first "off road parts" were acquired, two Marchal Magnum lights. I have no idea how old they are, what they were originally for, all I know is that they light the hell up out of everything in front of them.
The only thing I was lacking, in my mind, was the ability to communicate with the other guys on the trail. Which brings my little Sony Sport CB into play. I had it sitting in a closet for like...three years, with no antenna! So, after talking to that same Explorer-lover uncle, I got myself a big old magnet mount antenna and plopped it right in the middle of the roof. Yeah, every time you hit a nasty bump it falls over, or every time you drive under branches, or every time you look at it wrong. But it works, and that is just how I roll.
I was set. So, after talking to some of the guys on here, I went on my second "real" off roading run.
I handled my own. Dished out more than I took, that's for sure.
So I think we went on two of these trips before I ripped out the carpet and the next part was ordered and put on the truck (Remember, High school/College student with no real access to money...) which was....!
This sexy grille guard! It serves no other purpose than to protect my old as hell lights from idiots in the parking lot. So more offroading ensues, until the first "No turning back" modification came to my truck. It was scary. It was sometimes un-nerving. But...we did it. Midnight could now effectively breathe underwater.
Of course the engine computer is still down in the passenger side kick pannel, and yeah the breather lines need to be extended, but the snorkel was deffinitely a big step in the right direction. I had gotten too close to getting water in my truck too many times, and I wanted some sort of security.
And then came what I call "The Build".
The build was the result of myself comming into some money that wasn't needed for paying bills or anything. Money that I could use for what I wanted. Holy ****. Money you can actually spend on the things you want. You'd never imagine it. Anyway. I thought for a few weeks on how best to use that money on Midnight...and came up with this plan:
3" Body Lift.
2" Suspension Lift consisting of:
2" Coil Spacers
New Custom Fabbed Shackles
F-150 Leaf Springs
33x12.50x15 Tires
Torq-Masters "Aussie Locker".
I ordered the parts, and we were under way. I got myself some used LT285/75/16 BFG TA/KM's and had them mounted on 1996 Eddie Bauer 16" rims (Thanks Jack!). The body lift took me and 2 buddies about 3 days of a few hours a day work. The suspension lift went on in about 5 hours, and after a NIGHTMARE at 3 different alignment shops, Midnight was back on the road. I've got some minor rubbing at full wheel lock as the tire sidewall rubs against the radius arm. Going to have to be careful driving her until I can invest in brand new tires/rims with better backspacing. Around this time I decided to take the "Family Protectors" off, as I call them. The running boards. Underneath, most Explorers around here have HORRID rust problems. But as obvious in the pictures, Midnight is perfectly intact complete with all the little drain holes for the body.
And here she is, "finished":
She's my valiant steed, and as Alleizonme can attest to she takes me through things that I shouldnt be able to get through. More is obviously on the way, as I find better pics of little details like how I mounted my CB and how we built the snorkel and whatnot. For any newbie explorers who want to drastically increase their offroading potential with minimal money, my build has MORE than worked for me. Total, not counting the alignment, this was a $600 job. 5" of lift and a locker for $600 sounds pretty damn good to me.
-Will

")