VA7LFD
Active Member
- Joined
- July 12, 2015
- Messages
- 51
- Reaction score
- 7
- City, State
- Langley
- Year, Model & Trim Level
- 1994 Limited Edition Expl
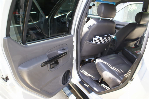
I have a 94LE X which is currently running perfectly but fuel gauge is not working. Has been reading empty since I owned the truck. I want to verify the resistance reading before dropping the tank just in case it's the anti-slosh module on the dash and not the float that's the issue. Is there a wiring diagram I can find on this forum or somewhere so I can check the resistance on the fuel gauge wires at various levels of fuel? I did try taking the dash out but the speedo cable didn't have any slack. I guess I will have to release from the transmission for more slack.. Is it easy to get at the wires at the firewall? I attached a photo here. All I need is to poke at the wires with a multimeter safely? Thanks for any info....