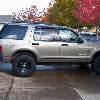
My first relatively major Explorer-oriented project in years. It felt great to wrench in and around one. 
My folks got back into the towable RV world after a +/- 15 year hiatus. My old man wanted a rear view camera on the trailer for traveling and backing up. After some research I chose Tadi Brothers equipment. Most of it appears to be re-badged items available on Amazon for less, but the Tadi Brothers warranty was attractive.
Starting with the trailer, there's a rear-facing 120 degree camera. It's stuck on the bumper then secured with U brackets. I couldn't bolt it to the bumper because the black water hose goes inside. The wires coming off are power and a 25 foot video cable. I ensured the cables would not disconnect by placing shrink tube over them and melting them tight. This also will prevent moisture from entering.

The cables run from the back to the front through 1" plastic split loom. (Does anyone need 65' of it? I bought a 100' spool and used about 35' of it.)

The wiring ties into the 12 volt system under the trailer, where the wires come in from the tow vehicle. The connections were made in the power junction box attached to the frame. Power runs through a waterproof rocker switch so there is no drain on the battery when not towing. The system is wireless, so without the switch, the wireless transmitter always would be on. Before my old man pulls out, he'll need to throw the switch. It glows red when it's on.

The wireless transmitter.

The wireless receiver sits on the back window of the Adrenalin.

I had the interior panels and part of the rubber flooring off. I also had the rear seats 3/4 removed. I wanted to hide all wires. The power wires run down the back, under the floor, and tap into the wires for the rear 12 volt power point. It was the easiest tap point, and my old man never plugs into it. The power to the receiver and front mirror, like the trailer, runs through a switch. It's an identical switch to the trailer, except not waterproof. Like the trailer, my old man will need to switch it on when he tows. But, it will prevent any drain on the truck's battery.

The video transmission wires run behind the interior panels to the front above the driver's side, where there is a small connector. The connector connects the LCD mirror to the rest of the system, so my old man can remove the mirror when he is not towing.

The mirror clips onto the existing mirror. The center contains a 7" LCD screen and, because the trailer camera reverses the feed, shows an image as if there was no trailer at all. The only issue I found was that the LCD mirror also is reflective (so you can use it when the display is turned off). The glare during the day was overly excessive, so I fixed it (below). The image you see is the rear lattice in the pole barn where the RV is stored. The image also displays distance lines, which are helpful for backing up, passing, etc.

The mirror with less glare.

And my solution to the glare. I removed the glass portion of the mirror and using 1/16" black plastic (similar to head unit space filler plastic) created a filler plate. Now the LCD screen is unobstructed and there is no reflection. The function buttons are not accessible now, but before I put the mirror back together I set the brightness, contrast, etc. Also, if you push on the lower right side of the plastic, the power button still functions to turn the LCD on and off.

Every power line is isolated with an inline fuse, either 2 or 3 amp, depending on the load on the opposite end. All connections are soldered and shrink-tubed.
Total install time was about 20 hours over three weekends. Most of the time was spent identifying an issue, then trying to determine the best approach, then waiting for electrical components to arrive after I ordered them. For example, I thought the RV's power line from the truck was one-way. However, it's two-way to the battery. So, that led to needing a switch, then trying to find a waterproof one, to buying washers from McMaster to make the frame hole smaller, to riveting it in place, to ordering switches and other electrical components from Super Bright LEDs, etc. In the end, however, the install was a blast.
My folks got back into the towable RV world after a +/- 15 year hiatus. My old man wanted a rear view camera on the trailer for traveling and backing up. After some research I chose Tadi Brothers equipment. Most of it appears to be re-badged items available on Amazon for less, but the Tadi Brothers warranty was attractive.
Starting with the trailer, there's a rear-facing 120 degree camera. It's stuck on the bumper then secured with U brackets. I couldn't bolt it to the bumper because the black water hose goes inside. The wires coming off are power and a 25 foot video cable. I ensured the cables would not disconnect by placing shrink tube over them and melting them tight. This also will prevent moisture from entering.
The cables run from the back to the front through 1" plastic split loom. (Does anyone need 65' of it? I bought a 100' spool and used about 35' of it.)
The wiring ties into the 12 volt system under the trailer, where the wires come in from the tow vehicle. The connections were made in the power junction box attached to the frame. Power runs through a waterproof rocker switch so there is no drain on the battery when not towing. The system is wireless, so without the switch, the wireless transmitter always would be on. Before my old man pulls out, he'll need to throw the switch. It glows red when it's on.
The wireless transmitter.
The wireless receiver sits on the back window of the Adrenalin.
I had the interior panels and part of the rubber flooring off. I also had the rear seats 3/4 removed. I wanted to hide all wires. The power wires run down the back, under the floor, and tap into the wires for the rear 12 volt power point. It was the easiest tap point, and my old man never plugs into it. The power to the receiver and front mirror, like the trailer, runs through a switch. It's an identical switch to the trailer, except not waterproof. Like the trailer, my old man will need to switch it on when he tows. But, it will prevent any drain on the truck's battery.
The video transmission wires run behind the interior panels to the front above the driver's side, where there is a small connector. The connector connects the LCD mirror to the rest of the system, so my old man can remove the mirror when he is not towing.
The mirror clips onto the existing mirror. The center contains a 7" LCD screen and, because the trailer camera reverses the feed, shows an image as if there was no trailer at all. The only issue I found was that the LCD mirror also is reflective (so you can use it when the display is turned off). The glare during the day was overly excessive, so I fixed it (below). The image you see is the rear lattice in the pole barn where the RV is stored. The image also displays distance lines, which are helpful for backing up, passing, etc.
The mirror with less glare.
And my solution to the glare. I removed the glass portion of the mirror and using 1/16" black plastic (similar to head unit space filler plastic) created a filler plate. Now the LCD screen is unobstructed and there is no reflection. The function buttons are not accessible now, but before I put the mirror back together I set the brightness, contrast, etc. Also, if you push on the lower right side of the plastic, the power button still functions to turn the LCD on and off.
Every power line is isolated with an inline fuse, either 2 or 3 amp, depending on the load on the opposite end. All connections are soldered and shrink-tubed.
Total install time was about 20 hours over three weekends. Most of the time was spent identifying an issue, then trying to determine the best approach, then waiting for electrical components to arrive after I ordered them. For example, I thought the RV's power line from the truck was one-way. However, it's two-way to the battery. So, that led to needing a switch, then trying to find a waterproof one, to buying washers from McMaster to make the frame hole smaller, to riveting it in place, to ordering switches and other electrical components from Super Bright LEDs, etc. In the end, however, the install was a blast.