Snowball 94 Limited | Page 18 | Ford Explorer Forums - Serious Explorations

  • Register Today It's free!

Snowball 94 Limited

Hey I'm a long time reader and Just bought my first X Wednesday I love it.
SnowballJune3103.jpg

She's a 1994 Limited.Named her Snowball (Sry If someone already had this name) I paid $1500 for her. She got a new Thermostat 2hrs after I bought her cause it locked up on me and over heated in the middle of the road. Her primary duty is going to be as a daily driver/Photography vehicle. I am an avid amateur photographer.

The day after I got her I took her out on her first photo Journey.
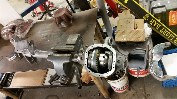
Here's some pics.


SnowballJune31018.jpg

She is replacing the 1989 Ranger my parents let me drive till I found my own and just like the Ranger I couldn't keep her on the pavement for long.

SnowballJune31015.jpg

I also found a mound of gravel and flexed the suspension a bit.
SnowballJune3107.jpg


SnowballJune3109.jpg


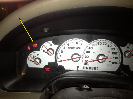
Her primary purpose will be to get me to college and back and do a little off-roading. She does have some problem but what 16yr old vehicle doesn't. I will eventually get some kind of lift but first is New/Used tires and a MAF.

Leave your opinions did I make a good purchase? What Kind of lift should I get it need to be cheap cause most of my money will be going to School.​


Join the Elite Explorers for $20 each year.
Elite Explorer members see no advertisements, no banner ads, no double underlined links,.
Add an avatar, upload photo attachments, and more!
.


Well I've been busy the last few days workin on Snowball.

On Wed. Iwent back to Pull-A-Part because my GF was upset i went without her. Didn't get much this time around just a few stereo wires, gauge surround (might paint an install later), and a couple of huge tow hooks off an expedition.

Tow Hooks
DSC_6562.jpg


Today I cleaned up the rear tow hook and layed some rust stoppin paint as well as some under coating on it and the front tow hooks.
DSC_6563-1.jpg

Only pic I have(just in rust stoppin paint then)

Then I removed my rear bumper to remove some rust and undercoat the inside. When I did this I found that the brackets inside the bumper are extremely rusted so I'm on the hunt for replacements. If I can't find any at a good price I'll just clean and reuse the ones I have.

I also cleaned off the rear inder carrage a little and laid down some rust stopping pain and some undercoating.
DSC_6566.jpg

Rust proofing paint only.

For the next couple days I'll be ridin around with a rear that looks like this.
DSC_6564.jpg


All an all today was very productive the bumper is broke down completely and I got the tow hooks as will as the step pad painted. I'm using this as an excuse to change that ugly gray trim over to black like I've wanted to for a while now.

Workin till dark tomorrow so no progress will be made but I'm off at 4 Sun so should get a little done.


Join the Elite Explorers for $20 each year.
Elite Explorer members see no advertisements, no banner ads, no double underlined links,.
Add an avatar, upload photo attachments, and more!
.


I went back to Pull-A-Part because my GF was upset i went without her.

:thumbsup:

I can't seem to date any girls who ever want to go to a pick and pull with me, much less complain I went without them.


Let me know how the gen2 fogs work out on yours. I'm looking for better ideas for my limited bumper.

From what I can tell so far they will work perfect just a very minor size difference. The stock mounting locations won't work without opening up the gap just a bit though.

The good news though is they'll plug right into the stock wiring just above the bumper. I plan to modifiy my wiring so they come on with the marker lights since I am using the stock switch for my roof lights.


:thumbsup:

I can't seem to date any girls who ever want to go to a pick and pull with me, much less complain I went without them.

Lol. She loves to help me work on the car. She even does her own oil changes now. Drives me a little crazy with all the questions sometime since she had no automotive knowledge till she met me. She's a keeper we'll have been together for a year and 7mounths tomorrow.


Well I cleaned up the bumper brackets today since the only ones I could find new were at LMC Truck and they wanted 44$ a side.

Here's a couple before pics to show all the rust that was on them.
DSC_6567.jpg

DSC_6569.jpg


Here's one all cleaned up and painted with rust control paint.
DSC_6568.jpg


Both sides are done now and coated with rubber under coat.

While I had the grinder out I cleaned up the step ball plate and through rust proofing paint on it too.
DSC_6570.jpg


Here's a couple shots of the bumper all toe apart.
DSC_6571.jpg

All the dirt on the wood came from where the brackets were after I took a wire wheel on the drill to it.
DSC_6572.jpg


The inside of the bumper is going to get the same treatment as the brackets. The outside will also get all the surface rust taken off and rust proofing paint on the top and most of the bottom.

I'm hoping to have this finished and installed by the weekend.


Well the bumper is all cleanned of rust and sprayed on the inside with rust prevention paint and 2 layers of under coating.

I picked up some cans of Duplicolor Oxford White pain yesterday and prepped the bumper for paint before I left for work this morn. I was plannin on painting it now but at almost the exact time I was gettin up to go outside and pain the sky's opened up and let out a massive downpour. So that's on hold till tomorrow. I'm about to head to Tractor Supply to get some new bolts so I don't have to spend hours cleaning the old ones.


On other new though my CEL came on 2 days ago on my way to work. Ran the codes and I got
  • KOEO
  • 335-Pressure Feedback EGR Sensor Voltage Higher Or Lower Than Expected During KOEO
  • CM
  • 327-EGR Circuit Below Minimum Voltage
  • 332-Insufficient EGR Flow Detected

From the quick searching I did everything pints to the DPFE or the EVR.
Gonna look up some test procedures for both and take it from there since the light hasn't came on since.


Lol. She loves to help me work on the car. She even does her own oil changes now. Drives me a little crazy with all the questions sometime since she had no automotive knowledge till she met me. She's a keeper we'll have been together for a year and 7mounths tomorrow.

Questions are good. Remember she's trying to better herself. The only foolish question is the one not asked.

Congrats on your length of time together. My wife and I just celebrated 4 years of marriage on June 13th.


Almost ready to put the bumper back together and on the truck I'm just waiting on all the paint to finish drying so I can assemble and mount it.

Here's the rear cross-member coated with some undercoating after I removed the rust.
DSCN1976.jpg


Tow hook and bracket ready to go on.
DSCN1977.jpg

Just a note for anyone who might try this in the future. You need to remove the bolts from the bracket and put them in the tow hook holes so that it can be bolted up with the tow hook then bracket then frame rail. The bolts are press fitted in the bumper bracket so it'll take a hammer to remove them then you can press them back in as you tighten the nuts own on the frame rail. (I'll take pics since I'm sure this is just gibberish to everyone but me.)

Here's the bumper all painted and cleared.
DSCN1978.jpg


And I'm not sure if I mentioned before but I'm changing the gray pieces to black so here's the step ball part and the top step all painted up.
DSCN1979.jpg

DSCN1980.jpg


I also coated the underside of the cargo floor and some of the frame rails with undercoating.
DSCN1981.jpg


I've got to work tomorrow so I doubt any work will get done on the bumpers but I have Sunday off so the plan is to have it all back together.


You could always leave the hitch plate off and give your bumper a roll pan look... that's what I did with mine, after I installed a junkyard receiver hitch.

I thought about that but it just looks strange to me. When I get a trailer hitch I plan to at least remove the ball from the bumper and plug the hole.


Here's a couple pics of how the rear toe hook mounts.
Above shot.
DSCN1984.jpg


Shot from the pass side.
DSCN1985.jpg

I don;t have a drill bit large enough to make a hole for the support arm bolt so I just drilled a 3/8 inch hole (largest bit I have) and put a grade 8 bolt nut and lock washer through it. I think it should be plenty strong enough.

Driver side shot.
DSCN1986.jpg

The 3 hole was already on the frame rail so all that was needed was a 1/2 inch grade 8 bolt, nut and washer.

It is solid as a rock and I'm very happy with it.

I also got the bumper completely assembled I left the nuts a little loose so I cane align it when I get it installed.
DSCN1987.jpg


I was planning to have the step pad on it today too but I ran in to a stinging problem.
We have few logs on the edge of our carport that hold flower pots and apparently some yellow jackets decided to make home in one of them. I kicked over the log and got swarmed by hundreds of them not happy about the eviction notice I just served on them. My sis, mom and Girlfriend were all standin outside with me when it happened and we all ran for the house fast as possible. I got stung twice in the angle and my GF got stung once in the arm.
Man those suckers hurt. Put a little backing soda and water on the stings to draw the venom out and then some ice for the swelling. My ankle turned yellow from it. Its all better now but itches like crazy.

My dad burned out the nest with some lighter fluid and got rid of most of them. Gonna do it once more tomorrow then flip the other log over and hope its not infested too.


Been a little behind on updating this. I got the rear bumper installed on Sunday. It's not perfectly centered, it's off to the driver side just a touch, but it good enough for me.

Here's a few completed pics.
DSC_6577.jpg

DSC_6578.jpg


Ignore the hanging wire it's for my under body light's. I had to remove the rear light as it interferes with the tow hook. I'll get it back on there one of these days though.

Also discovered that my hubs are extrememly hot after driving about 10 miles. I'm guessing they are stuck locked in. I'll take them off and clean them some time soon.

For now I'm heading outside to remove the front bumper to give it the same treatment as the rear and install the tow hooks.

Quick question about the tow hooks Should I use the stock expedition hardware as I got the bolt plates and everything or should I go with grade 8 hardware?


Oh ya one more thing mom was changing some blinds out in the house and had 3 perfectly good ones so I decide to put them to use. I installed them outside on the carport to keep the sun out bit still allow light in.
DSC_6580.jpg

DSC_6579.jpg


It makes it much cooler I just have to add some weight to the bottom of the blinds so they don't blow so much in the wind.


Well I got the front bumper off. Took all of about 15min much faster than the rear.

Not much rust on it so I'm just gonna scuff and paint it.
Couple shots of it.
DSCN1991.jpg

DSCN1992.jpg


And once I got the bumper off Ford made the decision easy for me on how to bolt the tow hooks on.
DSCN1989.jpg

DSCN1990.jpg

Didn't expect it to have those bolt sleeves in it so I'll be using grade8 hardware and drilling 2 new holes. Everything has been washed and the frame has been de-greased so tomorrow I plan on starting rust removal and painting.


Well I got one of the hooks mounted and the frame rails cleaned up and painted besides that it's been ridiculously hot here (103 Today and yesterday) so not much work has been gettin done. To add to that I recieved a new distraction that has had my attention for a while. My uncle finally brought my the Remington Nylon 66 .22 Rifle he had been holding for my day.

It was given to my dad by his father who died when he was 6. I've been researching it and learnin about it as I know little about guns. SO far I've found out it was made before 1968 and I've learned to disassemble it to clean it. I've only shot it once since we live in the city limits. I" plan to go to a range next week sometime.
DSCN1994.jpg

DSCN1993.jpg


I've also got a 410 shotgun that my dad's uncle has been keeping that he's gonna get next time he goes to Virginia.


Alright I suffered through the heat and now both the tow hooks are mounted.
DSCN1996.jpg

DSCN1999.jpg

DSCN2000.jpg


Drillin half inch holes throught the double walled frame rails was no fun. For the back holes I had to lay under the car and have razor sharp shards of metal flung on me. But it'll be worth it the first time I get stuck and use them.

I think I"m gonna pick up a couple shackles that'll fit over the hooks so I can easily attach a rope to them.

Bumper's all marked for cutting so tomorrow I plan to cut the holes and sand down the bumper and get it ready for paint.


Lookin good.

Thanks.

BTW 2nd gen fogs are a no go. I was doing all my test fitting without the bulbs in them when they are put in they hit the bracket and I can't figure out a simple way to make them work.

I'm back to the hunt for some first gen ones.


Thanks.

BTW 2nd gen fogs are a no go. I was doing all my test fitting without the bulbs in them when they are put in they hit the bracket and I can't figure out a simple way to make them work.

I'm back to the hunt for some first gen ones.

Thanks... If I find any I will send you the link.


Join the Elite Explorers for $20 each year.
Elite Explorer members see no advertisements, no banner ads, no double underlined links,.
Add an avatar, upload photo attachments, and more!
.


Thanks... If I find any I will send you the link.

I found some fog-lights from one of the vendors on the forum they can get NOS ones but they are 167$ a piece. Way too much for me just thought I'd let you know in case you really really wants some.


Back
Top