johnny499
Elite Explorer
- Joined
- February 6, 2007
- Messages
- 250
- Reaction score
- 47
- City, State
- brooklyn park,mn
- Year, Model & Trim Level
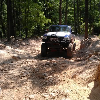
- 98 Mountaineer 5.0 SAS
- Callsign
- W3JF
Tom:
I didn't think the truetrac actually locked, i thought it was a helical gear based limited slip that has a higher bias then the clutch type limited slips. Which means it just takes a little more throttle before you go no where with one tire in the air. I see the advantage of not having the wear parts problem and the higher bias before losing traction. But i think if i was going to spend that much to upgrade i might spend more to get a selectable locker, which i agree you have to control and think about but am already doing that with the lockouts and transfer case and the locker affords you 100% locked.
I am still undecided at this point i think i may just rebuild the LSD till i can scrounge together the funds for what ever i decide is the best route for how i wheel and that thought could change after this has been on a variety of trails.