410Custom's builds a 2007 Ranger V8 - custom truck build - Project "Ranger Premier" | Page 41 | Ford Explorer Forums - Serious Explorations

  • Register Today It's free!

410Custom's builds a 2007 Ranger V8 - custom truck build - Project "Ranger Premier"

OK, I'm back to 28 so far..
Edited: found it
So is the 185 degrees before TDC for the crank sensor? unique to the Holley system?


Join the Elite Explorers for $20 each year.
Elite Explorer members see no advertisements, no banner ads, no double underlined links,.
Add an avatar, upload photo attachments, and more!
.


Yes unique to Holley, it is for the cam sensor not crank.
Basically it is how we get the ford cam synchro to work with the Holley pcm

With engine at tdc (cyl 1 compression stroke) then brought around so the crank damper is at 185 degrees before top dead center , the synchronizer is stabbed and cam sensor aligned

Post #502 is the start of 02 sensor bung install

Post in thread '410Custom's builds a 2007 Ranger V8 - custom truck build - Project "Ranger Premier"'
410Custom's builds a 2007 Ranger V8 - custom truck build - Project "Ranger Premier"


Page 31 for me


Cam sensor, I see. I look back and am still amazed how involved mentally, physically and time wise. :thumbsup:


Wait until you see the console and seats
After I sorted out the passenger seat it Took over a week to get the drivers seat to fit properly
It came out that is for sure, which is good because the way the drivers seat was before was unacceptable. I was even seat shopping just in case this was impossible. Had a line on some 2011 ranger seats but the dude wanted too much. I am super relieved that I was able to make these work…. And work they do!!!

One of the best conversions I have ever done, but it has its moments hahahahaha
Losing sleep over drivers seat fitment has me battling to win this war

Seat retrofit with console was about as much work as converting to v8 lol


Well done Jamie, that's all great work.

What kind of device might it take to alter the Canbus cluster functions, if you know? I like the 7k tach but might want a speedometer a hair higher than 120, and the older clusters are starting to become flaky/glitchy etc.

I have plans to add LED readouts within each of the smaller gauges, but hadn't planned any other major changes. I'd love to find that the Mongoose Plus can alter the cluster in some way, all I know of it so far is that it's for updating late model Fords, and doing the tuning/programming communications.

I think I learned recently that the drive-by-wire(DBW) Fords have the cruise control functions in the PCM, that's a guess though. I need to find a DBW throttle body to bolt onto the 302 elbow, and the matching gas pedal.

I hope that console work turns out great for that 07 Ranger. I'm interested in how it may be possible to mount a similar shifter(none with the shift button on it for 6R transmissions) in my 98 console.


Cam sensor, I see. I look back and am still amazed how involved mentally, physically and time wise. :thumbsup:
i will say the terminator system i am trying to do got the best of me. i had to send it out to jamie, then a second guy to figure it out! and jamie is doing way more then what i am doing. i dont know how he hasnt wound up in a asylum!

jamie, for the speedo, you might know this, or might not but i found this a while back when i was messing around with my cluster.


not sure if it will work for you because its a older cluster. all i know is that it beat driving down the road trying to read a gps, set the cruise, then trying to stab the needle in all while doing 60mph. what could possibly go wrong doing it that way?


There are can bus emulators for
Clusters available now, on eBay you can purchase a 2014 mustang gauge cluster desk art and you can control over some of the functions so people are on it…. That’s about as far as I got in my research before I discovered I could use 05 cluster still has 14 wires for indicators, signals and warnings

The one problem I do have is the milage goes w the cluster = this one reads 253,x.. this truck has half that
Can the cluster be reprogrammed?


I was at a custom speedo shop getting a new speedo cable made for the Explorer after installing the Atlas. There were several instrument clusters they had rebuilt. I asked how they got the clear plastic to look like new. They buy the cheapest headlight cleaning kits they can get from Walmart, then use plastic wax to finish them. I did that on mine, it looks like new and it's been a few years.


Love this, Thanks!
Losing sleep over drivers seat fitment has me battling to win this war
I can't lie, I'm losing sleep over that type of SHAG shop rag. At first I suspected 3 types, but now have ruled out frieze, and random, and settled on it being saxony 😈
🤪


Love this, Thanks!

I can't lie, I'm losing sleep over that type of SHAG shop rag. At first I suspected 3 types, but now have ruled out frieze, and random, and settled on it being saxony 😈
🤪
Shag and sexony go together in the same sentence.


All right here we go..... the seats
We all know I installed the drivers seat, 2014 Ford Edge 6 way power w heat
chopped up some ranger seat rails for the mounting "feet" and integrated them into the base of the 14 "edge" seat

I retained all 6 way power functions the result was a seat that sat too high off the floor for a ranger cab
It has been bugging me ever since
So when it came time to install the passenger seat I had some ideas
It turns out, they worked like a charm
I was able to install the seat on the ranger manual slider rails, and lower the seat significantly vs the driver side
This lead to a total re visit of the drivers seat install.........
Battle on

First up....the passenger side

4AB7D215-E618-41AC-BF9F-3698710D4276.jpeg

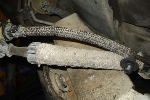
Starting with a factory ranger manual slider. Base
This would get heavily modified
FEF340D4-E376-4847-A9B8-07821A73D759.jpeg

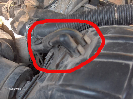
Donor rails Came from a 98-2000 ranger 60/40 front bench

Slider rails were shaved down and new mounts were added so they work in conjunction with the power functions of the 14 edge seat.
Sliding forward and back is done like a factory ranger seat, with the manual slider bar, spring assist.
The ranger base rails were mounted off center under the seat now, this allowed me to drop the seat another 1.5-2" vs previous power forward and back setup
The results are awesome

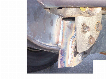
During fab and mock up
All 4 factory bolt holes are retained
Rails were modified heavily (lots of cutting, mount fab, trial and error, fit and chop cut weld..... until we have a bolt in seat fits and functions like factory
D4A2C288-9B8B-418C-8B5D-729C6C1A89F5.jpeg


Manual slider bar just like stock ranger
A7F13A19-2D20-40BE-ABDB-6FB5934C0834.jpeg


down low and back
08A289B2-1A65-45DD-9F0F-E50363B2B96E.jpeg


Lots of adjustability now
Power recline, power lumbar support, power front tilt and power rear tilt were retained.
Heated base and back was also retained
Now wired in! I am in the process of mounting switches and relays


A58CBC3F-0095-4733-828E-142547FDE37B.jpeg

D39E0E77-D5AD-4B8D-8D49-5A11643F313C.jpeg


way lower then drivers side
2E02F4F7-DF8B-4EB6-BDC0-DCC6D47B5ED0.jpeg

ACC062D3-1A38-4175-9E34-A0E5C4F73199.jpeg


Time to re visit the drivers seat
The drivers seat was then also mounted on a manual slider, lowered an additional 2" and set back a bit. I documented that full build
The drivers was much more involved then the passenger side

While the seats were in and out I also mounted the console shifter. Shifter park shift interlock, illumination and OD cancel buttons were final wired
The Holley PCM final mounting location was also decided. I built a weather tight floor plate with wiring and shift cable pass through

2008 Mercury mariner center console was fabricated to fit our ranger and between the seats.

Mounts were created, console, shifter Holley and all wiring are in. wait until you see how this turned out!
I added custom touches along the way, of course

Next up the drivers seat re do


okay I documented the whole build of the drivers seat, so there are alot of pictures.
There was ALOT of trial and error, putting the seat in taking it back out etc etc to get this right!
End result is seat is centered, as far down as possible, as far back as possible, retains 4 of the "6 way power" functions, the seat is mounted to factory manual slider for forward and back movement. Factory heat is retained and wired up, also the lumbar support and power recline backrest all function like a factory seat.

The first attempt had the seat sitting too high in the cab
The 2014 Edge power "rails" had to go

So first I needed donor parts, 2000 Ranger 60/40 bench, drivers sliders were removed

C6E3C9E2-64E6-4719-BB85-593769FADD8D.jpeg

779A5B6E-69EB-48F0-9060-4F1E16CE4AEE.jpeg

6248516E-2FF5-4AE4-A4F0-CE57D34A9394.jpeg

176EFC7C-B4A1-46DF-AB9A-B0B2F6E87163.jpeg


Now the factory rails get “shaved” with a grinder.
Basically the only thing I keep is the slider and the slider actuator rod and all 4 “feet”

More parts removed
9C3EAF9B-ACBE-485A-B1D7-F2D3AB3D4DCB.jpeg

Keep all hardware and the spring for later use

This is the 2014 edge power seat rail assembly from my first attempt. The structure is too tall and too wide for our ranger floor pans
89C680A1-8CE2-408F-B19F-41685F0121A8.jpeg

Time to get to grinding. I stocked up on cutoff wheels for this job

Plasma cutter could work as well but I did not want all the slag cleanup later

This is the passenger seat, it has been completed already. We have a similar goal for the drivers seat here

341B3083-7D7F-4E2E-AFD5-621A169DF8E5.jpeg


On the bottom of the 14 edge seats there are 4 mounting studs where the pivots take place for the front and rear “height” motors. These 4 studs will be the mounting locations for our new ranger manual slider rails
Previously the seat was mounted on top of the power sliders. My idea to lower the seats was to mount the manual slider rails off to the sides.
It works!
But not without some headaches

Pass seat seen here you can see the slider rails and how they are
Mounted.
259F9F97-BA1A-4CDE-BBE6-B36D0E64BDF8.jpeg


So first up I need to press the little studs out of the seat base so they can be flipped around and welded to the ranger sliders

936CF358-77FB-4ACA-B602-1EA44D8D54A9.jpeg

7E04B51D-7905-4764-B7C7-413120E7EA1D.jpeg

8861129D-FF3A-4814-B9BF-BAEE49418AB8.jpeg

Drivers seat no rails no studs ready for new parts…. Well kinda


So now we need to finish prepping the ranger slider rails
5F42B315-F13B-4F0D-8023-83E2FEBCE285.jpeg

Most everything shaved off the top
D1D296CC-C750-4A67-BF4A-14E1B563FECD.jpeg

Grinder got a nice workout all week

0225F494-5FFD-4646-9075-289D3A1C8E22.jpeg

Houston we have a problem. The inner slider (console side) needs to go right where this front height motor exists. Crap!!
Huge roadblock
Many hours later my brain hurts but I had another idea. After much measuring and calculations I decided I could relocate this
Motor to the middle out of my way
E7409296-C146-4D95-B53B-D0DC7B6F8C52.jpeg

I cut the motor off at its
Mount. I would Re use this part of the mount. I also had to chop off the strong arm where it attaches in order to rotate the front pivot bar

AB6067E3-C21E-4CAA-82B3-E963A9C83CBC.jpeg


The motor and it’s mounts

Now I had to figure out how to re mount it in the middle of the seat. I would have to create a new crossmember
918464A2-2682-4FF4-8C02-3BC2C8259701.jpeg

6BD130E6-7B83-4D7E-9A32-2344FF9E598C.jpeg

Add mount and clearance for motor angle
Welded to the old mount and both crossbars
EA014D09-0B8E-4A6E-9FB8-54C7C672F795.jpeg


Braced for strength. The strong arm pivot needed re located on its pivot bar (axle) so I made a fixture to retain strength
67030C06-CDD0-4C00-B5DD-41A51D38527F.jpeg


7D0C6F8C-2114-4EB1-B990-6120112C1E1D.jpeg

99E24B51-935F-45A8-9438-DF1043568C46.jpeg


Paint over the welds and mount the motor. Works like a champ!


now to fabricate and mount the new manual sliders

This is where the inner rail needs to live, exactly where our old motor was.
A294A823-FAE7-4D34-93A0-5D37C53E48DB.jpeg

4DCD5E6E-3C47-4625-A6C8-B25B127A5499.jpeg

Plenty of clearance now
01FD791A-97DF-4253-94B2-F2BC357677DF.jpeg

Inner rail getting final prep

4DA16E65-84B6-4E7C-A9E4-C26856B6BF17.jpeg

This is how the mounting studs will go, prepped and clean ready for welding
7E74451F-2DB5-467E-8748-49DDD726D897.jpeg

Welded 1/2” at time to avoid overheat and warping of the rails


All 4 studs mounted and measurements clearance checked

8BDA2915-F30E-43FE-8D27-653B32B01A79.jpeg

The neat part is the rails even though they are off to the sides and offset from center of the seat they are still correct distance apart for the factory slider activator bar!!

F0CE9BEA-B4F6-4E0A-9B23-325D5ABB298D.jpeg

B832D009-ADC0-4CFB-B053-8D96E98736FD.jpeg

Rails final welded and ready

EA31498E-6761-42BF-AD7A-6516262BB4A2.jpeg

This is how it fits, plenty of room for motor and rails. However the activator bar hits one of our front pivots and the seat still sits way too high


Well done.

edit, I thought those were 8.8 cross shaft bolts, I see the heads are Torx now. I replace the 8.8 cross shaft bolts every time I take one out.


not done yet!! still have some clearance issues, seat is now 2" off center and sits 1.5" too high. Getting closer

16CBA65D-6900-4263-B6DF-FAFC7AFF74EE.jpeg

Now this next part I have actually done a few times putting explorers seats into rangers I often have to remove 1.5” from the height of the ranger sliders

Bolt Holes off center
F3D5F087-2F6C-4EB4-8270-5590C4CD2A3E.jpeg

15324BFF-F130-47A8-A17D-BA7B297B4CB0.jpeg

Time to chop 1.5” out of all 4 feet

I use marks to keep things lined up once 1.5” of material is removed
2C5B7700-71AB-4F2E-9C99-E66F63CDB70B.jpeg

526A02CC-E139-4540-8EB4-4F891A236B0A.jpeg

3C6687B4-0FD3-4B10-BA08-5E5B00348E82.jpeg

New dropped feet and new bolt mount tabs being fabbed, tack welded and checked for alignment and fit

C673DFA5-4F18-453F-9D4E-069F19A232F6.jpeg

Chopping the other rail
FAF579ED-A559-4211-864A-9F52BE1081DA.jpeg

B80AABFD-80B1-4839-B70F-CB7865314109.jpeg

The pieces that were cut out are used to re enforce each mount
6987009D-F3BF-4A42-A7F2-15A25E40B149.jpeg

F85AA58C-2170-48A4-B468-C19862E9DB61.jpeg

Final test fit, mounting holes lined up to center seat and retain factory
Mounting locations
FE1DC973-6C71-4632-8BA8-669C76BAAE54.jpeg

138BA6F9-B902-4EFF-9ECA-C82BA39EB199.jpeg


Test fit time!
39653AD1-19AD-4A95-8E0C-7751E405B6F3.jpeg

Happy! Shhhhhh pretend you did not see the console and shifter yet

Seat removed again for final clearancing/ paint/ weld etx

7C10CDFC-2891-46CA-AC75-0589EA45C898.jpeg

Problem area

D9A22ABE-1897-41FF-98A4-72793256BC50.jpeg

My brain came up w another solution. I flattened the round bar in the press at the correct location and re bent for clearance. Then I used two small sections of angle iron to zig zag for
Clearance

6DDCBB02-0BE9-45AC-9C26-C30439A825DC.jpeg

It friggin worked!!

Now seat removed again for final paint, clean, lube, and wiring

B148DAF1-A5AE-43DB-A67F-E77DB658069D.jpeg


Added 8 pin connectors for both seats. Wired new power feeds for seat power and seat heat direct from fuse box under hood. Also included are seat buckle switch wires
AC6B410E-C9DA-439C-9A6D-A3C5AC1ADF1E.jpeg
22095727-9FDA-483C-ABC6-DA5B3EB2E5CA.jpeg


Final prep and paint complete the drivers seat is nearly done!!
4B86A4F7-12DD-48FA-8DD5-9E9BC5BCA0F6.jpeg

0BD427F7-E06B-42A4-8406-F5E125655346.jpeg

DD4A3C76-1A8F-45C1-A560-1142AEC72A8E.jpeg

BDFE35BD-1E43-437E-97D0-5348D6CA5346.jpeg

59A01B96-9B6E-4DDC-88C2-6F204E70000F.jpeg


Very nice work. What is the large module for, did it have side airbags too? I like the separate motor locations, that makes it easier to place them or have them take up less space.

I have a NOS Continental seat track which has memory seat motors in it, but the entire assembly is much different than the cousin Mark VII that I'm planning to install it into. I haven't begun to find out if the track will come close to fitting my floor mounts, thus no clue yet what it will take to make it work.


Join the Elite Explorers for $20 each year.
Elite Explorer members see no advertisements, no banner ads, no double underlined links,.
Add an avatar, upload photo attachments, and more!
.


Looking good. We need hands free cameras on our hats for documentation. Sort of like the cop cams on their chest...


Back
Top