-
Performance Upgrades - Maintenance - Modifications - Problem Solving - Off-Road - Street Trucks.
Covering the Explorer, ST, Sport, Lincoln Aviator, Sport Trac,
Mercury Mountaineer, Mazda Navajo, Ford Ranger, Mazda Pickups, and the Aerostar.
Featuring H.I. - Human Intelligence.
Register Today It's free!
You are using an out of date browser. It may not display this or other websites correctly.
You should upgrade or use an alternative browser.
You should upgrade or use an alternative browser.
Time to get my bed back, building my swing out tire carrier...
- Thread starter MidnightRebel07
- Start date
Elite Explorer members see no advertisements, no banner ads, no double underlined links,.
Add an avatar, upload photo attachments, and more!.
MidnightRebel07
Explorer Addict
- Joined
- March 6, 2010
- Messages
- 5,008
- Reaction score
- 12
- City, State
- Pittsburgh, Pa.
- Year, Model & Trim Level
- 2003 Explorer Sport Trac
Ok, hopefully this works. Here's the link to the build pictures on PhotoBucket... I'll be adding more as I go.
(dead links)
{The Wife to the rescue!") }
}
(dead links)
{The Wife to the rescue!
}LONO100
Explorer Addict
- Joined
- March 23, 2011
- Messages
- 2,911
- Reaction score
- 26
- City, State
- Bay Area CA
- Year, Model & Trim Level
- 03 sport trac XLT
just checked out the pictures, this is a great project. how is it going to lock closed? will it somehow clip onto a fabbed piece that will be attached to the tailgate? thats how the swing out carrier was on my rodeo. or will it somehow lock at the hinge?
MidnightRebel07
Explorer Addict
- Joined
- March 6, 2010
- Messages
- 5,008
- Reaction score
- 12
- City, State
- Pittsburgh, Pa.
- Year, Model & Trim Level
- 2003 Explorer Sport Trac
It'll be locked with the latch that's included in the kit and I'll make a secondary lock open/ closed pull pin.
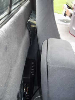
Here's a couple pictures of the latch and mounting brackets I made to weld to the frame.
(dead links)
I'm adding more pictures tonight after I get Matthew down for bed. Everything is done, all I have to do is weld eveyrthing together, grind down the frame once I take the bumper completely off so I can weld the mounting brackets to the frame/ bumper brackets and cut the two small holes in the bumper step pads for the spindle and latch brackets and isolator pad. Hopefully my buddy isn't busy on Thursday (busy tomorrow)so he can help me weld this and install it.
MidnightRebel07
Explorer Addict
- Joined
- March 6, 2010
- Messages
- 5,008
- Reaction score
- 12
- City, State
- Pittsburgh, Pa.
- Year, Model & Trim Level
- 2003 Explorer Sport Trac
Ok, more pictures have been added from today's progress. Check out the Photobucket link above in post #22...
LONO100
Explorer Addict
- Joined
- March 23, 2011
- Messages
- 2,911
- Reaction score
- 26
- City, State
- Bay Area CA
- Year, Model & Trim Level
- 03 sport trac XLT
the last picture puts it all together as to how this baby is going to close shut. i thought about this project too, and was thinking that i could somehow pull a tire gate off a bronco at a salvage yard or something and somehow modify it to fit where you are planting your tire carrier. im watching your progress closely!
- Joined
- August 14, 2004
- Messages
- 3,713
- Reaction score
- 14
- City, State
- Denver,NC
- Year, Model & Trim Level
- 1997 F150 XLT 4x4
You know, in all of my Sport Trac wrenching I had never seen a rear bumper with the cover off. It wouldn't be bad to leave the cover off if you have an off-road Track. Weld up the pad holes, a couple dock bumpers in the face cutouts and a good paint job and that cover-less bumper wouldn't look bad.
MidnightRebel07
Explorer Addict
- Joined
- March 6, 2010
- Messages
- 5,008
- Reaction score
- 12
- City, State
- Pittsburgh, Pa.
- Year, Model & Trim Level
- 2003 Explorer Sport Trac
Eventually I plan on building a full steel rear bumper but this will have to do for now.
Steve, I can't weld the pad holes, the bumper is plastic. The truck is primarily a daily driver, I haven't taken it serious offroading for awhile now but once Matthew gets a little bigger I'll get back to it. This just gives me time to modify it better for the trails. I can't wait to do the SAS, SOA and sliders/ steps. Also need to build a fuel tank skid plate.
Steve, I can't weld the pad holes, the bumper is plastic. The truck is primarily a daily driver, I haven't taken it serious offroading for awhile now but once Matthew gets a little bigger I'll get back to it. This just gives me time to modify it better for the trails. I can't wait to do the SAS, SOA and sliders/ steps. Also need to build a fuel tank skid plate.
MidnightRebel07
Explorer Addict
- Joined
- March 6, 2010
- Messages
- 5,008
- Reaction score
- 12
- City, State
- Pittsburgh, Pa.
- Year, Model & Trim Level
- 2003 Explorer Sport Trac
SO I'll be taking the Trac up to my buddy's house (he has the welder)in the morning and were gonna knock this thing out. Working on his ungrateful daughter's P.O.S. Eclipse today (can you say *****).
Pictures to come tomorrow.
Pictures to come tomorrow.
MidnightRebel07
Explorer Addict
- Joined
- March 6, 2010
- Messages
- 5,008
- Reaction score
- 12
- City, State
- Pittsburgh, Pa.
- Year, Model & Trim Level
- 2003 Explorer Sport Trac
Got stuck working on another friends car today and then took the rest of the day to fabricate some more brackets for a high mount third brake light from either a Rodeo or a Trooper? Plucked it from a junkyard truck the other day.
I'm uploading more pictures right now. Hope to get this thing welded and installed tomorrow as long as no one's vehicles breakdown.
I'm uploading more pictures right now. Hope to get this thing welded and installed tomorrow as long as no one's vehicles breakdown.
MidnightRebel07
Explorer Addict
- Joined
- March 6, 2010
- Messages
- 5,008
- Reaction score
- 12
- City, State
- Pittsburgh, Pa.
- Year, Model & Trim Level
- 2003 Explorer Sport Trac
Ok so I finally got a chance to work on the tire carrier today. My buddy Paul and I welded up the tire carrier and ground down the welds to make it look like it's all one piece. Still have to weld the mounting brackets I fabbed up for the frame/ bodylift bumper brackets tomorrow and finish up on smoothing out the metal and then paint everything.
I'm not sure if I'm mounting the third brake light right now or waiting til springtime. I am mounting auxilary lights for added back up lights and for tailgaters to wake them up, LOL.
(dead links)
I'm not sure if I'm mounting the third brake light right now or waiting til springtime. I am mounting auxilary lights for added back up lights and for tailgaters to wake them up, LOL.
(dead links)
OffTrac
Explorer Addict
- Joined
- February 22, 2010
- Messages
- 3,767
- Reaction score
- 14
- City, State
- Dublin, GA
- Year, Model & Trim Level
- '01 Sport Trac 4x4
Do you really need the third (or fourth, actually) brake light? If someone is so close to you that they can't see the third brake light at the top of the cab, just give them the shine from the added backup lights, or check to see if their airbags work.
MidnightRebel07
Explorer Addict
- Joined
- March 6, 2010
- Messages
- 5,008
- Reaction score
- 12
- City, State
- Pittsburgh, Pa.
- Year, Model & Trim Level
- 2003 Explorer Sport Trac
Hugh, that's what I'm thinking. I might just modify the brake light housing that I got and mount it elsewhere, not sure. I need to weld a bracket for the C.B whip and other things that will be mounted to it.
I hate the northeast rust, gonna make this thing waterproof and weld the brackets to it instead of drilling holes and letting the salt and moisture in. I miss the northwest (NO rust)!!!!!
I hate the northeast rust, gonna make this thing waterproof and weld the brackets to it instead of drilling holes and letting the salt and moisture in. I miss the northwest (NO rust)!!!!!
MidnightRebel07
Explorer Addict
- Joined
- March 6, 2010
- Messages
- 5,008
- Reaction score
- 12
- City, State
- Pittsburgh, Pa.
- Year, Model & Trim Level
- 2003 Explorer Sport Trac
All welded up, just need to smooth out the rough spots, paint and fabricate some step pads for the rear bumper out of stainless steel diamond plate using the stock step pads as templates. check out the link to PhotoBucket for all the build pictures.
Here's a sneek peek at the almost finished first in the world one off custom swing out tire carrier on a 1st Gen Sport Trac.
(dead links)
Here's a sneek peek at the almost finished first in the world one off custom swing out tire carrier on a 1st Gen Sport Trac.
(dead links)
LONO100
Explorer Addict
- Joined
- March 23, 2011
- Messages
- 2,911
- Reaction score
- 26
- City, State
- Bay Area CA
- Year, Model & Trim Level
- 03 sport trac XLT
sick! when you get a chance, can you post some close ups of the hinge point and the latch!? im interested to see it up close. great job, makes me want to get on my tire carrier project, although it wont be half as bad ass as this one came out.
MidnightRebel07
Explorer Addict
- Joined
- March 6, 2010
- Messages
- 5,008
- Reaction score
- 12
- City, State
- Pittsburgh, Pa.
- Year, Model & Trim Level
- 2003 Explorer Sport Trac
Thanks Lono. I did all the fab work but I wouldn't have been able to finish it if it weren't for my buddy Paul, he welded everything together for me. I ground down and smoothed out most of the welds to try and make everything look like one piece of metal. I'm going to get some filler to smooth out a couple low spots and then paint it today if the weather cooperates. Still have to mount the lights, C.B. whip and fabricate a "Lock Open" latch so it won't swing out and hit something. check out the PhotoBucket link, there's over 500 build pictures in the album.
sport97
Elite Procrastinator
- Joined
- September 25, 2008
- Messages
- 2,345
- Reaction score
- 1
- City, State
- connellsville pa
- Year, Model & Trim Level
- 1997 sport SOHC 4.0
Looks great Jerry! Does the extra weight hanging off the back make the suspension sag at all?
Goodluck with the weather, its still raining here. My skid plate is still in the basement waiting for a second coat. Can't seem to get a dry day when I am free.
Goodluck with the weather, its still raining here. My skid plate is still in the basement waiting for a second coat. Can't seem to get a dry day when I am free.
MidnightRebel07
Explorer Addict
- Joined
- March 6, 2010
- Messages
- 5,008
- Reaction score
- 12
- City, State
- Pittsburgh, Pa.
- Year, Model & Trim Level
- 2003 Explorer Sport Trac
Surprisingly for how heavy and thick the steel I used to build this the suspension doesn't sag at all, atleast not that I can tell when I open it. I'll have to have Carol open it and see if the right side goes down at all. It's definetly heavy and the weight of the tire adds to that.
I think I'll get the filler on and smooth out the low, rough spots today and maybe paint it tomorrow if the weather works with me.
I think I'll get the filler on and smooth out the low, rough spots today and maybe paint it tomorrow if the weather works with me.
Elite Explorer members see no advertisements, no banner ads, no double underlined links,.
Add an avatar, upload photo attachments, and more!.
MidnightRebel07
Explorer Addict
- Joined
- March 6, 2010
- Messages
- 5,008
- Reaction score
- 12
- City, State
- Pittsburgh, Pa.
- Year, Model & Trim Level
- 2003 Explorer Sport Trac
I'm going to eventually do a write-up project thread on this and narrow down the amount of pictures. I just posted all the pictures taken for reference and to see mutilpe angles.
I got the primary layer of filler down and sanded, need to do some small touch up spot filler, sand it all down smooth and paint. Hope the weather is nice enough to finish this up tomorrow.
Oh yeah, there's some more pictures added to the album.
I got the primary layer of filler down and sanded, need to do some small touch up spot filler, sand it all down smooth and paint. Hope the weather is nice enough to finish this up tomorrow.
Oh yeah, there's some more pictures added to the album.
Featured images


Featured images
Similar Threads
- Replies
- 10
- Views
- 4,324
- Replies
- 22
- Views
- 7,162
- Replies
- 4
- Views
- 1,525
- Replies
- 23
- Views
- 12,909