Section525 Fab - IZWack's D44 diff cover | Ford Explorer Forums - Serious Explorations

  • Register Today It's free!

Section525 Fab - IZWack's D44 diff cover

section525

sextion525
Elite Explorer
Moderator Emeritus
Joined
February 11, 2001
Messages
14,716
Reaction score
31
City, State
Red Bluff, Ca
Year, Model & Trim Level
1975 Ford Bronco 4x4
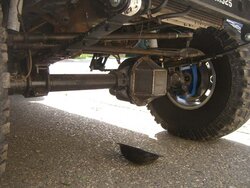
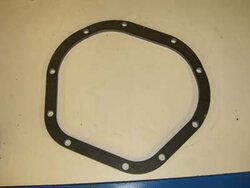
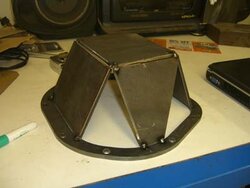
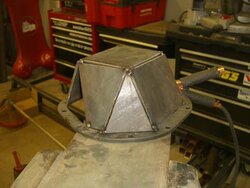
I've wanted to get a fabricated diff cover for a while now. The BTF one has a hefty price tag so after seeing jasonb make his own from scratch, I decided to give it a try. However, I don't have access to a CNC plasma (unless I go back to my hometown) so I decided to by the laser cut ring. I picked up the diff ring from my local 4x4 shop for $25. :cool:

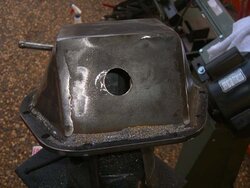
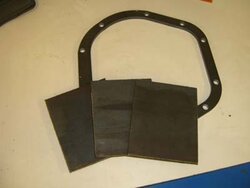
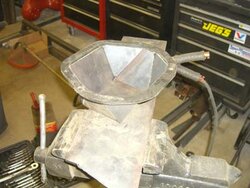
I went with 3/8" plate since I have a bunch in the garage.
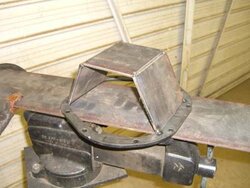
 

Attachments

  • 001.jpg
    001.jpg
    8.1 KB · Views: 505
  • 002.jpg
    002.jpg
    8.1 KB · Views: 515
  • 003.jpg
    003.jpg
    17.9 KB · Views: 519
  • 004.jpg
    004.jpg
    13.2 KB · Views: 517


Join the Elite Explorers for $20 each year.
Elite Explorer members see no advertisements, no banner ads, no double underlined links,.
Add an avatar, upload photo attachments, and more!
.


I'll smooth the outside of it tomorrow and paint it up special for IZWack. :cool: :D :thumbsup:
 

Attachments

  • 008.jpg
    008.jpg
    12.9 KB · Views: 490
  • 007.jpg
    007.jpg
    11.4 KB · Views: 487
  • 006.jpg
    006.jpg
    20.2 KB · Views: 503
  • 005.jpg
    005.jpg
    16.7 KB · Views: 500


It's a pretty fun little beginner project. Unless you have the ability to make precise cuts, you'll have to do a lot of trial and error to get the pieces to fit.

I'm getting more and more tempted to pick up a Spectrum 375 because I went through an ass load of cut off disks! :(


Very cool man, looks great! I didn't know you could by just the ring, i'll have to look into that.

BTW, that second picture of your second post looks a little scary, is that a paint can to the left of your welding area??? :eek:


Hwwwwow :D


Cool. Two things though. Where is the fill plug hole? Also it seems kind of tall I hope it will clear the steering. I know what you mean on the cutting wheels. On my bumper and skid plate I have gone through about 25 wheels. I am also thinking plasma cutter here pretty soon.


Nice work:chug: That thing's huge!


holy oil capacity!!

Nicely done as per usual


Yeah cant wait to put it on :D

I'm a little worried about the steering tho but we'll see (I'm running SkyManufacturing hi-steerm arms if that makes any difference).


I'm running the Sky high-steers too. I'll check it out. I think this is about the size of some other pre-baked units. I went off some DIY plans from offroadfab.net. :cool:


For the fill hole.. I'm picking up these sick ass plugs used on hydraulic cylinders and such, with high-pressure o-rings, and it'll be a super over-kill. :cool:

EDIT: And that's not paint. It's a gas can. You have to keep the welding interesting somehow. :p


offroadfab.net ?? are you sure you have the right URL? i went to it and got some weird undeveloped site


ahh I see, thanks


cool!


im curious too if it clears the steering...

Looks good anyways, I guess you can push the rocks out of the way if you can go over them :p

Next time your welding with the gas can right there, get the webcam running. :D


section525 said:
http://www.offroadfabnet.com/

Brian1 from this site is a big-time player over there. :cool:

LOL. It is definately a cool site to get ideas and ask questions about fabricating. It is still small now but keeps growing everyday.

Diff cover looks good, I have always wanted to make one like that myself. It does look big but I dont think you will have a problem if you run the tie-rod above the axle.


Very Cool :)


Join the Elite Explorers for $20 each year.
Elite Explorer members see no advertisements, no banner ads, no double underlined links,.
Add an avatar, upload photo attachments, and more!
.


It'll be done tonight. :cool:

This first pic was taken a couple weeks ago actually. I was making sure it would work with high-steer. Second pic is the hole for the fill plug. :cool:


A little bit more clean-up and it will be done.
 

Attachments

  • 07.jpg
    07.jpg
    47 KB · Views: 333
  • 08.jpg
    08.jpg
    36.6 KB · Views: 305


Back
Top