2000StreetRod
Moderator Emeritus
- Joined
- May 26, 2009
- Messages
- 10,597
- Reaction score
- 334
- City, State
- Greenville, SC
- Year, Model & Trim Level
- 00 Sport FI, 03 Ltd V8
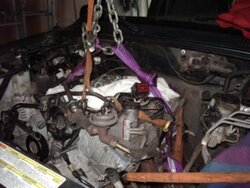
Motor mount nuts
Why did you need to replace the motor mount nuts? Were they rusty?
I paid Ford $4.50 each for four new exhaust manifold to downpipe bolts. I couldn't find an equivalent locally.
In my opinion either the Mustang or the Explorer plugs should work fine as long as they are the same heat range. If they are different heat ranges then I would use the Explorer plugs since the engine loading will be different. The longer Mustang plugs will result in a slightly higher compression ratio and possibly better flame travel due to the longer length.
You've done a fine job transforming the Mustang engine. I wish you success this weekend!