ld50 Explorer mods revisited | Page 3 | Ford Explorer Forums - Serious Explorations

  • Register Today It's free!

ld50 Explorer mods revisited

Hello fellow Explorer enthusiasts.
If you want to jump to my solid axle swap thread click link below: http://www.explorerforum.com/forums/showthread.php?t=163210

If you start here you will see the mods to my Ex in cronological order as they happened, and as my own ideas and expectations were being formed. Some of my early mods led me into my SAS, and were essential to the process. There is a link to my solid axle swap at the end.

This started out as a re-do of my modification thread I started before I finally became elite. I couldn`t go back to it and post pictures so I wanted to redo it in style.


~~~~~~ TABLE OF CONTENTS ~~~~~~

This is a rough guide that may depend on your resolution!

PAGE 1:

-Intro
-Front license plate raised
-driving lights
-Stock picture
-Cone air filter
-CB and cheap glass mount antenna
-Wire mesh grille
-Front tow hooks install
-2"suspension lift + shocks

PAGE 2

-2"suspension lift + shocks cont`d
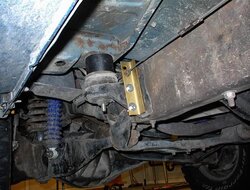
-Broken front lower shock mount remedy
-Addition of 31x10.5 tires
-Alignment woes
-Fire extinguisher added (with warning pics)
-Rear locker added (my initial thoughts)
-How I beat the "left side lean"
-My first real trip report with thoughts on truck perf.

PAGE 3:

-Body lift kit parts problems
-Canadian flag 3rd brake light
-2" Body lift install
-2" Body lift install cont`d
-Short lived front bumper gap filler (LOL)
-Rear bumper remount (2" higher)

PAGE 4:

-Rear bumper remount (2" higher) cont`d
-Front bumper remount (2" higher) (Tow hooks raised inside frame)
-Warrior shackles and rear shock mount skidplates
-Skid plate problems
-My first time towing a Jeep outta the mud
-Rear sway bar removal and upper shock mount mod
-Emergency brake cable mod #1

PAGE 5:

-More Warrior skidplate/shockmount problems noted
-Front splashguard (bumper to swaybar)
-Trip report; Vancouver Island
-Post trip thoughts
-Warrior skidplate shock mount breakage
-The amazing throttle cable mod!
-Hieght measurements to bottom of bumpers

PAGE 6:

-Info on wheel spacers
-Warrior comes through with proper plates
-Rear shock mounted to axle with old sway bar brackets
-Raised upper rear shock mounts
-I get the dumb idea to buy a bra
-The "Zimmerman" rear spring mod (I later regret)
-Front swaybar disconnects (cheap, didn`t work well)

PAGE 7:

-Emergency brake cable extension!
-1 & 1/2 inch wheel spacers
-1 & 1/2 inch wheel spacers cont`d
-Custom exhaust (brand?)
-My first stuck!
-Wheeling thoughts and misdiagnosed problem
-Hippoliner on rockers (like herculiner)
-Replacing a rear shackle bushing with poly
-Starter problem troubleshooting, repair
-Note on premature corroding of battery cables for 91-94 Explorers

PAGE 8:

-Better front swaybar disconnects
-Dual battery setup!
-Dual battery setup! cont`d
-Fender trimming to fit 33s

PAGE 9

-Fender trimming to fit 33s (cont`d)
-I put my front driving lights in the back for reverse lights
-The 33s are on!
-Warrior shock relocation bracket mounts for rear lowers

PAGE 10

-Four foot antenna mount at rear corner
-Another trip report
-1 year anniversary
-I prove that I could possibly be crazy

PAGE 11

-Cheap fender flares
-Old Man Emu rear springs (OME-36)


PAGE 12

-I assume that I have reached a plateau!

PAGE 13
-Detroit EZ locker install into my open front diff.

PAGE 14
-Detroit EZ locker install into my open front diff. (cont`d)
-Rear towhook install

PAGE 15
-J-Clips to keep front coils from popping out at the top

LAST PAGE
-Link to rusty rocker panel repair
-Link to Solid Axle Swap


Join the Elite Explorers for $20 each year.
Elite Explorer members see no advertisements, no banner ads, no double underlined links,.
Add an avatar, upload photo attachments, and more!
.


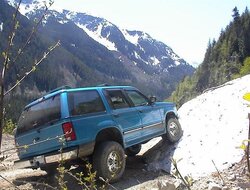
That`s my boy hangin` out the window. He was scared at first and then wanted to 4x4 all day long! The truck looks clean because we just ran through all the water at the base of the falls. In some places you could reach out your hand into water like that.

Shortly after that shot, I got into a trail and got some nice tree branch scratches from it. Tom said he didn`t think I would want to do it, but I figured that this is why I`m building this up, so I might as well get it over with.
It`s gunna hurt when I wash it tomorrow tho`

We had a great time checking out all the side roads and no one got stuck. The second day I followed Tom into this path he found and gave up after getting more scratches and bending my side skirts up a bit. Tom broke off his side mirror and a fender flare when he pushed on. I waited on the road for him and felt sorrow for the "cosmetic" damage he got.

So Ideally, a superlift would have been nice to get more clearance, but I won`t be getting one. Maybe some more skid protection and I gotta lose the side skirts now. I want rock sliders/nerfs on there anyway, but I was waiting till I lift the body a little. I thought I might keep the skirts on, Oh well, couldn`t wait. Down the road I`ll have to settle for larger tires for more clearance I guess.
Another thing I wasn`t really happy with was the antenna I got for my CB. It wouldn`t stay up at all. I think I will have to go with a whip of some type, maybe off my front bumper.

Stay tuned for more mods as soon as The parts come in!
I also got an idea for a close to free mod this weekend while sweltering in the hot interior. It would be great for guys with no A/C. I need more ventilation....

<EDIT, lol, instead, I got my A/C fixed and upgraded to the new system. My idea was to get a loop of metal, weld it to a small metal plate with a hole in it, and use another plate with a hole and a bolt with a wing nut to fasten it to my window latch loop. Make sense? It would have let the window be open a little -oh well.. Might of let fumes inside the truck anyway.>

Here`s 1 more pic I thought was cool:
 

Attachments

  • coq2 snow ramp.jpg
    coq2 snow ramp.jpg
    48.7 KB · Views: 2,917


Join the Elite Explorers for $20 each year.
Elite Explorer members see no advertisements, no banner ads, no double underlined links,.
Add an avatar, upload photo attachments, and more!
.


Road speed vs rpm

-With 4.10 gears and 31 inch tires.

approximately 100 km/hr (62mph?)in 5th gear had me at 2100 - 2200 rpm.

140 km/hr in 5th gear had me at 2900 to 3000 rpm.

I had to guesstimate for the difference in speedometer readings due to the bigger tires. I think I`m very close.

Still not bad for the freeway since most of them are 100/hr and some areas have 110/hr limits.


Damage Report!

So I got the Station Wagon all cleaned up and the scratches actually aren`t that bad! A little polishing should get rid of most of them.
I got a dent though, a trail scar. It`s on the front passenger fender above the tire. I think I can bang it out though, so I`m happy.

The side skirts, or, tupperware, is pretty scratched up, but I managed to bang it back into place for now. I`ll take it off before I do my rock sliders.

Also noticed my driver`s side rear shock mount got some metal folded over near the bolts. Probably from backing out of a couple predicaments.

Oh and Jack is missing in action! I will miss him. He`s probably lonely out there in the bush... I feel bad that I didn`t think about him when he obviously couldn`t have hung on.


Next episode:
"2" body lift install!"

Just got the call that my shipment is in, and will do it this weekend!


Well the lift is off for now, I didn`t quite get what I thought I was going to get in the kit.

I got a Performance Accessories kit and the main thing that has made me stop and re-assess the project was this part of the instructions:


quote:
--------------------------------------------------------------------------------
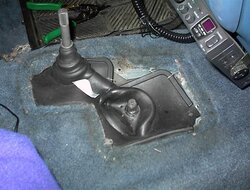
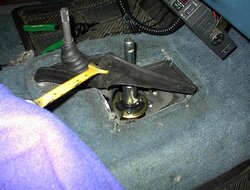
"MANUAL TRANSMISSION ONLY: The floor board must be notched to the rear of the shifter. Remove stock shift boot. Notch the floorboard back far enough to gain complete movement in all gears and 4-wheel drive. NOTE: the stock shift boot must be replaced with an aftermarket shift boot (not included in kit). There will be a small section in front of the shifter where a new piece of carpet will need to be installed. Install new shift boot (not included) check operation in all gears."
--------------------------------------------------------------------------------


Not believing it, I looked through the contents and found a steering shaft extender, but nothing else for the shifters.

I really thought, from reading the lift write up on this site, that I would have shifter extenders with the kit. I don`t want to end up with a shoddy looking shifter setup that is 2" lower that they are now, with a patch of carpet put in.
I specified That I had the manual shifter, and 4x4 shifter in the truck when I ordered, and the instructions do explain how to work around them, but it is unnacceptable to me. I can`t believe they wouldn`t give extenders with the kit, and what kind of aftermarket boot am I supposed to get?- Baah!

I`m going to call the place I bought it through tomorrow and ask about it, If this is all I can get, then I will take a look into fabbing something up, I guess. The cruddy thing is I won`t have much time to do it after this weekend. So it will have to wait a couple weeks.


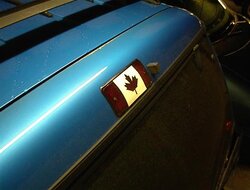
Oh I did up this little mod for my Canadian brothers, But non-Canadians are more than welcome to do it as well!

A Canadian thing!


I cut out the maple leaf using a template made from a picture of the flag from the internet which I printed out and then reduced on a photocopier until I had the right size, and then used it as a template for painting a flag on the brake lamp.
I waterproofed the whole deal with about ten coats of *Color Vision Crystal Clear Coat*, That I bought at Walls Mart for an unrelated reason.


I got the idea from someone else actually, that I spotted on the road. Maybe you can buy them somewhere?
 

Attachments

  • flag1.jpg
    flag1.jpg
    24.2 KB · Views: 2,880


BODY LIFT

Well it has been a while but I have that darn 2' body lift installed now.

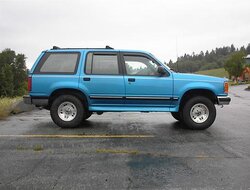
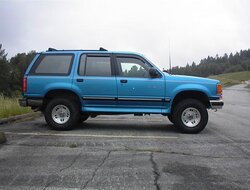
-I`ll start with a before pic from the side:
 

Attachments

  • body lift before bl.jpg
    body lift before bl.jpg
    32.2 KB · Views: 8,934


The kit is from Performance Accessories.
My invoice says item # PA792
I don`t know if that is a number for the 4x4 shop tho`

I wanted a transmission shifter extender and could only find one for a 3 inch lift.
Trail Master # 40124 (from package)

First of all, this is a b**ch to install, so be warned.
I sprayed all bolts several times with penetrating oil in the weeks leading up to it and the bolts were still stubborn.

I followed the kit instructions and won`t pour over all the details here, but will mention some tips, and highlight problems.

I first disconnected the emergency brake cable, the fan shroud and the steering linkage.

Then I loosened all the body mount bolts (ten of `em)
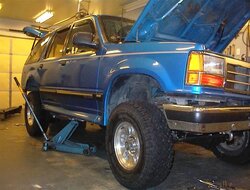
After the passenger side was free, I jacked her up like so:
 

Attachments

  • body lift lifting for spacers.jpg
    body lift lifting for spacers.jpg
    39.9 KB · Views: 2,878


I have a piece of 2x4 just under the lip under there. Don`t blame me if the lip bends on you, because it was okay for me!

All the bolts, except for the front, were removed from above. The nuts on the front most mounts have to be removed from the bolts. I had to move my air intake tube from the pass. side to use the acces hole on that side:
 

Attachments

  • body lift front mount bolts removal.jpg
    body lift front mount bolts removal.jpg
    41.7 KB · Views: 2,874


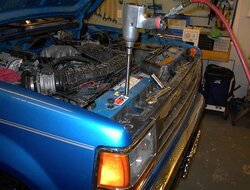
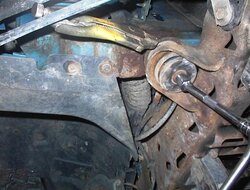
Then you have to take the bolts out of the mounts from below. They go into a sleeve, you see, and were a problem, because the mount will spin.
I used a big pair of vice grips to hold onto the metal part of the sleeve where it rests against the body,so I could get the pass. side out. I ended up having to grind off the head of the drivers side, pulled it out, put it in a vice, and unscrewed what was left with my vice grips.
Then you have to drill out the old threads in the sleeve to accomadate the new bolts.
 

Attachments

  • body lift front mount bolt with vice.jpg
    body lift front mount bolt with vice.jpg
    40 KB · Views: 3,142


I had to relocate the jack to the rear once I got the first couple of spacers in. It wouldn`t lift far enough where it was in the pic and I didn`t want to push my luck on bending that "lip". At the rear I had one 2x4 resting across the frame and the curved spare tire rest, then I had a 2x4 on the jack pointing up to that.

Once the mounts were done I put everything back together and looked at the shifters.
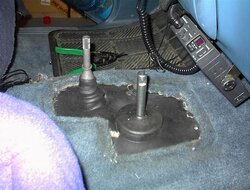
I trimmed a little of the metal near the transfer case shift because it was resting there in 2 wheel drive:
 

Attachments

  • body lift shifter extension 1.jpg
    body lift shifter extension 1.jpg
    41.8 KB · Views: 2,821


Then I put the extension on from below the rubber dust cover:
 

Attachments

  • body lift shifter extension 2.jpg
    body lift shifter extension 2.jpg
    40.9 KB · Views: 2,793


Gotta pull the rubber up around the transfer case shifter until everything sits somewhat even:
 

Attachments

  • body lift shifter extension 3.jpg
    body lift shifter extension 3.jpg
    40 KB · Views: 2,798


Then put the boot back on.
I pulled the boot up as far as I could to the transfer case knob, and as far down as I could on the shift pole. (past the weld)

I will leave it like this for now. The transfer case shift barely gets into 2 wheel tho` since it rests against the boot plate, so I might have to do something else later. I`ll see how it goes.

The lift kit also had a drop down bracket for the emergency brake cable. Fairly easy to get on:
 

Attachments

  • body lift brake cable kit.jpg
    body lift brake cable kit.jpg
    42.8 KB · Views: 3,181


So I ended up with a taller truck with ugly gaps above the bumpers!

After BL:
 

Attachments

  • body lift after side view.jpg
    body lift after side view.jpg
    31 KB · Views: 8,185


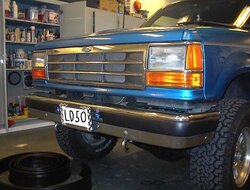
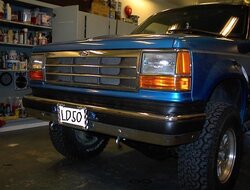
My plan is to replace those bumpers one day, but to make it acceptable for now, I started with the front:
 

Attachments

  • f bumper gap.jpg
    f bumper gap.jpg
    39 KB · Views: 2,785


Can`t remember where I heard this, but I went and bought some lawn edging and trimmed it to about 3 inches in width, and fit it in the gap.

I trimmed some off first:
 

Attachments

  • f bumper trim cutting.jpg
    f bumper trim cutting.jpg
    31.8 KB · Views: 2,782


I drilled 2 holes through the old gap fill trim and fastened it with 2 machine screws and nuts, one close to the tire and the other about 4" towards the front.
Then I pulled it tight to the other side and held it with vice grips to drill the holes and put 2 more machine screws in.
 

Attachments

  • f bumper with trim.jpg
    f bumper with trim.jpg
    34.6 KB · Views: 2,770


For the rear, I am going to have to get that bumper up somehow. It isn`t lined up with the trim anymore, so filling the gap is unnacceptable. I will do it this weekend, and show you how I did it!

TOTAL $ CDN SPENT

Truck = $8500.00

Plasma white hid headlights = $39.96
Mini driving lights = $65.00
Filter adapter = $68.41
K&N filter = $50.00
Window visors = $45.00
Cheap CB = $75.00
Antenna = $50.00
Tow hooks = $40.00
2" susp lift with shocks = $464.00
31x10.5 BFG T/A K/Os = $835.00
New lower ball jts. and alignment = $ 604.00
Fire extinguisher = $ 40.00
4.10 gears, locker, U-joints = $2635.37
2" body lift kit = $148.45
Shifter extension = $58.21
2" x 20' tow strap = $40.50

Total "EX"penses = $13758.90


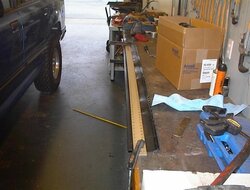
Remounting rear bumper after 2" body lift.


Well this turned out well. It took me three hours, but If I had these instructions it would have taken me two.

Tools I needed:

-Acetylene cutting torch
-Welder
-Socket set (obviously)
-Stationary grinding wheel
-Hand grider
-Hand buffer
-Big drill

I was lucky to have a shop at my disposal, but I bet if you didn`t have this stuff, or the know-how, you could roll into a shop with your bumper off and get this done cheap.


I started out by taking the bumper off, and then decided what to do.
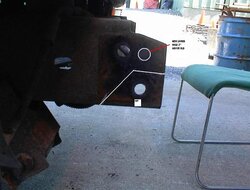
I measured straight up 2" from the lower bumper hole and chalked a circle.
I then chalked a line for my cut that would allow the bottom lip of the bumper to have room:
 

Attachments

  • bumper relocation rear step 1.jpg
    bumper relocation rear step 1.jpg
    29.9 KB · Views: 2,760


Join the Elite Explorers for $20 each year.
Elite Explorer members see no advertisements, no banner ads, no double underlined links,.
Add an avatar, upload photo attachments, and more!
.


Back
Top