Something w/ rabbits. 72.5 pages of BS | Page 10 | Ford Explorer Forums

  • Register Today It's free!

Something w/ rabbits. 72.5 pages of BS

This odd thing came today -- it's from an 82 Buick LeSabre and is I think called a "Powermaster I". It doesn't have the big pneumatic dome thing that most brake master cylinders use for boost. Instead, it has its own electric motor that creates pressure in the little globe on the side. I'll probably end up unbolting the motor and mounting it on the side instead. But besides not having the big dome, another advantage it has is being able to create boost even when the engine is dead.

lesabre_brakemaster.jpg


Wiring diagram for control is here: http://www.cameronsoftware.com/ev/images/PwrMstrWireDiagram.JPG


Join the Elite Explorers for $20 each year or try it out for $5 a month.

Elite Explorer members see no advertisements, no banner ads, no double underlined links,.
Add an avatar, upload photo attachments, and more!
.


Recover it into a container, take it to NJ, then let it go.

Hey now...I was born there! And it borders NYC! IZ could just release it down in DC. So much hot air and BS coming out of that place, it might just improve things.


Just catching up on this thread. Wow that is awesome, especially all the CAD drawings. Can't wait to see it evolve.


So you'll add an external proportioning valve? And where did you get that picture from?? :p:


So you'll add an external proportioning valve? And where did you get that picture from?? :p:
I's already gots me a proportioning valve. What picture are you talking about? The background?


Somewhere on the east coast, an Explorer is missing its dash.

dash_gone.jpg


At one time, that was a perfectly good truck.:D:p:
When its done, it'll have such a short hood that it'll look like a perfectly good Astro van :)

srastro.jpg


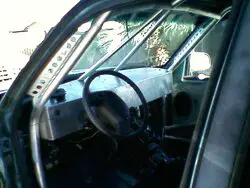
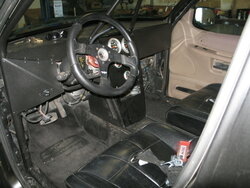
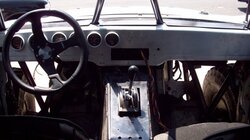
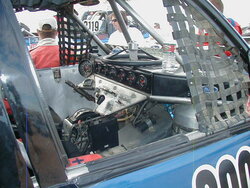
So how difficult would it be to get a cage behind (in front?) of the dash yet keep everything functional?


So how difficult would it be to get a cage behind (in front?) of the dash yet keep everything functional?
It depends on your cage design but if its the typical single bent bar going across with maybe one or two verticals rising to the roof, then its not difficult - although it would take quite a bit of time. Of course you could remove the dash but that involves a lot of parts. I think an easier approach would be to remove the windshield and put it back on afterwards. You can use a hole saw (with a long extension) to make some space on the sides for the vertical bars on the side (A-pillar bars) .. I guess kinda like what Jefe (I think?) did at the first Cage Party. Obviously make sure all the wires are out of the way before the hole saw -- there is a big bundle coming through at the top of the driver's corner, and a smaller bundle on the passenger's top corner. After that, then you can run the horizontal bar as close to the firewall and bottom edge of the window as possible -- which would probably be cake since its mostly the defrost vent thats back there. And you can still keep the defrost function cauz the air would just go around this bar.

I'll try to take pics of the back of the dash before I take it to the dump.


Be prepared!!!!!My dump wouldn't take a dash without the title:confused:


Be prepared!!!!!My dump wouldn't take a dash without the title:confused:
LOL what? really?

Sorry for not being clear -- by dump I meant the recycling/trash center where they take everything from refrigerators, used oil, tires, tree braches and so on (of course in different repository/piles). I've already throw away a few seats there so hopefully they wont be too picky about the dash.


Doesn't the dash hold the VIN tag? That may have something to do w/ it.


Ohhh you're probably right -- I'll remove the VIN tag before I throw it away. Good call jwrezz :thumbsup:


Yea that was the problem with me. All though the vin tag on my ex isn't attached to the dash, but the dash support at the bottom of the windshield. IDK, but CA is a bit rediculous and you may not have a problem over there.

Im going to be in germantown on the 22nd.:thumbsup:


this is looking all too familiar, btw, my VIN is on my body, not my dash, it's still there.

What I decided was organize everything and I didn't get clip happy with wires, everything is zip tied nicely (probably close to 50 zip ties) on to my dash and no factory wires were cut.

Aftermarket gauges will be wired to their own fuse on the aux panel and wired directly to each sender.

Only thing on my dash is still just the heater controls and the headlamp switch. Gauges are this weekends project.

**edit- I see I posted this pic before, got my hands on a digital camera, will take pics when dash comes out this weekend.**
 

Attachments

  • 11.jpg
    11.jpg
    47.8 KB · Views: 6,776


Im going to be in germantown on the 22nd.:thumbsup:
Freaking serious? The Ostman brothers are going to crash this humble little town? You visiting relatives or something?

DannyBoy -- did you end up re-using the steering column assembly with the key housing and all? I want to get rid of it but man there seems to be a lot of stuff in that assembly to have to redo.


Join the Elite Explorers for $20 each year or try it out for $5 a month.

Elite Explorer members see no advertisements, no banner ads, no double underlined links,.
Add an avatar, upload photo attachments, and more!
.


DannyBoy -- did you end up re-using the steering column assembly with the key housing and all? I want to get rid of it but man there seems to be a lot of stuff in that assembly to have to redo.

Yes my steering column only came out as far as dropping the two bolts down to remove the stock dash. I labeled most of the wiring or kept them plugged into everything. My new dash goes in, bolts on with 5 bolts that are welded into the front bar of the cage and then the steering column goes up under that. I screwed up and trashed the bottom cover of my column, otherwise it would look essentially stock. Here are a few more pics I gathered in the build.

incabcagedash.jpg
 

Attachments

  • Salep15631n2.jpg
    Salep15631n2.jpg
    155.3 KB · Views: 6,798
  • Salep21379n3.jpg
    Salep21379n3.jpg
    77.5 KB · Views: 6,674
  • P7080278.jpg
    P7080278.jpg
    55.5 KB · Views: 6,537


Back
Top