2000 AWD Xploder from Turbo back to NA | Page 69 | Ford Explorer Forums - Serious Explorations

  • Register Today It's free!

2000 AWD Xploder from Turbo back to NA

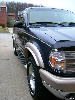
After getting an estimate on how much it would run me to fix up my Xploder with all new exhaust, cold side piping, and a bunch of other stuff done up the "right" way... I've decided to convert my Xploder back to NA form so that I can actually ENJOY the truck before I die of old age.

Anyways... To start it off I ordered up a MAC cold air intake (I do not have the stock intake) and sold my FMS headers on ebay.

I plan on buying a set of torque monster headers in the next week or so but am still up in the air on how I should run my exhaust from a performance "speed" perspective. I do not plan on doing much, if any, off road driving, so am looking for a setup that improves take off and speed for spirited pavement driving that sounds good.

I already have the spare tire removed (and will be keeping it off, I have free towing anyways lol)... What would an optimal setup be with the above in mind and no worry of a spare tire being in the way? True duals (straight pipe off of each header, thru separate mufflers, and out the sides), or a dual exhaust both going into a 2 in 2 out "H" pipe style muffler and then out the sides? Or something else? In all cases I won't be running any cats.

I also plan to re-tune my car since currently it is tuned for the turbo setup which obviously will no longer apply once I rip everything out.

Thank you for any input! :)


Join the Elite Explorers for $20 each year.
Elite Explorer members see no advertisements, no banner ads, no double underlined links,.
Add an avatar, upload photo attachments, and more!
.


I liked the CF dipping service we got as a group buy in the early 2000's. I still have mine with just the radio bezel in my Mercury. I have waffled on whether to swap to a 4WD, so the bezel I have will be great if I stick with AWD(it has no 4WD switch).
Ooo, nice! To bad I missed that! I need to teach myself doing some carbon fiber skinning but so many projects and things to learn.. so little time, lol.

Got the bezel/radio back into the truck. Looks pretty good, everything snapped it and I don't think any of my repaired clips broke (yet.. maybe once removed again, lol). Overall improvement to the interior and my list of reasons to not get back working on the ac keeps shrinking, LOL..

20220531-163630.jpg

20220531-163642.jpg


Ignore the big hole in the lower center console.. it's for my new wideband that I need to wire up and install so I can maybe get an updated remote tune one day, lol. The hole next to it used to be for the boost gauge from the turbo glory days but I bought a gauge hole cap and then opened it up and added a usb port for the Android auto/Apple car play :D


Join the Elite Explorers for $20 each year.
Elite Explorer members see no advertisements, no banner ads, no double underlined links,.
Add an avatar, upload photo attachments, and more!
.


That interior looks nice, way better than my latest 98 Limited(white and tan interior, had the wood grain trim pieces).

I also have a steering wheel that would fix yours. I changed my 99's two spoke wheel with a nice four spoke from a JY, in 2006. I thought I would like the normal one better to steer with, using one had. Now I'd change back if I knew I could find a decent two spoke wheel(original was very rough), and the special clock spring. I've got too much to do.
Thank you! Yes.. turned out pretty good. Now I can't keep putting off the air conditioning and trans fluid work much longer, haha.

Yeah, my steering wheel is pretty beat up. Are you selling your wheel? You have a nice wheel just like the one I have already but in better shape? I do need to swap the cruise control buttons (again)... somehow the new ones cracked almost immediately when I let my wife's dad borrow the truck for a few weeks years ago. I have a new set of buttons laying around somewhere, lol.

Put together a little video on the radio bezel/radio, overlays, and dash cover stuff... as usual video runs to long, haha...


Had some fun putting together a new garage chair a few days ago... the thing is built for world war 3 or something, lol.


Had a fun day Saturday as well... Finally got around to installing my Swisstrax Ribtrax Smooth PRO flooring tile! :) I just did the 2 car garage portioni of the garage and left my floor from my workbenches to the 3rd car garage wall as bare floor as I plan to weld/grind/etc over there and didn't want to possibly melt the tile... plus my wife paints and works on her furniture junk over there so didn't want that hassle, lol. I may end up adding some diamondtrax tile over there which doesn't have any opening or gaps so no worry of saw dust and what not getting under the tiles, but they would still have a possibility of melting so would need to lay down fiberglass sheet when doing anything with fire, lol. Turned out nice I think!

Here is the floor when I began (with the shelving and everything pulled out and placed into the driveway, lol):


Tile down... waiting on some new transition pieces for the edge between 2 car and 3rd car garage (hopefully get them in in a week or so):


Parking the zl1 in the garage for the first time after installing the tile:


Turned out pretty nice, IMO! I initially wanted to do the epoxied floor BEFORE I moved in but with the delays on the house build, then it finishing and having like 1 day to go from my cramped 1 bedroom apt to the house, I just ran out of time and wasn't able to do it. Now, with so much stuff in garage I just can't pull everything out and leave in the driveway for multiple days while grinding the floor and doing the epoxy so this is a nice middle ground.


Tossed up an install and overview video of the Swisstrax Ribtrax tile :)


For anyone whom may get bored easily, here is a quick 1 min time lapse, lol:


Got off my butt and decided to wash the zl1 finally... I don't drive much so it stays pretty clean, but does get covered in dust and the wheels get dirty quick as the brakes are pretty much track brakes from the factory and dust up a TON... made a cool little time lapse video, haha.


Hope to work on the AC this wknd on the Xploder... praying for success, LOL... It's been my kryptonite for a while now :*(


Began work on the AC system once again, lol.. Project replace "almost" everything, haha :D All new lines, new compressor, new dryer, only keeping condenser and heater core (both I will be flushing with coil cleaner and blasting out with air compressor with lines disconnected).


Ok... still tinkering, lol. Got compressor and all ac lines swapped out, new dryer/accumulator, new pressure switch, got the heater core and condenser cleaned up, and everything mostly back together with a new XS Power battery installed. Noticed I forgot to order a cycling switch (the on that attaches to the accumulator), ordered that and should be here tomorrow. Put on some nice fancy XS Power battery terminals which helped clean up the wiring a bit. New battery doesn't clamp down fully onto the battery tray so ordered up a base clamp setup they sell and once it arrives will need to bolt it onto the OEM tray and then I can fully lock in the battery, lol :D


I also seem to not be able to find the plastic ac line clip that snaps over the spring lock clip for the top ac line. I did find the plastic clip for the bottom line going into the heater core.

I kind of want to fab up some kind of heat shield for the intake eventually as well.

If I ever get this AC fully functional, next up.. also long delayed... is draining out the old funky transmission fluid and putting in some fresh stuff, lol, and replacing a couple wheel speed sensors to hopefully get the ABS light to go away. I bought a new transmission pan with a drain plug that I will be swapping on and a new transmission filter. Also have some nice wire loom stuff coming in to clean up the wiring some more as it's a mess, haha.
wish i could work on my X as fast as you 🤣 looks so nice, maybe someday... if i ever get a v8... gonna have to follow along with what you did;)


wish i could work on my X as fast as you 🤣 looks so nice, maybe someday... if i ever get a v8... gonna have to follow along with what you did;)
Haha, slow but sure... and I wouldn't say I've been working fast on the Xploder... this is afterall a 69 page thread that I started back in 2011, HAHA! :D


Haha, slow but sure... and I wouldn't say I've been working fast on the Xploder... this is afterall a 69 page thread that I started back in 2011, HAHA! :D
well, i take too much time to do stuff! to do what you did, hmm... give me 20 years 🤣


well, i take too much time to do stuff! to do what you did, hmm... give me 20 years 🤣
Lol! I initially began on the AC system like... 5 years ago? Then just kind of left it, finally got back working on it recently and just want it to work, haha.


Unrelated to AC but does anyone know where I can buy the correct sized bolts for the engine manifold top little 5.0 v8 logo plate? lol.


Installed my XS Power D3400 battery yesterday. It wouldn't lock into place with the OEM battery tray and the little clamp thing so I used the XS Power hold down base and modified it into the OEM battery tray. Now the battery locks into place and is super secure (and safe!) :D Made a little video shindig :) Ended up with extra time as my BRAND NEW Four Seasons accumulator wouldn't hold vac and leaks from the Shrader valve. Swapped the Shrader valve core... still leaked. Order a completely new accumulator, blah! So, had time waiting on the new accumulator to tinker with the battery situation, lol. I also found some correctly sized screws for the top of the engine 5.0 v8 name plate and picked them up and hopefully will have them in a few days! Anyone looking for them, these are what I picked up: 1986-1995 Ford Mustang 5.0 V8 Nameplate Screws Attaches Plate to Upper Intake 4p | eBay


Got in new accumulator last night... picked up one from SPECTRE or some such, lol. Couldn't grab a Motorcraft one at a decent speed and SPECTRE was overnight. Wanted to avoid the 4 seasons this time, lol. Will see about swapping it on and hoping I can pull and hold vac this time!

Starting to build a decent little YouTube playlist on the Xploder now, lol:


Ok.. so.. I AM CURSED. Swapped the new new accumulator and BAM.. no more leak from the Shrader valve! AWESOME! Vac system down and have it hold vac... no leaks, holds it rock solid for an hour +... Go to charge system.. 3/4th filled from first can and... BAM!!! SAME F'ING connection blows out.. the quick connect between top of accumulator on the long hose over to the compressor. No clue what I must be doing wrong with this... Ugh :-/


Ok.. so.. I AM CURSED. Swapped the new new accumulator and BAM.. no more leak from the Shrader valve! AWESOME! Vac system down and have it hold vac... no leaks, holds it rock solid for an hour +... Go to charge system.. 3/4th filled from first can and... BAM!!! SAME F'ING connection blows out.. the quick connect between top of accumulator on the long hose over to the compressor. No clue what I must be doing wrong with this... Ugh :-/
is it doing this to take the attn away from the camaro? these fords man, dont want ya to touch other stuff, gotta stay with em 🤣 "that chevy 4x4 says it all sittin in my place" it aint a 4x4 but same idea! all jokes aboutchevy aside. sorry to hear that :( aint no fun!


Join the Elite Explorers for $20 each year.
Elite Explorer members see no advertisements, no banner ads, no double underlined links,.
Add an avatar, upload photo attachments, and more!
.


is it doing this to take the attn away from the camaro? these fords man, dont want ya to touch other stuff, gotta stay with em 🤣 "that chevy 4x4 says it all sittin in my place" it aint a 4x4 but same idea! all jokes aboutchevy aside. sorry to hear that :( aint no fun!
Lol, I dunno man... this ac has been my Kryptonite for many years now, even well before I got the ZL1! LOL


Back
Top