New Navajo Truggy build | Page 4 | Ford Explorer Forums - Serious Explorations

  • Register Today It's free!

New Navajo Truggy build

..Props for your honesty in sharing..:biggthump

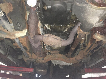
..Man, that could have been a real bad deal but it does look like it's going to leave a mark...


Join the Elite Explorers for $20 each year.
Elite Explorer members see no advertisements, no banner ads, no double underlined links,.
Add an avatar, upload photo attachments, and more!
.


Double sheer lower track bar mount

Here are a few shots of a double sheer lower track bar mount I built this afternoon.

IMG_0801.jpg

IMG_0802.jpg

IMG_0803.jpg


Welded high steer knuckles, Track bar bracket, E150 van fuel tank mounted

I know welding knuckles is frowned upon but these things are bad ass. I took them to Solo Motor sports in Covina, CA. Bobby and Carl are the owners and are a top notch company. They specialize in TTB 4x4 long travel stuff and build and race all that they fabricate. The Dana 44 knuckles were pre heated, welded then post heated before spending the night in a bucket of sand to slowly cool. http://solomotorsports.com
IMG_0805.jpg


IMG_0808.jpg


IMG_0809.jpg


Notice how they drilled out the taper, inserted Chromoly (i think) tig welded and then grind it smooth.

IMG_0810.jpg


I followed this guys build to install a van gas tank. I used G&J aircraft in Ontario for all my fuel and brake lines. Very good work for cheap. http://www.explorerforum.com/forums/showthread.php?t=249316


IMG_0816.jpg


IMG_0820.jpg


Upper track bar mount is installed. I am going to box it in when I get time

IMG_0822.jpg


IMG_0823.jpg


I was way off on the amount these coils will compress from the weight of the vehicle. Luckily I had adjustable coil buckets. They ended up settling 4 or 5 inches. I drilled the track bar mount so I could install a bolt since on side of the track bar mount is welded to the coil bucket.

IMG_0824.jpg


IMG_0825.jpg


IMG_0826.jpg


IMG_0827.jpg


Articulation

Full Bump
IMG_0837.jpg


IMG_0841.jpg


IMG_0844.jpg


Me Neither, not sure I have ever seen so many self-fabricated parts before.


how have i not been watching this thread?

fwiw i agree that the rear needs bedsides or something to cover up that last bit of frame


fwiw i agree that the rear needs bedsides or something to cover up that last bit of frame[/FONT][/COLOR][/QUOTE]


The rear will be mostly cage that will tie into the front half exo cage. I was thinking about flaring or morphing whats left of the rear wheel wells kinda like the rear fenders of a baja bug but done in smaller tubing. Splice in aluminum and rivets. Should look cool.

Thanks to everyone. This website is most of the inspiration. I just had some pent up fabrication frustrations I needed to get out.

I fabricated so many parts myself because I have a budget of about $4K.


0601060747.jpg


Build is looking good, I've seen way too many track bar brackets rip off the frame, one halfway through an 8 hour trail. I never had a problem from a simple solution of running a piece of steel to the engine cross member. You can see it behind the bracket. This never failed me, it's the only weak part I see of your build, otherwise it's looking great!


Track bar mount

[QUOTE

Build is looking good, I've seen way too many track bar brackets rip off the frame, one halfway through an 8 hour trail. I never had a problem from a simple solution of running a piece of steel to the engine cross member. You can see it behind the bracket. This never failed me, it's the only weak part I see of your build, otherwise it's looking great![/QUOTE]


Thanks for the tip. I did notice that a lot of mounts attach the way you describe. I wanted to articulate the suspension first to make sure nothing colided.
I still need to box it in and I also want to incorporate some tubing for added strength. The frame area where the track bar is welded to has a 3/16" plate with rossett welds everywhere.


Rear Shock Hoops

Here are my rear shock hoops. I have a little area where the shocks pass by the body and the gas tank.

IMG_0885.jpg


IMG_0886.jpg


IMG_0887.jpg


IMG_0889.jpg


Front Shock Hoops

Eventually I want to go to coil over shock. These hoops could be modified with extra reinforcement to accommodate coil overs.

IMG_0888.jpg


IMG_0890.jpg


25 deg angle lean on these hoops bring it closer to the shock location.
IMG_0891.jpg


I made some mock up shocks out of all thread rod. A little beating to the floor board gave me extra clearance for the hoops
IMG_0893.jpg


IMG_0896.jpg


IMG_0897.jpg


My cheapo Harbor Freight notcher worked great.

IMG_0898.jpg


IMG_0899.jpg


IMG_0900.jpg

All I have left to do is tabs front and rear. I'm running 14" shocks in the front and 11" in the rear.

Once the brakes are done I should be able to drive it home. THEN THE CAGE STARTS. I can't wait.
Stay tuned.


Looking good!! I'm excited to see this done and on the trail.

Thanks Dude. I'm excited to be almost done. I'm definitely running out of steam. I think once I get started on the cage I will get my second wind.


Track bar mount FINISHED.

[QUOTE

Build is looking good, I've seen way too many track bar brackets rip off the frame, one halfway through an 8 hour trail. I never had a problem from a simple solution of running a piece of steel to the engine cross member. You can see it behind the bracket. This never failed me, it's the only weak part I see of your build, otherwise it's looking great!


Thanks for the tip. I did notice that a lot of mounts attach the way you describe. I wanted to articulate the suspension first to make sure nothing colided.
I still need to box it in and I also want to incorporate some tubing for added strength. The frame area where the track bar is welded to has a 3/16" plate with rossett welds everywhere.[/QUOTE]


Running a brace to the cross member becomes a little difficult beacuse I extended the wheel base a few inches.
I came up with this to strengthen the track bar. I dare this ***** to break.
IMG_0904.jpg


I had to make sure I could still get to the bolts for the adjustable coil buckets.

IMG_0905.jpg


I made another plate to "scallop" effect. I put a rossett weld where the tubing and brace are.

IMG_0906.jpg


Added some 1/8" plate to box the whole thing in.
IMG_0908.jpg


Finished product.
IMG_0910.jpg


Join the Elite Explorers for $20 each year.
Elite Explorer members see no advertisements, no banner ads, no double underlined links,.
Add an avatar, upload photo attachments, and more!
.


Shocks and brake lines

Got the shocks installed and the brakes done.

IMG_0911.jpg


The rear shock hoop had such a long span that I incorperated the shock mount and brace in one.
IMG_0913.jpg


I stitch welded the mount so the tubing didn't warp.
IMG_0914.jpg


Kind of hard to see the braided brake lines. Thought installing them this way would keep them safe. Just need to be sure the tires don't hit them at full lock. Might install a small bungee to keep them out of the way.
IMG_0915.jpg


IMG_0916.jpg


Back
Top