Pugly | Page 29 | Ford Explorer Forums - Serious Explorations

  • Register Today It's free!

Pugly

The Good, The Bad, & the Pugly :D

1994 Purple Explorer XLT 4wd


I decided to have a registry for my "Other" rig so I can post things done and have a reference for it.

Pretty much stock drive train.

4.0 OHV-A4ld-1354e.
D35 front 4:56 Yukon gears, Aussie Locker.
2nd gen disc 8.8 rear 4:56 gears, Spartan Locker.

Front C-Clip eliminator Mod.

Slight lift with 2" Skyjacker coils & rear F-150 hybrid leaf packs.

3" PA body lift
Helpful thread with pics for the front body mounts
Pics of front body lift mounts

Swapped to manual hubs.
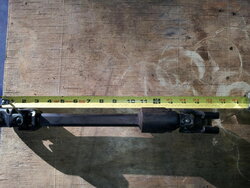
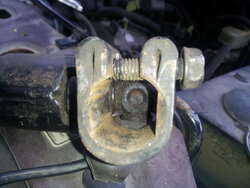
Double U-joint XJ steering shaft.

33" x 12.5" x 15" Cooper Discoverer ATX3, mounted on 15"x10" AR Outlaw1 alum wheels - full size matching spare.

Shocks:
Front Rancho 9000xl
Rear Rancho 9000xl
Duff Stabilizer shock.

Sway bar quick disconnects front & rear.
Custom tube sliders w/kickouts

22" LED light bar.
18w amber fog Led pods.
55w rock lights--2 front--1 rear over diff.
8 LED pods for rocker lights.

Full brush guard.
2.5" Fender Flares.

TTB Diff guard & Skid plate.

Custom roof rack with 48" Extreme Hi-Lift jack.

Flipped Tow hitch & front hooks for tow points.

Cobra19 CB & rear hatch mounted firestick antenna.
Rear view HD camera.
JVC DVD/CD/MP3 Head unit with 7" HD Monitor.
Sony 6.5" front speakers.
Rockford Fosgate 5.25" component rear speakers.
8" JL Audio sub in 2001 enclosure with 500w amp mounted on enclosure.

Custom made center console with CB/Rear view color monitor/2-12v outlets/ in-out temp display. D cell Maglite mounted on cargo panel. Truck bed liner on cargo floor.
Custom Cargo storage box with topside spare tire mount.

'99 Eddie Bauer Front Leather buckets.
'94 Limited Rear leather split bench.


Pugsnewshoes_zpsf609e609.jpg

puglynewbrushguard1.jpg

94frontpassprofile.jpg

puglyrti2.jpg

puglyrearrti1.jpg

puglyrti1.jpg

aftermathmudbath2.jpg

puglysnewseats.jpg

cbantbracket.jpg


Join the Elite Explorers for $20 each year.
Elite Explorer members see no advertisements, no banner ads, no double underlined links,.
Add an avatar, upload photo attachments, and more!
.


I'm betting you found the issue.
Congratulations. Ah, and be careful with your back moving that compressor round.

Thanks! I hope that was it. :thumbsup:

That compressor has to be 100+ lbs of pure one man awkwardness. Getting it into a lifted SUV is going to be fun! LOL


Join the Elite Explorers for $20 each year.
Elite Explorer members see no advertisements, no banner ads, no double underlined links,.
Add an avatar, upload photo attachments, and more!
.


Update on the vibration....

What vibration? :D

Yeah baby, all good now! For once, the issue was solved with the first thing checked. Woot!! :)

Anybody want to help me unload this replacement compressor? LOL!


Rag joint elimination mod

The 3" Body lift made the steering shaft bind a bit because of the angle of the lift. This binding over time has taken it's toll on the rubber rag joint, and caused slop. It needs more range of motion or greater degree of rotation. I have read of others cutting the firewall and dropping the entire steering column for this, but that does not interest me at all. The solution is a double U-joint shaft.

Another member here (FR-425) made a mod for this using a shaft out of a ZJ, and did a great job of doing it, with a nice how to thread.

After picking thru the salvage yards here, all I could find was steering shaft out of a '95 XJ. I have to try make this shaft work.

The stock XJ shaft is set at 22.5" in length right now. I need to shorten it to 16" total in length, by removing close to 6" or 3" from each shaft.

For this shaft, I need to use a torch and melt the factory epoxy resin injected thru a key way slot in the solid shaft. About 2-3" out, from the inside end of the hollow shaft. Then I can separate the two for cutting.

The center of the shaft has what looks to be a metal crimp stop. What it is for I have no idea, as it is actually, just a pc of plastic. :scratch: It has to be removed.

The column end can be installed by either notching the top with a die grinder to allow the Jeep bolt to pinch, or drill a hole to use the stock Ex bolt thru the column stub shaft, or both.

The gearbox end is a simple pinch bolt with a spline end that can be tapped on after opening it a bit.

I will post pics of this mod after I attack it, and report success or failure.

1) full view
2) column end
3) box end
4) plastic part
 

Attachments

  • shaft plastic part.jpg
    shaft plastic part.jpg
    86 KB · Views: 262
  • shaft box end.jpg
    shaft box end.jpg
    102 KB · Views: 245
  • shaft column end.jpg
    shaft column end.jpg
    68.2 KB · Views: 247
  • shaft full view.jpg
    shaft full view.jpg
    91.8 KB · Views: 238


Used MAP gas and heated up the center until the plastic holding it together melted and burned out. Warning: The fumes from the plastic burning is highly toxic. I used a charcoal respirator during this process.

Once the plastic stopped oozing out and burned off, I simply pulled them apart, and cleaned them off with a hand file. They are close to a foot long each. Put back together, it collapses fully and total end to end length is 16".

The stock Ex shaft extends to 13", and the body lift extension adds another 1.5" to it, for a total of 14.5", with a good 6" of collapse in case of a front impact. This space is needed so the steering wheel/column is not forced into your body in a head on impact.

So... I am going to make this XJ shaft able to extend to 14.5", and have as much room to collapse as possible without losing too much inner shaft. I want as much inner as I can for strength, but the stock set up only had 1.5" inner shaft inside the outer. I would like to have at least 2"' of inner inserted.

Edit:
Got it installed. Cut off 2.5" on the tube shaft, and 3.5" on the solid shaft. Since this has the 3" Body lift, and been using the steering extension, I made this shaft a little longer then one would need for a stock set up. Overall length for the lift is only 1.5" longer then the fully extended (13") stock shaft, not 3". Total is 14.5" installed with a 2.5" collapse in case of a front impact.

All went smooth for the top install. I ground off a little on the steering column stub to allow the stock bolt on the shaft to pass over and clamp it tight. I drilled holes and inserted a pass thru bolt like stock uses for safety.

Bottom end was not so good. The design of the Jeep shaft has the clamp bolt all the way at the end. The Ex gearbox spline shaft stub has the bolt groove in the center, not allowing the shaft to install all the way using this slot. So... there is a flat spot on the box stub like a "D" shape. Turning the shaft to allow it to be on all the way, and be able to slip the clamp bolt on, makes for a sad steering wheel. it is a full 90* out to the right. If I spun one half of the jeep shaft 1/2 turn, it would be 90* off still. :(

So this cheap $10 mod is not as cheap as it seems, I have to go get an alignment. The pitman arm is keyed, so the only recourse is to adjust the TRE's to get the wheel back to center. Add $80 to the cost of this mod.

Good news is the steering has never been as tight/responsive/smooth, as it is now. Turn the wheel, the tires move, period. Zero slop in it.


Pics:
XJ shaft separated
XJ shaft fully collapsed (uncut)
XJ shaft top end inside view showing bolt in the way
Steering column ground for bolt clearance
Stock shaft with body lift extension & modified XJ shaft comparison. Both at 14.5".
XJ shaft on, upper
 

Attachments

  • xj shaft apart.jpg
    xj shaft apart.jpg
    88.5 KB · Views: 226
  • xj shaft fully collapsed.jpg
    xj shaft fully collapsed.jpg
    87.3 KB · Views: 228
  • column shaft ground for bolt.jpg
    column shaft ground for bolt.jpg
    61.6 KB · Views: 226
  • XJ shaft top end inside view.jpg
    XJ shaft top end inside view.jpg
    61.2 KB · Views: 221
  • stock and modified  XJ shaft.jpg
    stock and modified XJ shaft.jpg
    82.2 KB · Views: 228
  • XJ shaft on upper.jpg
    XJ shaft on upper.jpg
    72.6 KB · Views: 207


So, I'm sitting here thinking about the steering wheel off center. If I take it in to the alignment shop, its an all day affair. I don't want to waste a day there and they tell me they can't get the TRE's to move enough to bring the steering wheel back to center (currently turned to the right 90*). I'm not positive there is enough either, but I just don't know enough about the TTB TRE setup to feel confident on a decision here.

I know a few of you subscribed to this thread know all there is to know about this subject. So, if you happen to see this, please chime in, if you would. Thanks!

Ok, so I did the string test from front tire to rear tire. Turned the steering wheel perfectly straight, and locked it in place. As you can see from the pics below, it is about 2" off at the rear of the tire.

Does this mean, I need a full 2" of TRE thread adjustment to the pass side?
OR... Does the turning of the TRE (threading in/out) multiply the actual distance moved? ie... 1/2" in/out thread adjustment = 1" distance?

If so, it looks like there is plenty of thread to simply use the TRE's to bring the steering wheel back to center. If not, I'm not sure what else to do here. :scratch:
 

Attachments

  • dr side tires string test view.jpg
    dr side tires string test view.jpg
    108.8 KB · Views: 212
  • tire string measure dr side.jpg
    tire string measure dr side.jpg
    59.9 KB · Views: 211
  • pugly pass tre.jpg
    pugly pass tre.jpg
    67.7 KB · Views: 211
  • 94 wheel out 90 degrees.jpg
    94 wheel out 90 degrees.jpg
    89.2 KB · Views: 190


For each inch you shorten or length the rod, your tires will be magnified in adjustment. It is definitely not a 1 to 1 relationship.


For each inch you shorten or length the rod, your tires will be magnified in adjustment. It is definitely not a 1 to 1 relationship.


Thanks! :thumbsup:

That's what my brain is telling me too. I just don't want to max the threaded rods out on those TRE's if I have to crank them all the way one direction to bring that wheel back to center.

If 1/2" of adjustment was enough, I would feel safer as they wouldn't be maxed out.


Give it a try. I think a 1/2" would be plenty. Just remember, if you are 2" difference from the front of the tire to the rear of the tire while holding the wheel straight, you are really only 1" off overall. Each amount you move the front of the tire towards the center of the truck, you are bring the rear out equally as much. So you would really only need to bring the front of the tire in 1" to bring it back into adjustment.

Due to the geometry in placement of the steering linkage on the "spindles", you would then be even less than 1" of thread adjustment to bring the steering wheel back to center. Do you follow what I'm getting at?

A little adjustment will go a long way for you.


Distance is shorter at the inside then at the outside. That is what my brain is trying to tell me. I just needed someone to confirm this, as with anything new to me, I need all the help I can before I dive into something. :D

Thanks again!

I have been soaking the TRE couplet with PB Blaster for a couple days now. Hopefully it helped. lol


I remember you saying that the end of the steering column was a bit 'bell-mouthed' on the end, and in the pics I can see it. Not too bad though..

Just a reminder: The bit of shaft you cut off the xj shaft will fit perfectly inside the column to strengthen it up. :)

IMG_20140215_102028_zps02def82a.jpg


I remember you saying that the end of the steering column was a bit 'bell-mouthed' on the end, and in the pics I can see it. Not too bad though..

Just a reminder: The bit of shaft you cut off the xj shaft will fit perfectly inside the column to strengthen it up. :)

The female end on the steering shaft was wollered out from the extreme angle due to the body lift, causing it to bind. After some time, the bind went away because the parts broke / wore out. This is the entire reason I wanted a double U-joint steering shaft.

The shaft on the column is fine. I don't need anything inside the column shaft other then the bolt I ran thru it. There is no more stress on the column shaft end any longer with this shaft. :thumbsup:


Mint!

Now we now that the xj shaft is doable as well.

Nice work.


BTW I straightened the steering wheel on mine after the shaft change.

It was off to the right same as yours.

Turn the TRE's so that you make the tires turn farther to the right. You will then need to turn the steering wheel left to get back straight. Make sense?

Longer on the right, shorter on the left.

On mine it only took one full turn on both sides..

As long as you do exactly the same to both sides you will not fudge up the alignment.


I have been so busy, I haven't had a chance to spend a day at the alignment shop yet.

I will have some time tomorrow tho, so I might as well try as you say, and do it myself.

I was thinking I might have to spin the wheel 180 the other direction after the tre adjustment. :)


Na, it doesn't take much, the steering ratio is what 20:1

I just did 1/4 turns until I got right.

You do need to run it down the highway to get a good gauge on how well centered it is.

rinse and repeat.


Hmm.. Since the wheel is keyed to the column, I can't adjust it there. The only way to adjust it is at the column shaft to steering shaft, and that is only in 180* moves because it is not square, but rectangle.

How are you adjusting in 1/4 turns? :scratch:


Hmm.. Since the wheel is keyed to the column, I can't adjust it there. The only way to adjust it is at the column shaft to steering shaft, and that is only in 180* moves because it is not square, but rectangle.

How are you adjusting in 1/4 turns? :scratch:

Tie rod ends. turn the tie rod adjusters

Post 574


You mentioned adjusting the TRE's in an earlier post so I assumed.

Sorry for the confusion.


Join the Elite Explorers for $20 each year.
Elite Explorer members see no advertisements, no banner ads, no double underlined links,.
Add an avatar, upload photo attachments, and more!
.


Back
Top