Well now that Im Elite i figured Id start a thread to document my SAS build...


-
Performance Upgrades - Maintenance - Modifications - Problem Solving - Off-Road - Street Trucks.
Covering the Explorer, ST, Sport, Lincoln Aviator, Sport Trac,
Mercury Mountaineer, Mazda Navajo, Ford Ranger, Mazda Pickups, and the Aerostar.
Featuring H.I. - Human Intelligence.
Register Today It's free!
You are using an out of date browser. It may not display this or other websites correctly.
You should upgrade or use an alternative browser.
You should upgrade or use an alternative browser.
The Black Pearl SAS and build
- Thread starter KurtECV
- Start date
Elite Explorer members see no advertisements, no banner ads, no double underlined links,.
Add an avatar, upload photo attachments, and more!.
Elite Explorer members see no advertisements, no banner ads, no double underlined links,.
Add an avatar, upload photo attachments, and more!.
- Joined
- November 1, 2017
- Messages
- 760
- Reaction score
- 408
- City, State
- Lebanon MO
- Year, Model & Trim Level
- 93 Sport
Is it READY yet?
its soooo close
- Joined
- November 1, 2017
- Messages
- 760
- Reaction score
- 408
- City, State
- Lebanon MO
- Year, Model & Trim Level
- 93 Sport
Yes it will. Its a trip driving that thing. Needs a woman's touch but overall its pretty awesome. going to work on swapping the roof mount A/C with a small through wall mount AC/Heater unit. Ditch the big ol' unit on top and save on aerodynamics lol
- Joined
- August 1, 2008
- Messages
- 11,765
- Reaction score
- 2,136
- City, State
- MO MO
- Year, Model & Trim Level
- 94 & 95 XLT's
That AC cover came off on the HWY on our trip to KY. It was aerodynamic, but just didn't like living up there, and said.....I'm Out!!
We need to build a box for the back of that for storage of parts & tools. Because...... Ford.
We need to build a box for the back of that for storage of parts & tools. Because...... Ford.
- Joined
- November 1, 2017
- Messages
- 760
- Reaction score
- 408
- City, State
- Lebanon MO
- Year, Model & Trim Level
- 93 Sport
That AC cover came off on the HWY on our trip to KY. It was aerodynamic, but just didn't like living up there, and said.....I'm Out!!
We need to build a box for the back of that for storage of parts & tools. Because...... Ford.
Thats what james said. I figure i could add a heating/cooling unit to he back once i figure out how high to mount it (depending on where the Pearl's front bumper sits. James sent a crank style roof vent that will go in place of the factory AC box.
I am a little sad that the big storage box isnt on it, but it is what it is, I can build something to go in its place that fits my needs.d
- Joined
- November 1, 2017
- Messages
- 760
- Reaction score
- 408
- City, State
- Lebanon MO
- Year, Model & Trim Level
- 93 Sport
Well I was invited to a local off-road park the last week of April. Hoping to make it there i made a To-Do List on the rig... Thats a lot, I know if a few other things that need to get done before that trip but i am unsure of what i am going to do, i will update the tread on that issue in another post.
- Joined
- November 1, 2017
- Messages
- 760
- Reaction score
- 408
- City, State
- Lebanon MO
- Year, Model & Trim Level
- 93 Sport
Marked off the list:
Picked up the new lug nuts (longer so its easier to get them off because of the thick mounting flange in the rim)
New Group 65 AGM battery.
Got the passenger side body mount done (had to cut those front mounts off to reinforce the frame rails)
And i have been having one hell of a time with battery cables, while using those cheap-o battery terminals, the ones you cut and clamp the cable to the terminal. Mine were horribly corroded and when i would jump start the truck (shot used battery) the negitive able would start to glow LOL from high resistance.
So using the BIG 3G upgrade that the BKO guys do,i replaced the positive and negitive terminals with marine style stud clamps and upgraded all the main wires (minus the charge wire, I will do that one this weekend) with 0 gauge welding cable, and High Voltage/High Amperage cables and (thanks to @gmanpaint for showing be the cable clamp tool!) cable lugs.

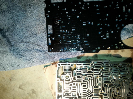
Battery/Starter cables

Not liking the idea of cutting away a small section of insulation on the ground cable, to ground the frame, i replaced that section on cable with its own short section, the above lug will bolt to the frame, and then to the engine block where that factory bolt is.
 You can see above the other end of the frame grounding cable and engine grounding cable. used the factory bolt and also the factory bolt "keeper" so if anyone does this upgrade try and save the little keeper to reuse.
 Here is the starter side of the cable, starter power wire and the starter trigger.
my rig still has the factory setup at the starter solenoid and is still in good condition so i cut the start trigger wire about 6 inches from the solenoid and installed a WeatherPack connector.
Picked up the new lug nuts (longer so its easier to get them off because of the thick mounting flange in the rim)
New Group 65 AGM battery.
Got the passenger side body mount done (had to cut those front mounts off to reinforce the frame rails)
And i have been having one hell of a time with battery cables, while using those cheap-o battery terminals, the ones you cut and clamp the cable to the terminal. Mine were horribly corroded and when i would jump start the truck (shot used battery) the negitive able would start to glow LOL from high resistance.
So using the BIG 3G upgrade that the BKO guys do,i replaced the positive and negitive terminals with marine style stud clamps and upgraded all the main wires (minus the charge wire, I will do that one this weekend) with 0 gauge welding cable, and High Voltage/High Amperage cables and (thanks to @gmanpaint for showing be the cable clamp tool!) cable lugs.
Battery/Starter cables
Not liking the idea of cutting away a small section of insulation on the ground cable, to ground the frame, i replaced that section on cable with its own short section, the above lug will bolt to the frame, and then to the engine block where that factory bolt is.
my rig still has the factory setup at the starter solenoid and is still in good condition so i cut the start trigger wire about 6 inches from the solenoid and installed a WeatherPack connector.
- Joined
- November 1, 2017
- Messages
- 760
- Reaction score
- 408
- City, State
- Lebanon MO
- Year, Model & Trim Level
- 93 Sport
And if anyone is wondering what Gman is talking about with the Buggy-barge, I picked up this 27' 1983 Fleetwood Pace-Arrow last weekend. The buggy on the back is his, for referance those tires are 44x20
Since i dont have a "buggy" i renamed it the "Crawler Hauler"
I am thinking about starting a thread on it. We will see.

Since i dont have a "buggy" i renamed it the "Crawler Hauler"
I am thinking about starting a thread on it. We will see.

- Joined
- November 1, 2017
- Messages
- 760
- Reaction score
- 408
- City, State
- Lebanon MO
- Year, Model & Trim Level
- 93 Sport
It was that, or get a new 3/4 or 1 ton truck and a flat bed trailer. Or pickup this guy.
Works out cause the family can come along or I can go alone, with out without campsite hookups
Works out cause the family can come along or I can go alone, with out without campsite hookups
- Joined
- November 1, 2017
- Messages
- 760
- Reaction score
- 408
- City, State
- Lebanon MO
- Year, Model & Trim Level
- 93 Sport
Well after much thought, I pulled the rear axle out of the rig and am currently cutting the leaf spring perches and lower shock mounts off in prep to clock the rear axle and point it at the transfer case.
I am also working putting together a double carden rear driveshaft.
I went to the wrecking yard last weekend and pulled the front transfer case yoke (double carden) off of one of the explorers there, as the front and rear spline count is the same. Installing that (front) yoke on the rear will give me the ability to run a double carden 1310 joint on the rear of my rig.
Now if i can just find some info on finding the long side of the rear driveshaft with a slip yoke sleeve with a 32 spline count i would be completely set up on the rear driveshaft
- Joined
- November 1, 2017
- Messages
- 760
- Reaction score
- 408
- City, State
- Lebanon MO
- Year, Model & Trim Level
- 93 Sport
Finally got the 9 inch done!!

These are the lower shock mounts, I had already installed them and cut them off to clock the axle to point at this transfer case. the lower eyelet is turned so the eyelet can pivot with the axle during articulation.

To get a better idea of how it is mounted; That is a piece of 4 inch tube to reference the rear axle tube. The mounting bolt with be installed from the back and the nut slide between the bracket and axle tube,


New spring perches welded up, i think my welds are getting better!

Weld on the lower shock mount.

Front transfer case yoke installed, allows you to run a double carden joint on the rear.

Sch 40 2" ID PVC for mock up, that piece in 2.250" long and the slip joint is a little too compressed so i think ill shorten it up a bit and check full compression and extension on the suspension and see how things fit.

All welded up and ready to go!
These are the lower shock mounts, I had already installed them and cut them off to clock the axle to point at this transfer case. the lower eyelet is turned so the eyelet can pivot with the axle during articulation.
To get a better idea of how it is mounted; That is a piece of 4 inch tube to reference the rear axle tube. The mounting bolt with be installed from the back and the nut slide between the bracket and axle tube,
New spring perches welded up, i think my welds are getting better!
Weld on the lower shock mount.
Front transfer case yoke installed, allows you to run a double carden joint on the rear.
Sch 40 2" ID PVC for mock up, that piece in 2.250" long and the slip joint is a little too compressed so i think ill shorten it up a bit and check full compression and extension on the suspension and see how things fit.
All welded up and ready to go!
- Joined
- November 1, 2017
- Messages
- 760
- Reaction score
- 408
- City, State
- Lebanon MO
- Year, Model & Trim Level
- 93 Sport
All instead of working on the Dana 44 like i should (cause i have all the parts!) I hate how to stock rear bump looked with everything else modified on the truck and with removing the rear tow hitch and hangs down really bad because of the 3 inch body lift so that was taken off and NO Recovery points.
so i started to fab up a simple rear bumper.

so i started to fab up a simple rear bumper.
- Joined
- November 1, 2017
- Messages
- 760
- Reaction score
- 408
- City, State
- Lebanon MO
- Year, Model & Trim Level
- 93 Sport
I've Been working night and day to get this thing done for a shakedown run next weekend. I don't know that I'm going to make it or not.
A few pictures of the progress.
Ebrake cable is done


And the rear driveshaft works perfectly. Unfortunately I couldn't keep the rubber boot on the slip joint because with the boot fully compressed, I couldn't compress the driveshaft far enough to install it.


A few pictures of the progress.
Ebrake cable is done
And the rear driveshaft works perfectly. Unfortunately I couldn't keep the rubber boot on the slip joint because with the boot fully compressed, I couldn't compress the driveshaft far enough to install it.
- Joined
- November 1, 2017
- Messages
- 760
- Reaction score
- 408
- City, State
- Lebanon MO
- Year, Model & Trim Level
- 93 Sport
I am going to skip the SMORR meetup this weekend to get the To-Do list done on the Pearl. Thinking about the recovery points, i ordered a set of shackle mounts from Chassis Unlimited last night. 2 pounds EACH!

CNC Machined from 1" Thick 1018 Cold Rolled Steel -1" Thru Bore- Perfect for upto 7/8 Clevis Pins -2" Wide -Optional 3/4" Mounting Holes, for Bolting onto Frames ETC
CNC Machined from 1" Thick 1018 Cold Rolled Steel -1" Thru Bore- Perfect for upto 7/8 Clevis Pins -2" Wide -Optional 3/4" Mounting Holes, for Bolting onto Frames ETC
- Joined
- November 1, 2017
- Messages
- 760
- Reaction score
- 408
- City, State
- Lebanon MO
- Year, Model & Trim Level
- 93 Sport
Started to pull the front ring and pinion out of the rig last night.
The inside of the housing and the carrier were painted black, none of it was peeling off so it looks really well done so i am going to leave it.
It looks to me that someone has put in a series 4 carrier with 3.50 (42/12) I will confirm that tonight when i pull the ring gear off and measure the ring gear mounting surface of the carrier vs a series 3 and 4 i have sitting in the shop
- Joined
- November 1, 2017
- Messages
- 760
- Reaction score
- 408
- City, State
- Lebanon MO
- Year, Model & Trim Level
- 93 Sport
Well i just got an email from Chassis Unlimited, The shackle mounts are back-ordered until next week. Guess i can be working on the other things before i jump on the bumper
- Joined
- November 1, 2017
- Messages
- 760
- Reaction score
- 408
- City, State
- Lebanon MO
- Year, Model & Trim Level
- 93 Sport
Still bugs me that there isnt some kind of dust boot over the slip joint on the rear driveshaft. Talking to Gman, I have a few extra shock boots and i believe they will slide right over each end of the driveshaft.
Like a dummy i installed the rear ujoint backwards and cant access the zerk fitting, so when i pull the yoke off to spin the ujoint i am going to see how that boot fits over each end. I think it will work.
Elite Explorer members see no advertisements, no banner ads, no double underlined links,.
Add an avatar, upload photo attachments, and more!.
- Joined
- August 1, 2008
- Messages
- 11,765
- Reaction score
- 2,136
- City, State
- MO MO
- Year, Model & Trim Level
- 94 & 95 XLT's
Good call on skipping the meet. Need to take your time on all that stuff. Nothing like finding out you forgot something on a trail.
The shock boot will be better than nothing. They aren't as strong, but should last a while as long as they are clamped tight, and don't spin.
If that doesn't work, then you know what you have to do, to that shaft.
The shock boot will be better than nothing. They aren't as strong, but should last a while as long as they are clamped tight, and don't spin.
If that doesn't work, then you know what you have to do, to that shaft.
Featured images


Featured images
Similar Threads
- Article
- Replies
- 216
- Views
- 34,052