1956 F100 Explorer Chassis Swap | Page 11 | Ford Explorer Forums - Serious Explorations

  • Register Today It's free!

1956 F100 Explorer Chassis Swap

Subscribing here. Lots of good info and tips here. Good work Buddy. Looking at doing a similar thing but planning to keep AWD. Picked up my donor for $500, fully loaded 96 so hoping to recover some of the cost in parts sales.


Join the Elite Explorers for $20 each year.
Elite Explorer members see no advertisements, no banner ads, no double underlined links,.
Add an avatar, upload photo attachments, and more!
.


Subscribing here. Lots of good info and tips here. Good work Buddy. Looking at doing a similar thing but planning to keep AWD. Picked up my donor for $500, fully loaded 96 so hoping to recover some of the cost in parts sales.

Thanks SLUGGISH!!!! :) Please keep me posted on your progress!


6Q_QVPvsx-Rhqmtb68zBmdzTcHkLxut3wyiO52V1gXIO=w316-h177-p-no


Ok guys, winter weather has been hanging on for dear life, but it's about to be gone for (mostly) good very soon. I'll be back on here posting real soon with pics and stories of what I've been up to.

43Yi6BprHrHtbVYMvByg247caj3YSlBBAO_1HT3TK0cl=w316-h177-p-no


I'll admit, I've not been faithful with my project.... been cheating on a few other things lately. I have FINALLY got the Mercedes out of the yard that I sold back in September and I've picked up and sold a few things here and there. Still have no buyer(s) on the Explorer parts I listed on Craigslist. Just a bunch of idiots asking if it runs......... SERIOUSLY!?!?!? These are pics from the listing:

9mXEwyT7BHONFqEJ0kEClvHSNSNK6PbMkEJBEu1qDJHp=w317-h177-p-no


5_bYmRIo1f6CajVGO7XgEbnkY1NVgeZ1x0y47hgofKy4=w288-h162-p-no


A lot has changed, but I will fill you all in as soon as it all thaws out!

QFP5tsGyIHNVuPK4YA_U7UeAZCShY2RQHt4tRZfFsdKK=w267-h191-p-no


So does it run??:D If so I'll take it.


I hear you on the crap weather. My buddy drove out an hour and a half to help me work on mine, about 5 hours with no heat and 10 degrees out. We got the front suspension out and some stuff from the engine compartment. I wonder how much we could have gotten done if it was in the mid 30s.


Ok, it's about friggin time for an update. I have been elbow deep in numerous cars, trucks, boats, trailers, and other adventures since I last posted. Things have simmered down now, so I finally have a chance to breath and post again here! I'll give you a sampling of what I've been doing, what I've bought, and what plans I have for the near-future.

In January, I regrettably bought a 96 Dodge Stratus ($500) but it's still in my yard.... long story... next subject.

Next, I bought a Chinese side-by-side for $700. I didn't have to do a thing to it, just posted it back on Craigslist for $2500. It didn't run, just needed some wiring work though.

IMG_20140128_083057_283.jpg


IMG_20140222_105246_942.jpg


My two little helpers wanted to hammer on everything!

IMG_20140222_113511_704.jpg


I got a call from a guy who wanted it but wanted to wait until he sold his boat and lawnmower..... but who is buying these kinds of things in January??? Well, I did buy a (different) boat... this was my other January purchase,

IMG_20140120_152456_955-1.jpg


... a 1976 Chaparral boat. The guy had it listed for $400, but came down to $250 on the particular Sunday afternoon while on the phone. I actually called him because he had a 77 Trans Am for sale but had already sold it before I could reach him. He mentioned the boat he had and I agreed to take a look. It wasn't the prettiest thing in the world, but definitely worth a few hundred. So, I offered $150, he countered with $200. We finally settled on $175. DONE!!! 1 can of spray paint later and re-listed it for $800. Sold within a few days. Guy showed up and gave me FULL ASKING PRICE!!!! WOO HOO!!!

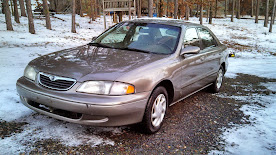
A co-worker wanted to buy her son a car for $2000, so I bought this 98 Mazda 626 by posting "Looking to buy a car today for $1000 must run and drive" and wham, pulled up in my driveway and asked if I could give him a ride home. He saw my ad while at work and needed to have $1000 to put down on a car he wanted from a place that didn't take trade-ins. Perfect for him, perfect for me, perfect for the buyer. On his way home I bought it out from under him, cleaned it up, fixed a few items, and sold just like that.

1LTaU4q6XgVKDqjY0YHM0gFF7PHTznXj7-gzbjEluIub=w276-h155-p-no


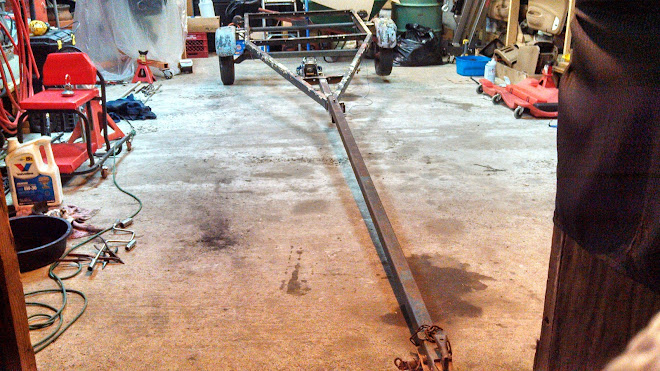
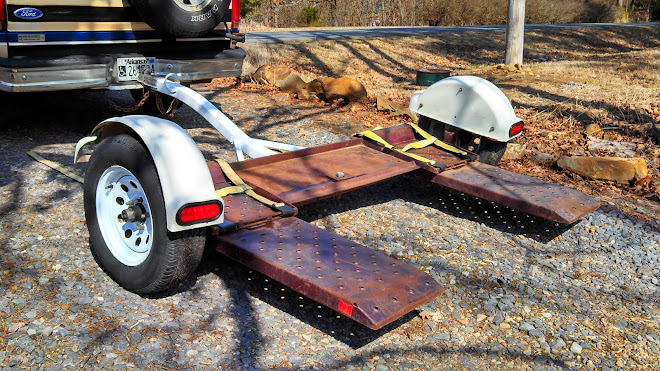
I regretted selling the car dolly I had last year, so I set out for another one. A guy wanted $500 but didn't have lights and other imperfect things. It took a month, but I got him down to $375. I used the heck out of it. AND damn.... sold it the day before yesterday for $541.73 + a coin from Kuwait. (severe negotiations) I guess I'll look for yet another one!

IMG_20140311_152004_586.jpg


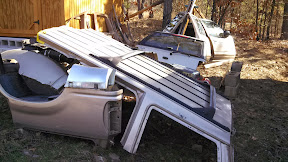
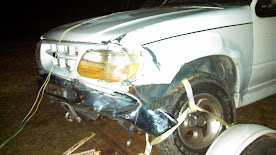
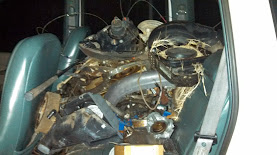
I found a $300 Explorer labelled "Scrap Explorer, runs, drives, no brakes" no price listed, so I took a chance and sold it a few days later to a scrapper for $500 as I had NO calls for $750. Easy flip, especially as I didn't touch it besides unloading it from the dolly and almost rolled away without brakes!!! It was full of scrap metal, trash, junk, and who knows what.

M7v6muR0VmGH_D4iQ4UMCHDFZYPVDSi7nfPaT2v33lgH=w277-h155-p-no


vojfG5WanDjrGb93miazK_udgyRwcz7-QmxBxeEx4g9J=w276-h155-p-no


vVaMbA_eS-Gj2vbYWBPyQK_G6ZHBEDp0xHIF4SRet3bE=w277-h155-p-no


I got to spend the weekend at Hot Springs, AR two weekends ago, went to "the only" casino there (made $30 - walked away), horse races (made $260 or so..... ran out!) and took the UTV with me because the guy who called me back in January who wanted the UTV mentioned that he hadn't sold either items but was interested in doing a trade + cash. I inquired about trading for BOTH his boat and lawnmower...... he agreed!!!

Since he lived minutes from the track/casino, it was right there, took care of two birds with one stone. My current lawnmower is currently half-working, with one shaft broken which cuts one side of the deck. The grass is finally about to come up full-force, so getting this mower was PERFECT!!!

vt6BkHa3LobjKqdiMsRm3kttdO2BK7-LNgGn5xTT6uM1=w276-h207-p-no


NGcmxI0BSm02dh4xhsQZFtkI3KoPwXoaJwaWBhvFv8Ie=w207-h154-p-no


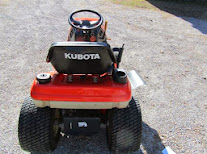
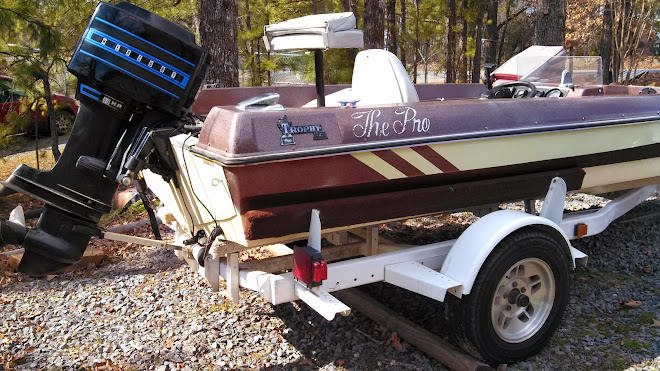
The boat, on the other hand, is made for "the pro" who is an avid fisherman. Not me. An older gentleman messaged me saying he had $1500 to buy a boat and wondered if it would be enough to buy mine, which was listed for $2000. Well, YES! He brought $100 bills. I made several hundred PLUS a free KUBOTA lawnmower worth $1500, couldn't have worked out much better.

IMG_20140311_154241_802.jpg


IMG_20140311_154104_786.jpg


IMG_20140311_153850_506.jpg


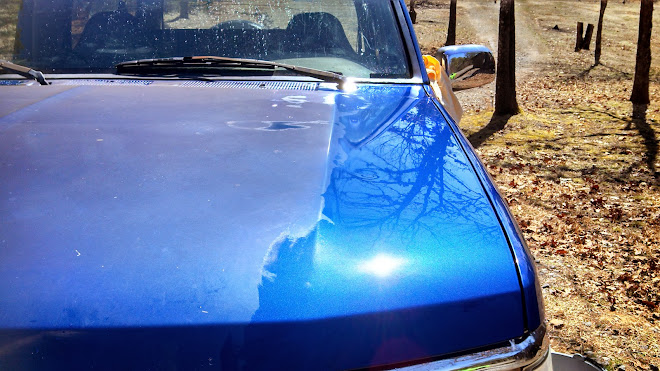
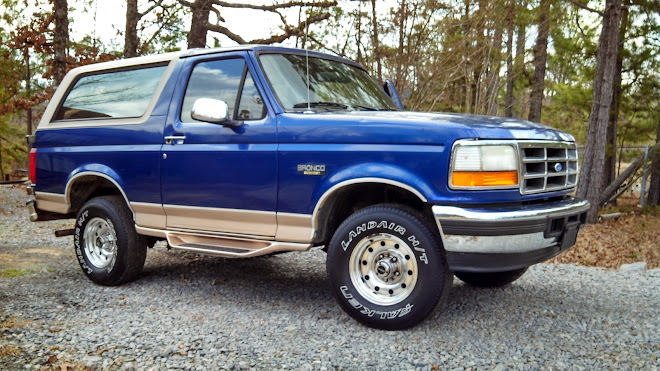
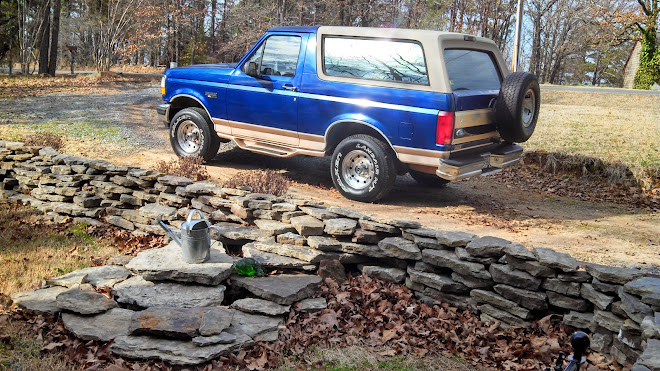
My step-mother passed away about 5 years ago, she was more of a mother to me than she ever knew. She purchased a 1996 Bronco as her last vehicle. She got it new after seeing and liking my blue 1984 Bronco that I had at the time. She liked mine so much she had to have one of her own. It had been sitting for a few years now and probably at the brink of becoming a salvage yard zombie Bronco.

IMG_20140310_141757_187.jpg


IMG_20140311_161211_578.jpg


IMG_20140314_162328_916.jpg


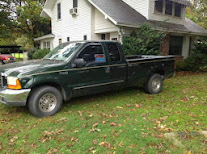
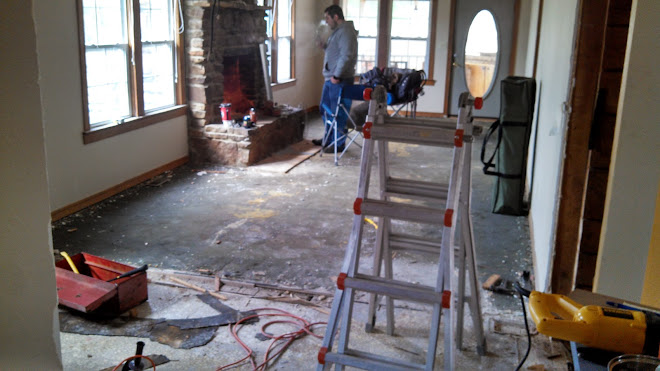
I have been asking about it lately and my dad agreed to let me take care of it. He was using it to store stuff after his move and just sold the house. I knew it was time to get it! Last weekend, my brother and I took on the adventure to stay one last time in the house we grew up in as kids, camped out in front of the fireplace and reminisced about all the good and bad times, memorable times, and the ones we would to let go of. We took his new toy I helped him find - 99 F250 Super Duty
1oHhTGi9w0UPACop4Qua8fqRv1C4gWXjcDKFCuiE1Qpw=w207-h154-p-no
(that is stored at my house with UNLIMITED USE - purchased from Craigslist, of course!!!) to go pick up the Bronco.

IMG_20140308_100743_712.jpg


After all this time, just changing the battery, filling the tires with air, and some fresh gas, it ACTUALLY DROVE 200 miles back to my house!!! Tow dolly not required! Not a single issue until I got to my driveway AND LOCKED THE KEYS INSIDE!!! Ha!

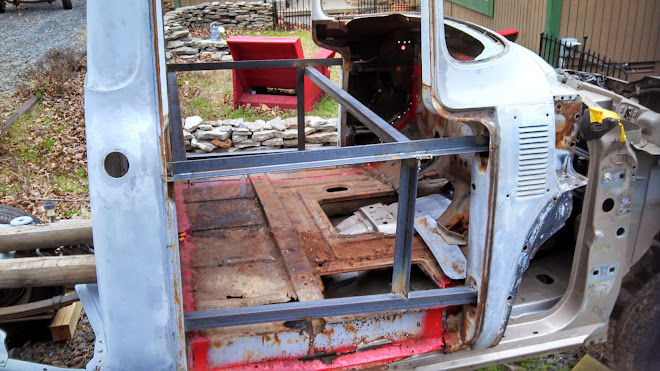
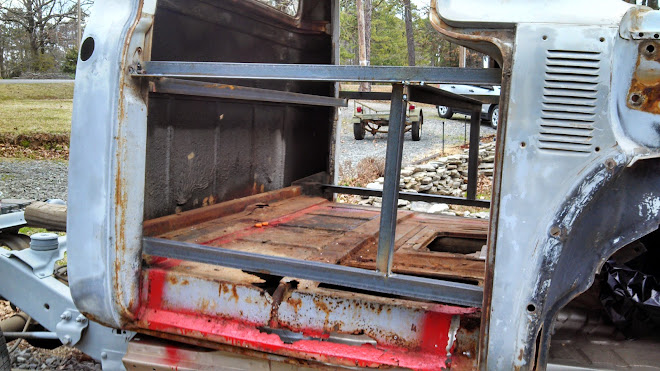
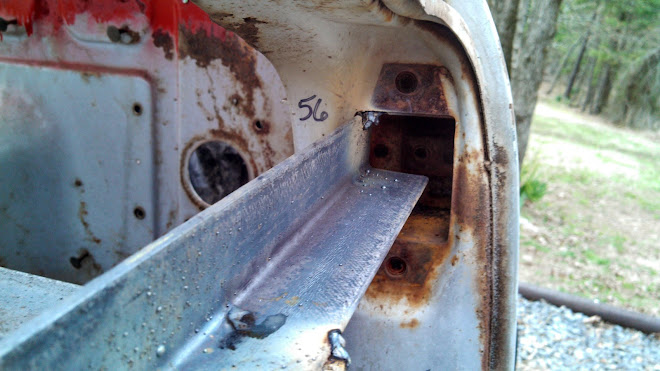
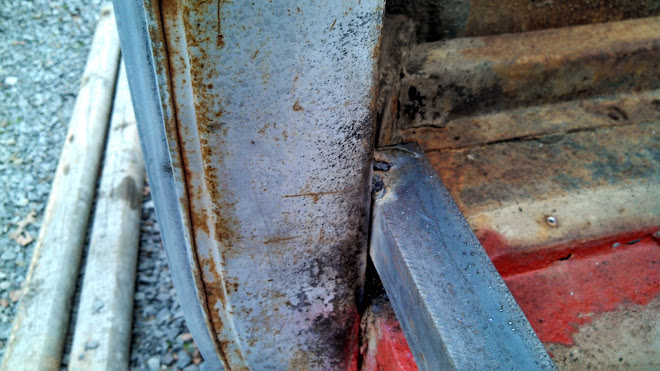
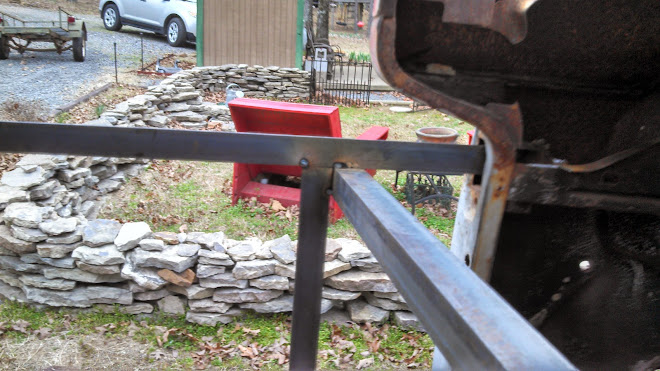
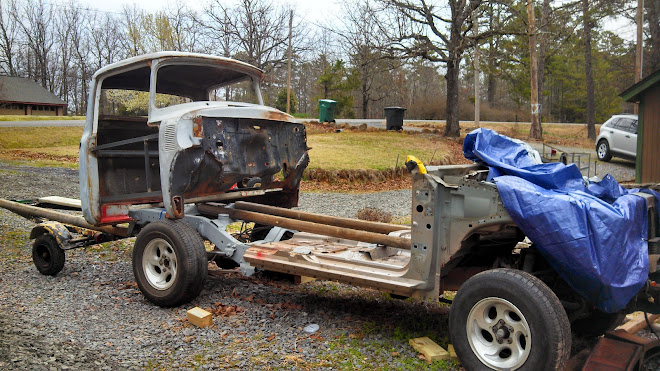
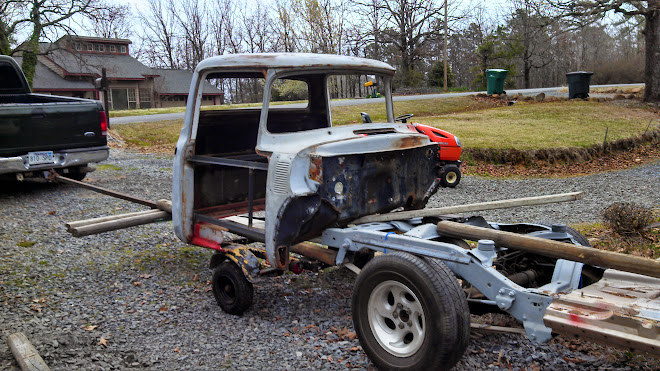
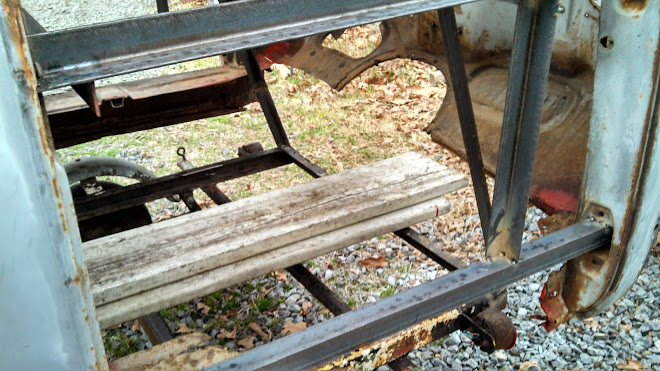
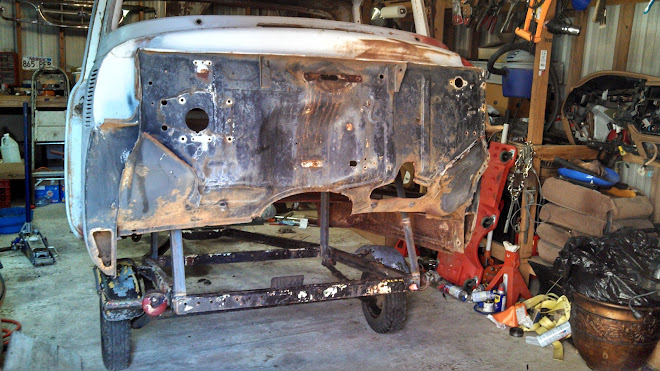
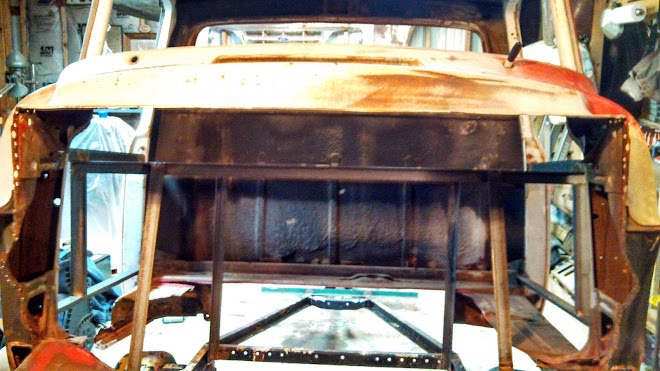
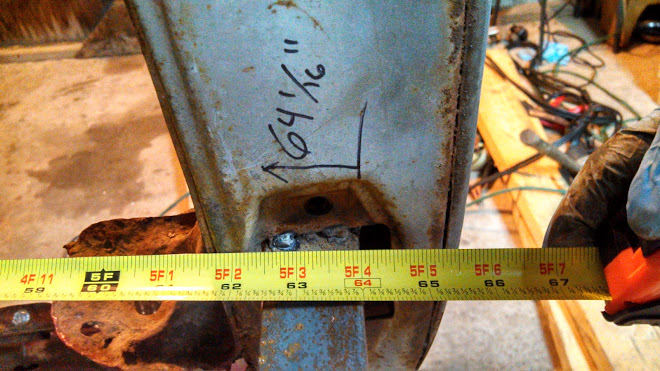
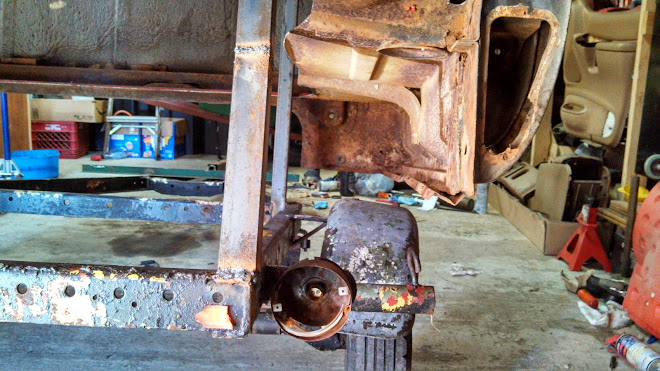
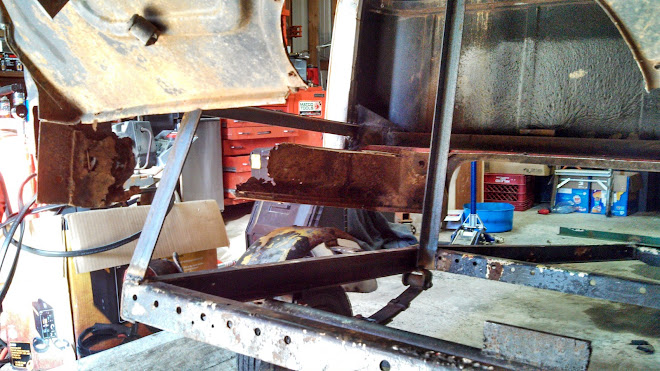
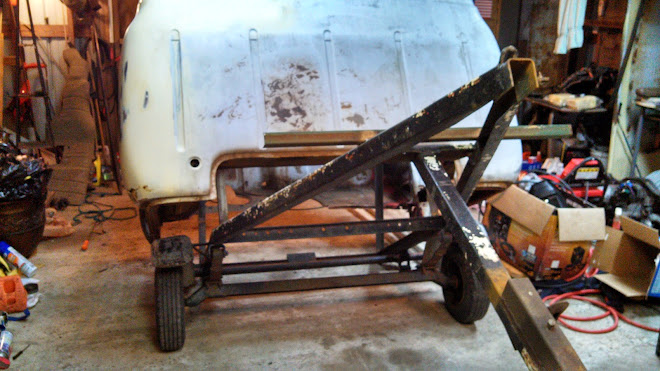
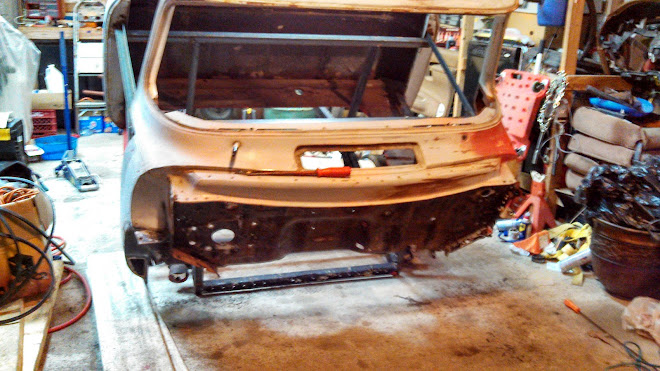
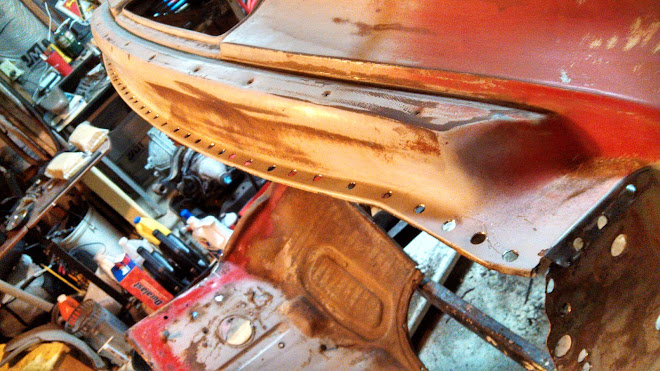
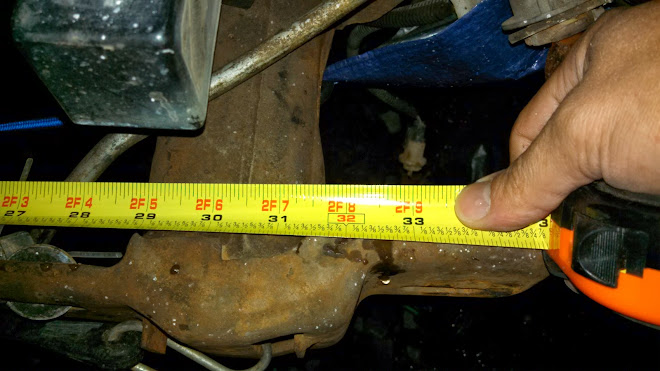
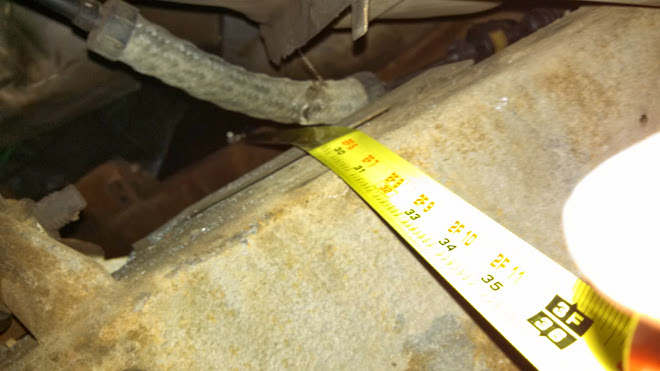
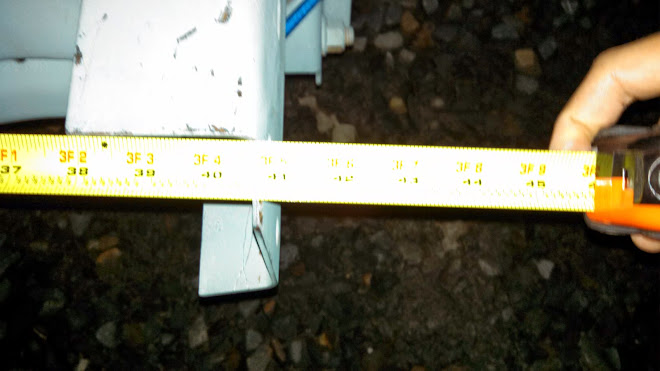
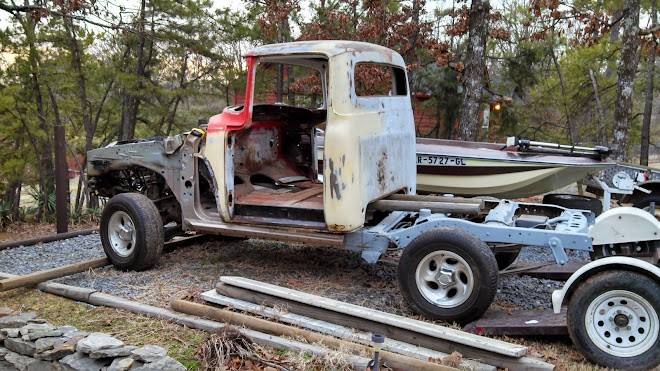
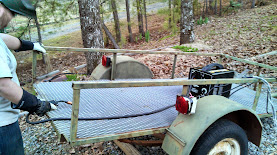
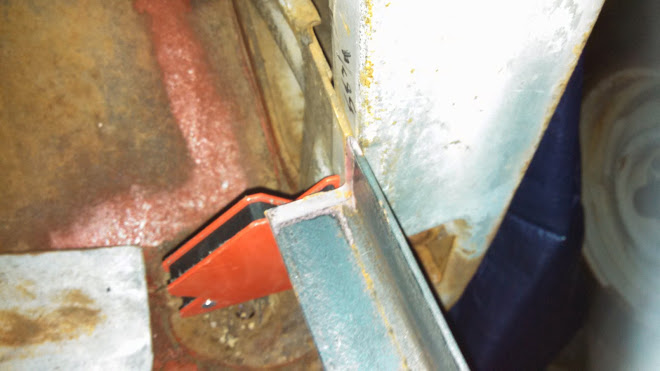
I've got some other little things going on with repairs, small items, and other stuff, but without further adieu, the moment you've been waiting for...... 56 project updates! Right before I sold the car dolly, I decided to get the truck into position for welding the support braces. THAT'S RIGHT, W-E-L-D!!! I bought the Harbor Freight 170 amp 220 volt welder with coupon for $174.99, I think.

IMG_20140309_183035_801.jpg


With the truck moved to the front of my house, it is within a short distance of a 220v power supply I installed for RV parking a few years ago. It has also allowed me space to work on things INSIDE my shop once again. I am finally able to move forward now with tools, supplies, money, and (hopefully) more warmth and daylight to work with!

***My next purchase BTW***

IMG_20140206_183228_595.jpg


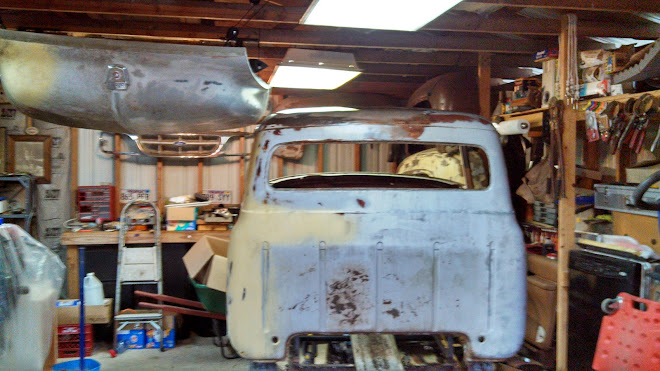
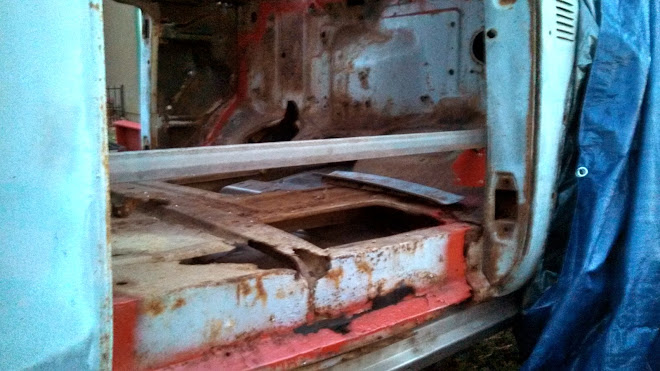
Ok, so, there's not a lot of updates on the 56, but progress is progress, right? I wonder how many of you thought this thread was done??? No way! It's just beginning to spark back to life!!!

Sit back and watch!
:-Buddy


Nah not dead. And nice bronco. That blue really is an eye catcher


No welding happened over the weekend due to rain, however, about 10+ hours went into cleaning and organizing the shop. It hasn't been properly cleaned since I started tearing the Explorer apart in October. I'll shoot for next weekend.


You're one heck of a business man!

I look forward to your updates on the 56' as well! I'll keep my fingers crossed that you have some nice weather this weekend too.


WELDING TIME!!! It's about time I got to get the new welder out and learned to use it. My good friend Bobby, who is an experienced welder, came over today to give me some guidance.

cwH9py8MJEF0sxRcKFfIUrlb2hUiUAZhgFpiFjubVexn=w276-h155-p-no


We had a trailer to practice on. It's for another friend who is going to use it to haul his motorcycle. I picked up 2 pieces of 1.5" angle iron and 4'X8' sheet of expanded metal.

_b4vR7daHdTFih2L2Ofte2DMI01Nq5nJikGesQgo94XU=w277-h155-p-no


I got to jump in and impressed myself with my "beginner's luck" first weld. After that, I went too fast, not enough coverage, and other problems that I had to learn to overcome. I am definitely not a pro yet, but I can now confidently weld some steel!!!

I started measuring the cab to get the metal started, but as the evening was approaching, daylight was fading quickly, so I wrapped it up. This is what I have so far.

The top piece measures 54" and sits perfectly across the top of the door/ceiling area.

FW2rG_VCLV74mrWc5y2yBM1nqbEam4tXie2Sx77QFN9S=w288-h162-p-no


The bottom door pieces measure 36" and will support the bottom while giving enough clearance to allow cutting out the floorboard.

IMG_20140320_193633_915.jpg


IMG_20140320_193708_863.jpg


IMG_20140320_193734_911.jpg


IMG_20140320_193745_609.jpg


These pieces have not been welded in place. I still need to make additional cuts for the other points. Once I have the next pieces cut, I'll give more details of the plan, measurements, and photos.

There are several considerations to be made as I intend on using the Explorer floorboard and firewall. Once the old parts are removed, the cab may flex, buckle, weaken, or lose it's intended shape. By placing the metal pieces strategically within the cab, it will help reduce the chance and severity of that happening.

The plan is to have two horizontal door pieces to keep the gap correct for the door. Two going across for the width and squareness of the front part of the cab. And two from the cab's rear ceiling that will angle down towards the front to attach to all of the pieces on both sides to tie it all in together.

I didn't get a chance to get over to Harbor Freight yet for the welding cart or any other tools that I need. Maybe this weekend will get a FORECAST CHANGE..... rain is in it. :( 
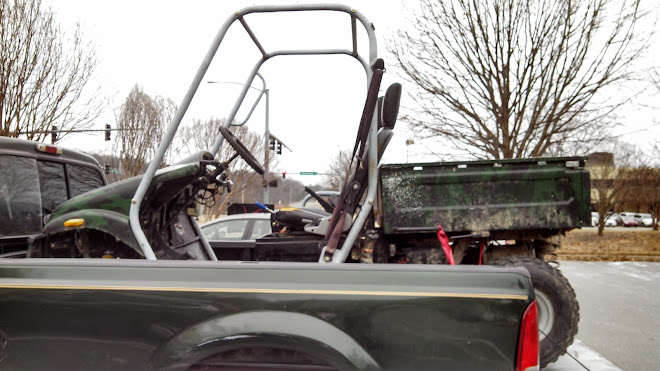
At least I had a great day to get started and get some real hands-on time with what I do have!


Keep up the good work. One of the few guys I've seen with more projects going at once than I have.


Keep up the good work. One of the few guys I've seen with more projects going at once than I have.

Thanks! My wife would hate to see how much I would try to take on if I didn't have a full time job on top of all of this! I haven't even gone into my shop plans and progress yet! Next week we are remodeling our son's room with, as you might guess, car stuff. More updates and pics soon!


Ok.... scratch off a few things I mentioned recently.

1: Kid's room remodel is postponed for the moment. Waiting on a few things.

2: Welding measurements and plans. See below for more info.

Last Sunday I was doing a brake job for a co-worker and went to AutoZone for parts. On my way back I saw this trailer in the ditch in front of my neighbor's house.

IMG_20140323_210305_164.jpg


They were piling junk on top of it. I stopped and asked if they were throwing all the stuff away. "Yes, take all you want! You may not want the trailer, one tire doesn't roll anymore." HA! $30 in new wheel bearings and the thing works like (kinda) brand new!!!

Although I had to buy a $5.00 1-7/8" ball, it was definitely worth saving and to find a use for it. Everyone I know said things like "gonna sell it, huh?" I couldn't argue, I probably would try to make a buck on it. I guess I am the opposite of a hoarder in a way. The trailer features a tilt function to most-likely load a lawnmower or ATV.

All of a sudden, I came up with an idea to use it for the '56 project. What better way can I do work on the cab and other parts, a stable platform to keep the structures square and off the ground, and portable enough to drag in and out of the shop. I could easily cut, grind, weld, repair, blast, paint, etc. right there on the trailer.

So, with that in mind, I had to change the structure of the welding cage I needed to build. That's why I now have this.

IMG_20140326_181721_232.jpg


IMG_20140326_181734_216.jpg


Measurements.... of course, may vary if you try to replicate this... are as follows.

Bottom of door - 38-1/2" x2 (goes all the way into the door hinge pockets)
Top of door - 36" x2 (welded in the latch area and welded to the top of the hinge pockets)
Vertical door beams - 17" x2 (just between those first two beams)
Horizontal beams across - 63" x2 (lateral support and ties everything in)
Stems from the trailer to the cross beams - 32" x4


I welded the supports into the cab yesterday.

IMG_20140326_181748_313.jpg


IMG_20140326_181758_383.jpg


IMG_20140326_181813_965.jpg


IMG_20140326_181804_943.jpg


IMG_20140326_181827_378.jpg


I bought 2 - 20 foot pieces of 1-1/2" steel "L" beams cut at the lengths nearly in half to accommodate the projected measurements I needed. It worked out perfectly. I literally have a 10" piece and a 16" piece left which I could add somewhere for additional support. (I also used an 11" piece on the previous trailer project.

Then I cut the floor out of the cab to allow me to "Flintstone" the cab by myself from the Explorer frame to the trailer this morning.

IMG_20140327_101735_637.jpg


IMG_20140327_103219_298.jpg


IMG_20140327_104645_348.jpg


1395937744665.jpg


IMG_20140327_124811_301.jpg


IMG_20140327_124819_682.jpg


I moved the cab into position on the trailer and started welding the stems onto the trailer first. Once I had two in position, I lifted the cab onto them, clamped the beams in place and started the other two. Once all four were in position, it was time to get some good strong welds to hold it all together. After all welding was in place, I tested the welds by rocking the cab back and forth, side to side..... SOLID!!!

IMG_20140327_130119_857.jpg


Just as I picked up my tools and wheeled the cab to the shop, down came a torrential downpour of rain. It couldn't have worked out any better than that!

Now I can easily do the work when and where I need to without having to worry about the Explorer frame being in the way. My neighbors drove by slowly staring at me :p

IMG_20140327_131122_110.jpg


Last thing, I used strong welds on the trailer, spot welds on the cab, this way when I am ready to mount the cab, there won't be a lot of work removing welds. I also made sure to intentionally weld where any damage to the '56 metal is not as visible and simple to clean up.


By the way, I've adjusted to welding well. The hardest part is getting through the initial nervousness. For those who haven't welded, but may have used a soldering iron, I guess it's somewhat similar. And it's like connect the dots in a way too. Definitely not a pro by any means, but I can make two pieces of steel stick together!!!


I turned the cab around in the shop to get a good position to remove the remainder of the firewall and floorboard. I'll post with pictures and additional info tonight or tomorrow. I'm still in the process of drilling out the welds of the firewall. I'm not cutting this front part because I may need to match the curves and line up the metal for any fill-in portions that I'll have. Once it's all removed, I'll store the pieces for later use.

Coming up soon will be cab repairs. Cab corners, roof, and a couple of other areas.

Be back soon!


After 93 welds were drilled out, the firewall is finally free after 58 years!

IMG_20140330_174003_037.jpg


IMG_20140331_241243_055.jpg


Before I removed the firewall, I knew that there may be some slight cab movement, so I measured and wrote the measurement on the cab. Good thing I did, because the measurement changed by 1/8". Not a huge change, but something to consider when it goes back together. Future cuts, modifications, and installation may cause even more movement. I will correct this by the time it's all said and done.

IMG_20140331_241808_820.jpg


I didn't quite plan out the trailer idea, but somehow feel lucky that the cab is well-positioned for weight distribution and height. It clears everything I need (so far) AND with the tilt feature, it made it so easy to get the top welds out without wearing out my arms.

IMG_20140330_174024_890.jpg


IMG_20140330_174045_084.jpg


IMG_20140330_225357_343.jpg


IMG_20140330_225435_137.jpg


I did, however, give my drill a workout. Hard to make out the smoke coming from it.

IMG_20140330_231414_601.jpg


That's a lot of welds!!! A couple of pieces of advice, I had better luck using the step-down drill bit over the spot weld remover bit. Less slipping, better control, easier work. There will always be a few holes that do not completely remove the welded areas, no matter the hole size, so using a flat screwdriver, chisel, or hard scraper can help motivate these areas.

IMG_20140331_241304_613.jpg


IMG_20140331_241316_361.jpg


I've had a couple of members ask me a few questions about this build and there have been requests for some measurements on the Explorer frame. One new member is building a 49 F1 contemplating using his 2000 Explorer frame and wanted the following info. I figured I'd share here for all to see in case there are others who would like to know.

Someone correct me if I'm wrong, but I would assume they would be basically the same from 1995-2001 (4-door 4x2 and 4x4 for these specific dimensions).

I meant to measure as soon as I got home, but a rogue rain hit on my way home and got distracted. So, the pics are dark and hard to see clearly from the flash, sorry for the delay...

Front frame, just behind the bumper brackets: 31-1/2" (outer width)

IMG_20140331_203229_908.jpg


Mid frame, just below the firewall: 30-3/4" (outer width)

IMG_20140331_203524_174.jpg


Rear frame, at the very end: 40-3/4" (outer width)

IMG_20140331_203624_794.jpg


If anyone needs any measurements that I haven't listed so far, please let me know. I'd be glad to help!!!


Advice for the night: MAGIC ERASERS!!! I have found a million uses so far (outside of the "recommended home use"), from removing sticky adhesive from glass, to removing rust from chrome bumpers. Recently I tested the plastic headlights on a minivan I worked on. Magic Erasers have a molecular structure to it that makes it mildly abrasive.... so don't use it on painted surfaces or anything fragile.

This was before.
IMG_20140323_020459_283.jpg


After wetting the Magic Eraser and rubbing in different directions and patterns.
IMG_20140323_021628_234.jpg


Don't spend $10 or more on headlight polish. Just get some toothpaste if you need to add some extra abrasiveness to it.


I ordered parts to repair the 56 cab; both rear corners and the passenger rocker panel.

0023.jpg


Order Details:

In Stock
Quantity Part # Description Price Amount
1 49-9020 CAB CORNER-LH 29.95 29.95
1 49-9021 CAB CORNER-RH 29.95 29.95
1 49-9069 ROCKER PANEL-RH 39.95 39.95
Parts Total: 99.85
Delivery & Handling: 18.75
TOTAL: $118.60

The same parts from Mid-Fifty was going to be $182.50, mostly because the shipping was $44 and $30 for an "over-sized part" charge. Perhaps I might miss out on the quality differences, but these are not vital parts to me, certainly not worth the extra charge.

Mid-Fifty ALSO wanted $15 for this simple piece of metal to fill in the fuel hole. (which I will not be using, as I will retain the Explorer fuel tank) So I will make do cutting and shaping my own piece of metal.

7734-19576.jpg


Shopping Cart

Product +Ship Core Price Qty Total
CAB CORNER, REAR DRIVER
Part Number: 7709-L $10.00 $0.00 $30.00
REMOVE

CAB CORNER, REAR PASSENGER
Part Number: 7709-R $10.00 $0.00 $30.00
REMOVE

ROCKER PANEL, PASSENGER BLACK
Part Number: 7729-56R $10.00 $0.00 $48.50
REMOVE

2014 CATALOG
Part Number: CATALOG 2014 $0.00 $0.00 $0.00
REMOVE


Parts Total: $108.50
Core Charges: $0
Oversize Charges: $30
Standard Shipping: $44
Sub-Total: $182.50

______________________________________________________

My shop plans are coming soon. I'm still contemplating the size I'm going with, but as a minimum, I will be adding at least 1,000 sq. ft. If you look at this pic, you'll see a truck, car, and trailer all within the width of the add-on I'm planning. three car bay, or maybe 2 with office/storage. We'll see what happens by then.

aAXG3JIBUrdcxKZwWVhFUp_pH2QhhPudzHwDwRLRmwJ6=w660-h371-no


Here's the rendering of my ideal add-on

0


Tomorrow I will leave work at lunch to go pick up a backhoe. Not only will I be using it to move earth towards the shop to build up the foundation, but I really need to try to get rid of the 20 stumps still left in my yard that I've been trying to burn over two years. There are piles of gravel, rock, and dirt that are lining one side of my property. Might as well take out two birds with one stone.

Although we have more rain in the forecast, it's not supposed to be too wet with weather in the upper 60's and lower 70's. These are the times I love..... minus the miserable allergies. It's always gotta be something, huh?!?!?!

More pics and progress by the end of the weekend. :)


Join the Elite Explorers for $20 each year.
Elite Explorer members see no advertisements, no banner ads, no double underlined links,.
Add an avatar, upload photo attachments, and more!
.


Appreciate the measurements. Don't think I'm going to be able to use the Explorer dash entirely, because the cab on my '49 is so narrow. Still watching this closely though, because I'm still planning on using as much as I can.


Back
Top