1956 F100 Explorer Chassis Swap | Page 13 | Ford Explorer Forums - Serious Explorations

  • Register Today It's free!

1956 F100 Explorer Chassis Swap


Join the Elite Explorers for $20 each year.
Elite Explorer members see no advertisements, no banner ads, no double underlined links,.
Add an avatar, upload photo attachments, and more!
.


Happy Easter everyone! In between yard work, house work, and family time, I've been working on the 56 cab body work.

IMG_20140419_112222_817.jpg


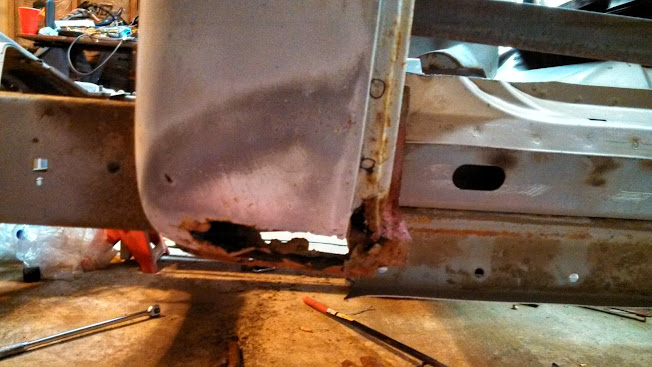
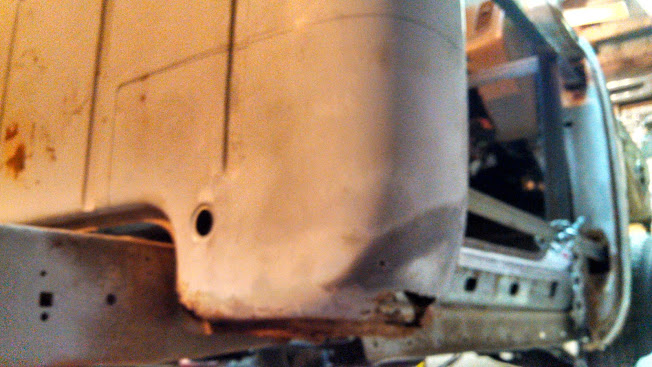
I took a closer look at the corners and realized that not only do I have damage throughout this entire area that the replacement piece covers, but it would be much easier to hide the welds AND keep the cut lines square.

IMG_20140417_225020_924.jpg


IMG_20140417_225049_641.jpg


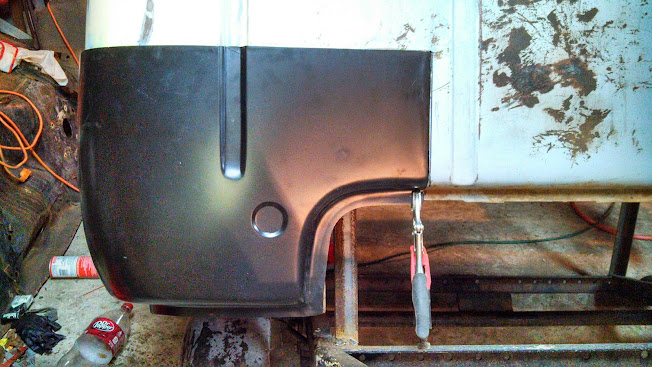
I placed the cab corner pieces in place to mark my cuts.

IMG_20140417_225416_903.jpg


IMG_20140417_225222_346.jpg


You can see that the inside edge is far enough inside (to the left) that the bed will hide that edge.

IMG_20140417_225138_448.jpg


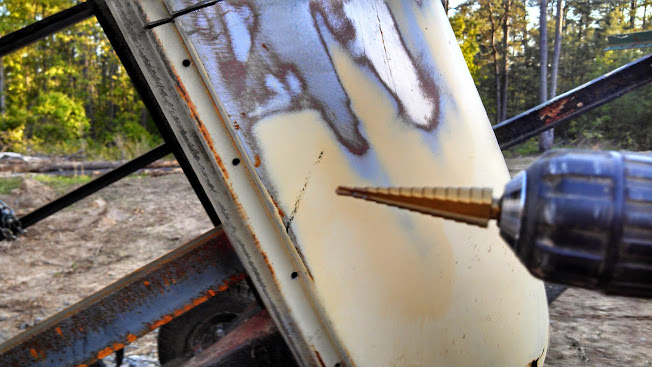
After marking the areas needing trimming, it was time to get the cab back onto the trailer to get some work done on it. I used the engine crane once again to lift it off to place back on the trailer for the last time. Because the welder could not be used in the shop, I drilled holes into the support beams to use bolts instead.

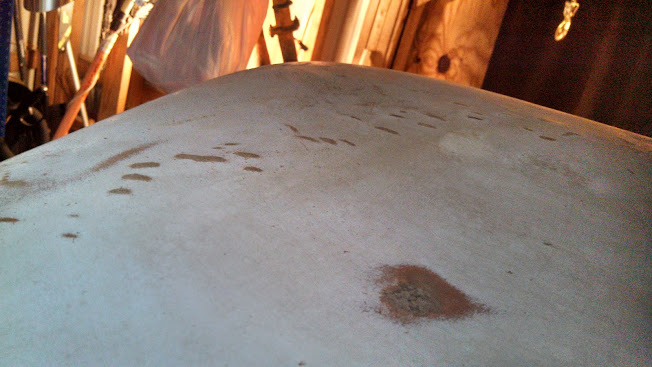
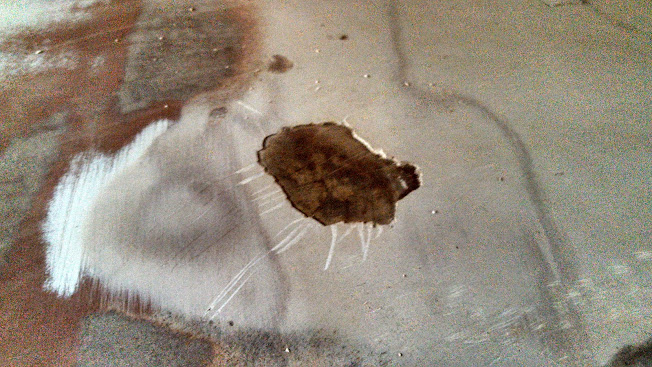
Once I wheeled it out, I decided to start on the area that would be hardest... first... the roof. In an earlier post, I explained that there were many dents that had been pounded from the inside. Over 50 were protruding and needed to be smoothed out. Not only that, but the other big dents that were still not pounded out made the roof flex easily. Just touching the top sounded like I was playing a steel drum, sounded like I was in Jamaica! Here is a playback of some of those pics.

IMG_20131204_242204_911.jpg


IMG_20131204_242242_231.jpg


IMG_20131204_242332_383.jpg


IMG_20131204_242523_447.jpg


IMG_20131204_242844_421.jpg


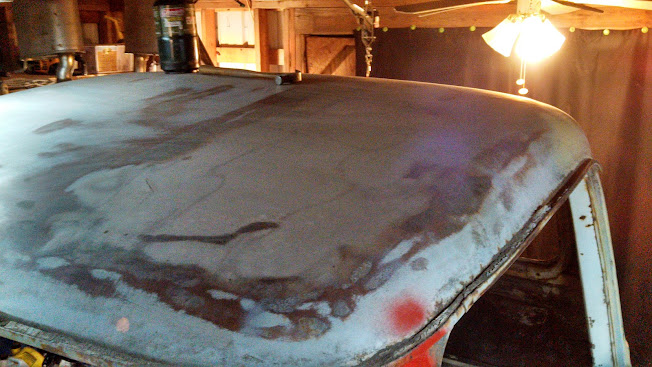
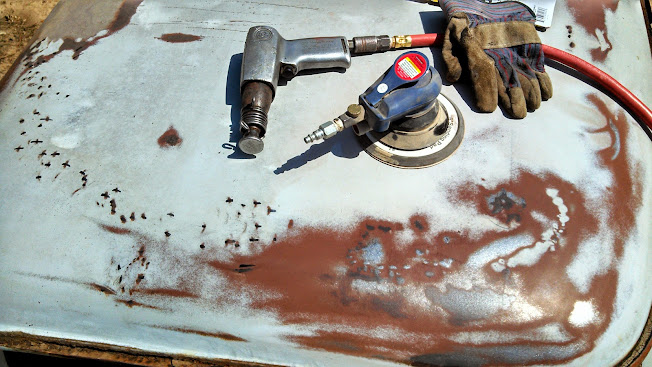
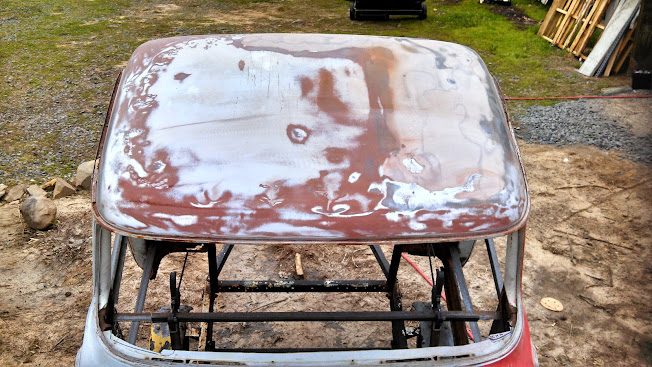
It took most of Friday to get it looking and feeling flat. I used an air hammer with a wide head and then sanded it to look for high spots. There are still some low spots that will need to be filled. I marked the high spots with a marker for better visibility.

IMG_20140418_140906_139.jpg


I decided that this would be a good time to clean up the drip rail to see what I am working with. Using this tool and a flat, thin, but hard scraper I pried out the old sealant.

IMG_20140418_182237_408.jpg


I felt like I was making love to the top; foreplay feeling it all up and down, massaging the metal back to original position, and finally pounding the crap out of it! :p Once I was satisfied, I went to sleep..... NO, just kidding, just kidding!

IMG_20140418_181928_097.jpg


I used a small handheld glass bead blasting gun to hit the rusted spots prior to sanding again.

I tested the flexibility of the roof, SOLID! It is no longer popping in/out. Once I was satisfied with the top, I needed to clear the dust and prep the panel to protect the steel from rusting. I used compressed air to blow off dust and vinegar mixed with water to wash the top. I probably used 10 paper towels until it wiped with no residue. Once cleaned, I used acetone to ensure no oils or contaminants were left on the surface before spraying primer.

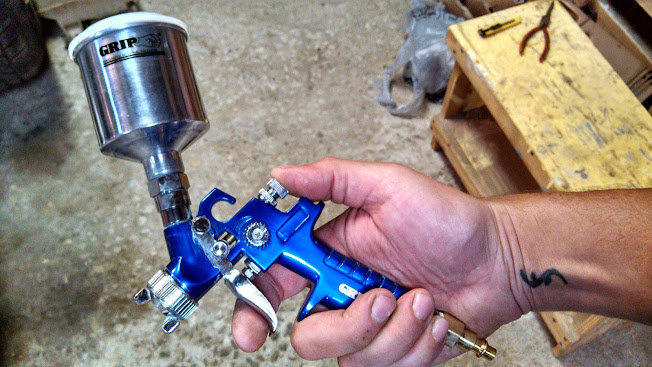
At the last minute, before I decided to use spray can primer, I decided to run to a body shop supply store. I got a small "touch up" gun to handle small areas at a time to help reduce waste and work on a section at a time.

IMG_20140420_205202_797.jpg


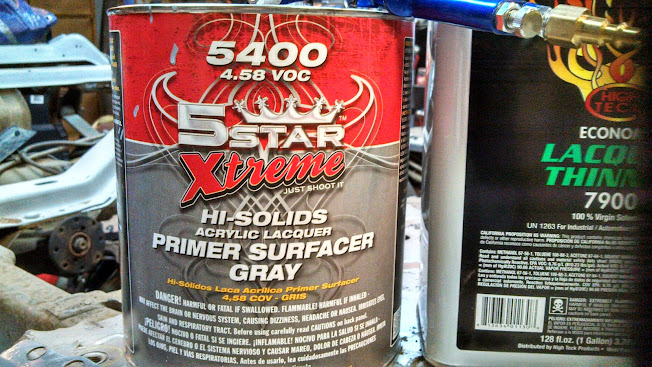
Because you mix this primer half and half with acetone, that means I'd have approximately 2 gallons of mix to spray.

IMG_20140420_204853_809.jpg


The sprayer, strainers, acetone, and professional primer cost $87. I believe it's enough to do the entire project, but this is my first time spraying paint, so we'll have to see.

IMG_20140420_204831_386.jpg


I would have rattle-canned it but all the online comments I found, plus my experience with drips and runs, kept me with using this process instead. Sure, I could have bought a few cans at a time to try to save a few bucks now, but when you add up the cost, I think it's relatively the same price or better in the long run. Just be sure to protect your respiratory system. Don't count on squinting your eyes and holding your breath!

IMG_20140420_204951_798.jpg


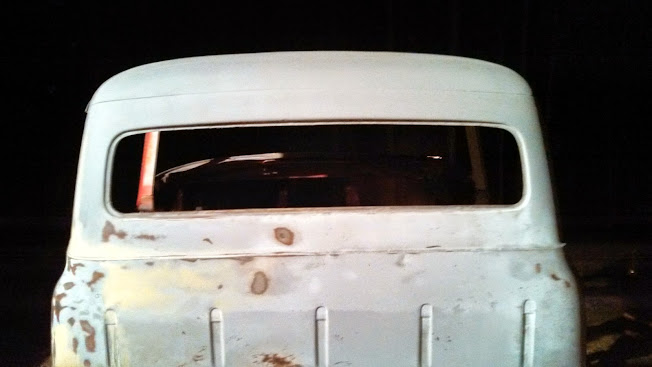
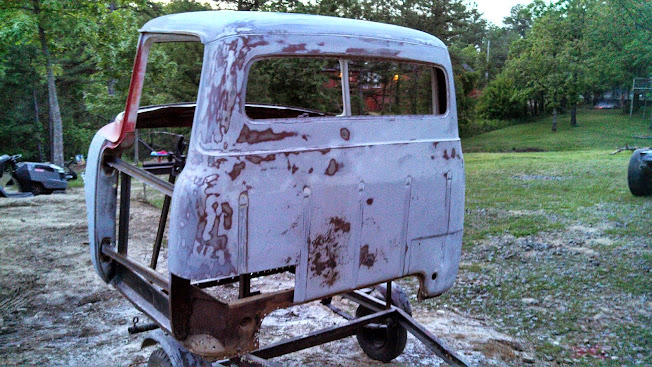
3 good "double" coats should be a good start. 10 minutes break between coats. I finished at dark. Here's the results.

IMG_20140419_014330_880.jpg


IMG_20140419_014315_812.jpg


Sorry, lighting wasn't good to get better pics or angles, I'll get more soon with close-ups.

Hope you enjoyed Easter with your family as much as I did!


Great Work

Hey Buddy,

I really enjoy looking at your pictures... I also have a 56 cab that I am interested in putting on my 2001 Mountaineer Frame. I had to take the mountaineer off the road because it needed over $2000 worth of work to get inspected. I look forward to your progress as inspiration...:)

I also have a 54 that I am working on and just bought cowl replacement panels from LMC to put on it... I was a little disappointed, the catalog says 53-56, but as you know the 56 cab is much different than the 54. I had to do a ton of working on them to get them even close to fit. They are about 1 in short of reaching the body line at the door and hood... They look like they would fit great on the 56, but just aren't right for the 54...

Recommendation on primer... I am using a laquer based hi-build primer.... I use fast evap laquer thinner. I bought a cheap gun from Harbor Freight, and mix enough to fill the gun each time. I leave it right in the gun and just take off the tip and put it in laquer thinner when not in use. Im not building a show truck, and I have never had any problems. I did the same thing with my 48 and the paint is almost 20 years old and still looks great...

Looking forward to pics of the latest progress.

Happy Easter

Scott G.
Delanson, NY


Thanks Scott! I guess I cannot imagine what $2000 of work would be for an inspection. Is it something you can't fix yourself? What about getting a donor Explorer/Mountaineer to swap parts from to save $$$?

I'd love to hear more about your progress as well as pics (for others to see too) especially the cowl process that you endured. Do you have any links to see what you're doing?

Thanks again!


OK, it's been nearly a week since my last post.... it's time to catch up on my progress. In fact, I will save part of my progress for tomorrow night. I was outside most of my "new weekend." My work schedule has changed, so I am now off Friday and Saturday.

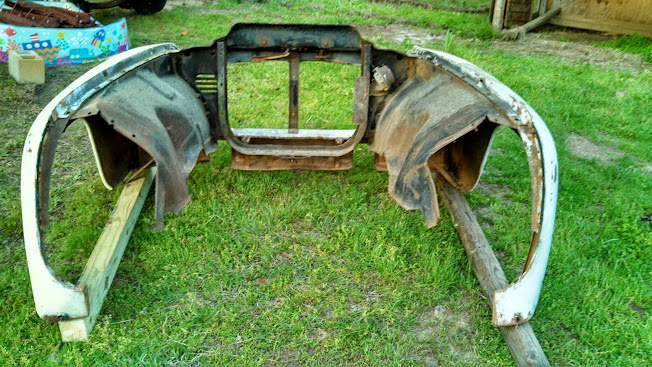
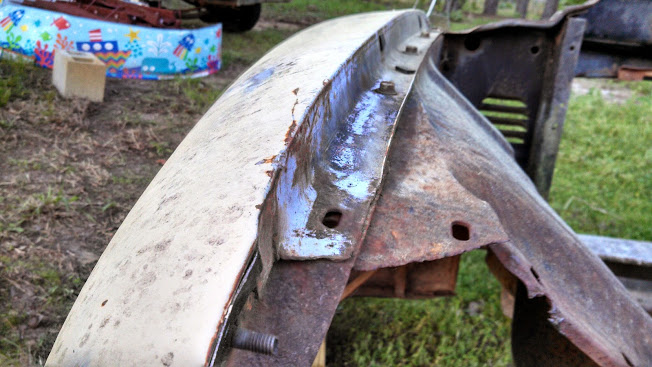
I spent much of this past week, again, just staring at the Explorer chassis, but this time specifically on the inner fenders. Because I had the opportunity to set the hood onto it, I realize that it would sit too low to save more than a small sliver of mounting space, so it will be necessary to use the 56's inner fenders. On a previous post, there was a blue 56 that was built with what appeared to be the Explorer radiator mount/support panel and assume that there are other "saved" chassis parts from under the hood.

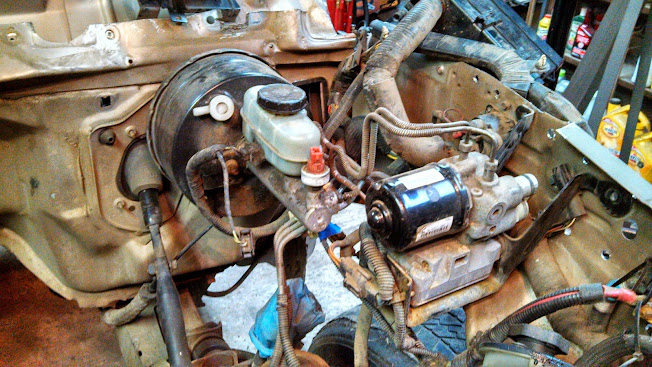
After removing the major components on the passenger side...

2ObGZMLDUw47Q8MVeRZN9kcUL7V5tzfPDmji_Dk9_Gw1=w653-h367-no


IMG_20140425_245216_116.jpg


I took one look at the driver side and the complex wiring routes (and how late it was getting) so I took a bit of a shortcut.

IMG_20140425_245321_865.jpg


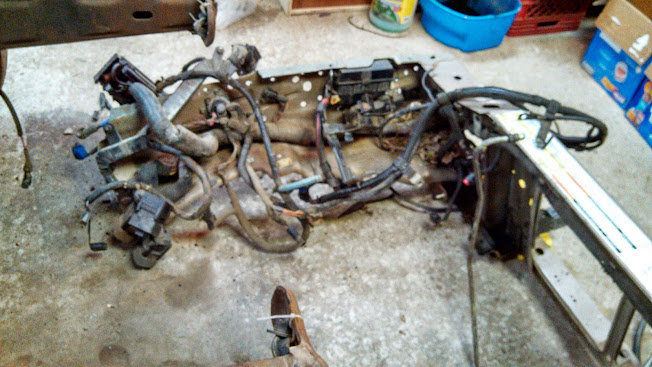
So.... I decided to take the whole front end off! Luckily I sprayed the front cab spots on the inner fenders, this made it easy to determine where I needed to cut to insure enough material to weld the cab to.

IMG_20140425_010805_958.jpg


I left just a little bit extra for "just in case"

IMG_20140425_012440_766.jpg


Boo ya, there it is! Once the front clip is in place, I'll easily be able to remove each piece and fabricate new locations on it's older counterpart. I'll leave this all together until then. There was very minimal connections to remove from the frame. Speed sensors on each side, a vacuum line/system, and a bracket that was bolted to the frame.

IMG_20140425_013935_196.jpg


IMG_20140425_010321_530.jpg


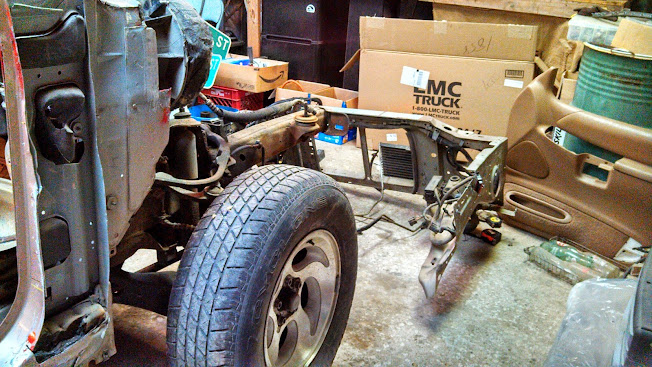
This is what is left, in all it's glory.

IMG_20140425_013950_807.jpg


IMG_20140425_014055_134.jpg


I used a 2x4 to hold up the brake system. I don't want to "break the brake" connection yet, as it may be necessary to roll it around and need it to stop. I don't trust parking brakes 100% on ANY car.

IMG_20140425_014516_688.jpg


I started degreasing the frame, but have much to do here to clean it up like I want. I will be using a pressure washer (borrow from my in-laws) and get all the hard to reach areas.

IMG_20140425_021427_931.jpg


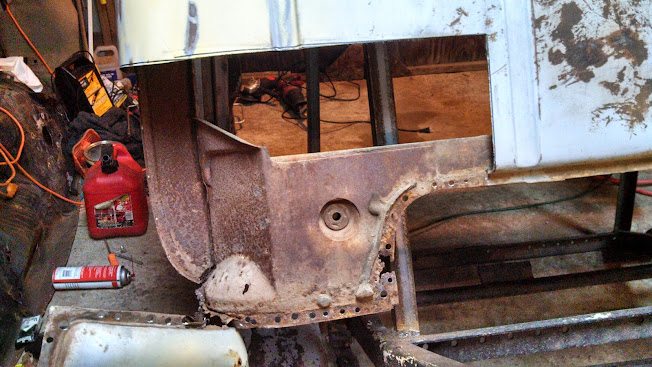
Back over in the cab department, it was time to remove the cab corners. I started by cutting along my marked edges (triple checking the accuracy first, of course) then drilling out the welds with the step-down bit. I gently pried with a screwdriver to make sure I drilled out the full weld. The step-down bit offers the ability to "go one more step" without changing bits. I really am an advocate for these tools.

IMG_20140425_191117_547.jpg


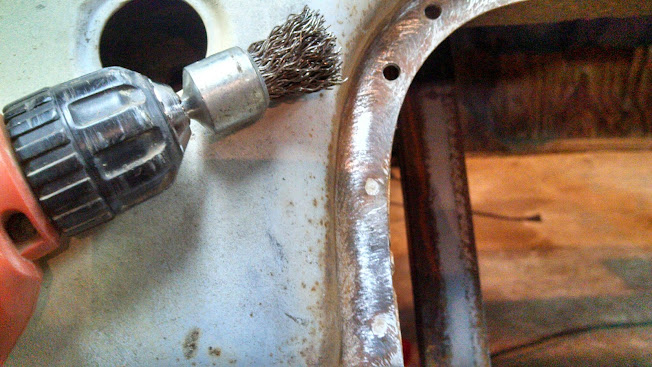
Using a wire brush attachment helped locate the welds. It basically left paint in the pocket that didn't scrape away. I've mentioned other ways of doing this in the past on a darker color. This worked better on the lighter paint.

IMG_20140425_233626_469.jpg


One down...

IMG_20140425_235224_066.jpg


IMG_20140425_235235_164.jpg


Now I have a different thought about the cab corners. They will need to be stretched, bent, man-handled, and cussed at before they look right. I had no idea. This is the first time I've ever done any panel replacement. I will be welding these on, but first I'll need to get the proper gas and welding wire to work with body parts. Since this metal is much thinner than most steel welding I've done so far,as well as an earlier post by Fordkid88, you will not want to use flux core welding wire on body panels.

IMG_20140426_241656_759.jpg


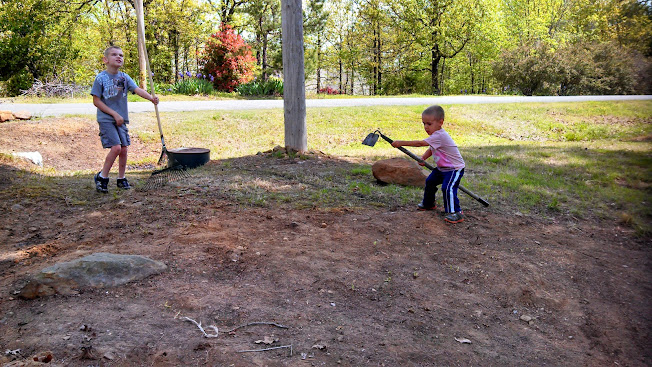
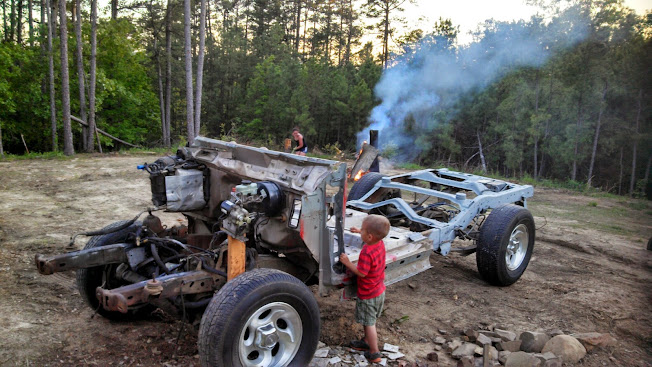
As soon as I rolled it out of the shop, (with brakes :) my kids became inquisitive.

IMG_20140425_193359_568.jpg


Yeah, there are plenty of sharp edges, gotta teach them young what they can/can't touch! Please don't let your kids play around dangerous things like this without close supervision and direction.

IMG_20140425_193412_609.jpg


IMG_20140425_193449_798.jpg


IMG_20140425_193512_269.jpg


IMG_20140425_193546_462.jpg


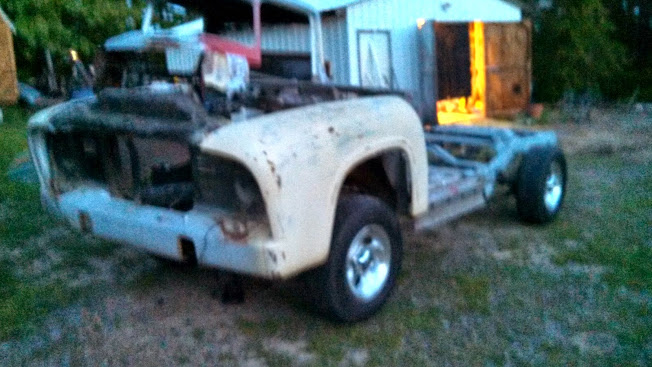
Some yard deconstruction required me to remove the front clip. High winds tore the roof off a small shed, had to tear down half of it and didn't want this to get damaged.

IMG_20140425_193623_345.jpg


Close-up view of the driver POV down the length of the fender/inner fender.

IMG_20140425_193631_978.jpg


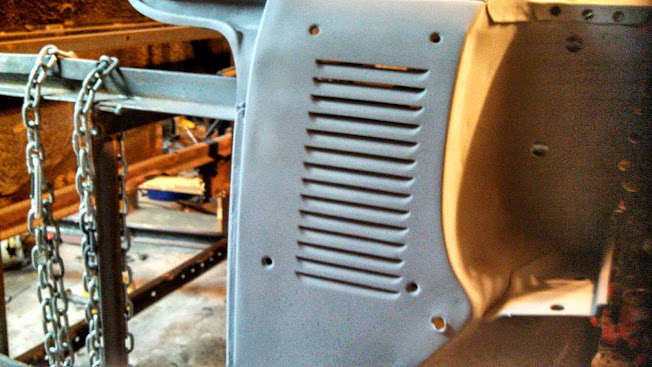
Comparing that to the earlier picture with the sprayed Explorer inner fender, you can see how low the fender will actually be and why I'll need to use this.

IMG_20140425_193653_547.jpg


Ain't she pretty even without any jewelry?!?!?!

IMG_20140425_193710_232.jpg


Dang, I thought this picture came out better, otherwise, you can see how this might look, minus the fact that it will sit down 10" or so.

IMG_20140425_201102_291.jpg


More to come soon!


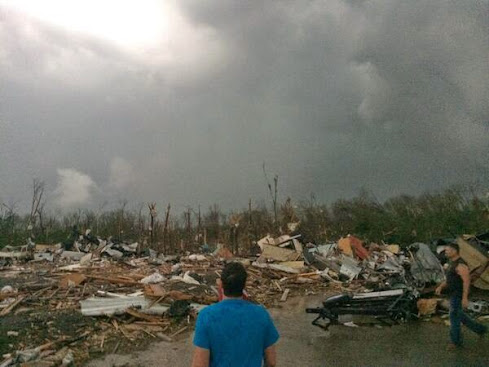
Tonight the 56/Explorer came closer to death than I would ever want again. A tornado started nearby, ripped through a subdivision just down the street, and left a trail of destruction over 30 miles long. Hundreds of homes completely flattened. +10 confirmed deaths, last I heard. All you could hear outside since 7:30pm were the sirens of Police, Ambulances, and Fire trucks. Too close for comfort!!!!!!!

download_20140428_001038.jpeg


I realized after going back to last night's post I had been a bit vague on some details. If you would like any measurements, diagrams, or any other info on this project, please let me know.

Tonight I want to describe the primer job. Prep is everything, right??? Don't use thin plastic (like Solo cups) to mix the thinner and paint together. OOPS... Don't overfill the cup. AND do not, under any circumstances, try to rush yourself (or let others rush you). Take your time and do it right. Priming isn't the top coat, but screwing up here can cost you later costing more time and risk the finish. I just hope I'm doing it right.

IMG_20140426_195352_705.jpg


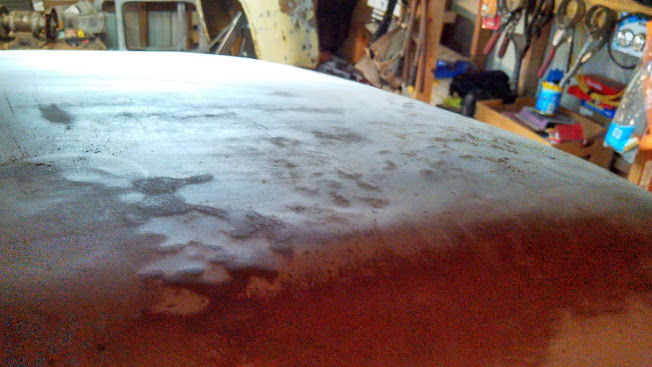
I was alarmed by the way the primer started looking after 3 coats. Maybe someone knows a little more about this than I do, but from my first experience, the paint started to appear to have turned into popcorn ceiling material. My assumptions are that this is ok and will smooth out easily when doing a final sand prior to paint. This is what it looked like and a diagonal swipe of my finger easily knocked most of it down to a smoother level. I can imagine wet-sanding this with a very fine sandpaper will make it shine like like a jewel.

IMG_20140427_222456_298.jpg


It's almost like particles were drying up as it was making contact with the body. OR, I am doing something wrong. Another item I'm struggling with, are the grooves where the panels meet. I've sandblasted, scraped, and hand-sanded these grooves (some of which were previously filled with Bondo) and I want to bring back the factory or better look to these areas. Any professional advice from anyone?

IMG_20140427_222810_936.jpg


The "popcorn-ing" can trick your eyes, appearing as if there are dents, which they are not.

IMG_20140427_222604_019.jpg


Three newly-discovered dents have surfaced that I found after priming. Can you spot them?

nvFptrHys8pVPSTmV_7bt9SAlep9q_mkbzWZQG3Mol17=w630-h367-no


I'll be repairing those soon. The only places still needing to be sanded and primed will be the front nose, upper windshield pillars, and interior. Kind of hard to get into all the inside stuff, guess I've been putting it off. After all the priming is done, a little more bodywork will commence with as little body filler as possible.


Heard the news of the tornado this morning. My heart goes out to all of those affected. Glad to hear you are ok buddy.


Good to hear your project is still going and more importantly you and your family are alright.


[MENTION=9927]MONMIX[/MENTION] please take a look at post 246, the "popcorning".

Looks like it's going on to dry to me... I've never shot acrylic lacquer.


Primer and spot weld cutter

Hey Buddy,

It looks like there is water drops trapped in the primer. Being you are getting so many storms is it high humidity? Try using a fast evaporating thinner, and shoot lighter coats...

I also tried the Step drill. But broke down and bought a decent spot weld cutter at the autobody store. I also bought one at harbor freight for 4 bucks and it worked just as good. A spot weld cutter works better because it doesn't make swiss cheese of the panel below, where most of the time you can't plug weld the holes because you can't get at them... important note with a spot weld cutter, drill on super low speed and make sure you have a good dent punched so the point doesn't jump out of the hole. When it jumps out, it breaks a tooth and them peels them all off...

I cut off my front cowl corners last weekend, it took me like two hours to do the first side, then 15 minutes to do the second, after I knew what I was doing...
10292140_657771887604722_2112507784049615218_n.jpg


1497473_657771934271384_7949847889310277527_n.jpg


I was a little upset, they sent me corners for a 56 and they fit like crap on a 54... as you can see, I have to make a 1" piece at the top and have to bend the door edge to make them fit.

Scott


Thanks Sluggish and Fordkid88! Glad we were spared, the damages were much more than first estimated!

AHA!!!! Scott, I never suspected moisture, but now that I think about it, I remembered that when I was blowing the dust off to prep for spraying, there was a bit of liquid coming out of the spray nozzle, which I expected to be reduced with all the addiditonal usage. I can't seem to drain my compressor completely because of rust particles (chunks) that are in it's old tank that clog the hole. Perhaps I may invest in a separator to trap the water. I will eventually get a newer compressor.

Wow, I would have thought that the 53-56 all had the same size front cowls, but this is enough of a difference that I might consider a return.

I purchased both the step bits and weld remover bits from HFT on the same day, and I wore out two weld bits. It didn't seem to take long to feel the bits losing their "bite" so I started using the step bits for areas that I felt like I could reach both sides by welder and wouldn't be affected by cutting all the way through. It seemed to save me a lot of time and not as much need to indent the initial point. I definitely lost a few teeth by going too fast with them. That's what I get for trying to hurry.

I have been having some down time on the project with the extra events, weather, and other items I've needed to focus on. I will post more by this weekend. Thanks for all the replies and tips everyone!!!!


Primer Problems

Those inline filters work pretty well too...If it isn't moisture or humidity...Try doing just the opposite and get slow evaporating thinner. It could just be drying too fast and the popcorning is just from going on too dry...

I tried sending the cowl repair panels back... But they only make them specifically for 56 and list them 53-56... They dont make them specifically for the 54...

Must be since the 56 is the more desirable year... we lower class 54 owners have to make them fit...:( I will send some pics of my modifications... They look pretty good now..


I just wanted to submit a quick post to let everyone know I'm still here and moving forward. This time of year there's so much to do with yard work. When I started this project heavily, leaves were falling and I didn't do much to keep up with them as I was focused on this. Now I'm facing the consequences; raking in May. :thumbdwn:

In between late arrivals home due to heavy traffic caused by the tornado (everyone who has decided that they want to go see the damage for themselves) that has doubled my travel home and my wife studying for her semester finals, progress came to a stand-still. I have several other excuses/reasons why I haven't posted much progress lately, but I'll be back on track very soon.

I am steadily adding to my "to do" list and tool collection preparing for more work. I purchased an in-line filter to help with the moisture and other particles for (hopefully) a better spraying experience. I also went ahead and got more Sawzall blades :sawzall: and a larger capacity sprayer for only $10, couldn't pass up the opportunity to try it out and for this price I don't think that's bad at all!!!

7Qo8lk2MmiWanEd4fA-ZLxsw8WuxBP288Db8GLg4iu6T=w652-h367-no


These are decent for saving my hands from very minor scrapes and grease.

IMG_20140504_171749_058.jpg


Save these pics for your own use, Harbor Freight only needs the codes from the bottom. Save 'em to your phone!

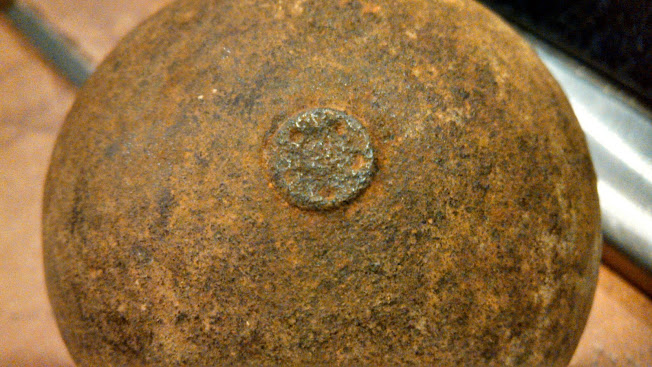
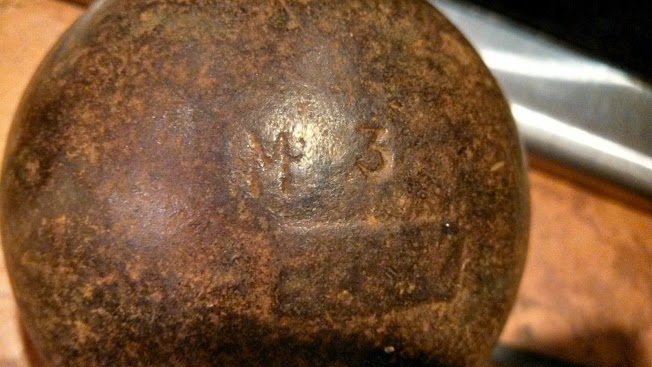
Here are my dad's rusty balls.... they are actually Civil War grenades that were never used, found just a few miles from Pea Ridge AR, a location that the battle of Pea Ridge was fought.

IMG_20140426_223542_401.jpg


IMG_20140426_223646_080.jpg


IMG_20140426_223735_057.jpg


If you or someone you know might know more about these, please PM me. My dad is looking to find more info on them and I thought I'd stick them on here for some visibility.

IMG_20140504_210518_405.jpg


Going to sleep now, I will post more soon!
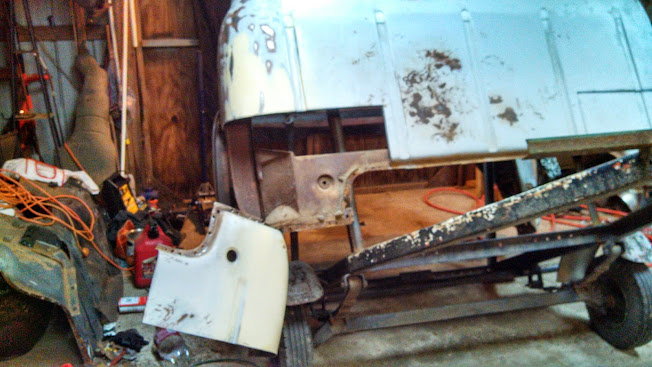


As a fellow 56 F100 builder I am kind of torn on this build... I love the amount of work and craftsmanship into the build and never heard of combining and explorer and F100 before, but IMHO it seems like you worked a lot harder than you had to to reach this point. I have a mustang II front end (tubular control arms, drilled and slotted rotors, will be on air ride) and a 4 link rear with a disc 8.8 (will also be on air ride) and I'm running a 4.6 DOHC out of a crown vic (which fills the engine compartment very nicely). It wil ride like a new car while still having the original frame, have plenty of power and still get good fuel economy. But none the less great work so far and excited to see the end result and how it all turns out!!


Those old grenades are cool! I've seen them before on civil war history shows, but never knew anyone to own any.


oops, wrong button


As a fellow 56 F100 builder I am kind of torn on this build... I love the amount of work and craftsmanship into the build and never heard of combining and explorer and F100 before, but IMHO it seems like you worked a lot harder than you had to to reach this point. I have a mustang II front end (tubular control arms, drilled and slotted rotors, will be on air ride) and a 4 link rear with a disc 8.8 (will also be on air ride) and I'm running a 4.6 DOHC out of a crown vic (which fills the engine compartment very nicely). It wil ride like a new car while still having the original frame, have plenty of power and still get good fuel economy. But none the less great work so far and excited to see the end result and how it all turns out!!

Thanks Blue! As much as I initially dreamed of doing so much more with performance, I really wanted to do this on a shoestring budget and keep maintenance similar to a common vehicle. I think that the deciding factor for using the Explorer, really fell on the ability to find almost any mechanical and electrical part I might need from any salvage yard in any town and not wait for a special-ordered item to be shipped to me. Besides the money I spent on the tools (which I hope to use on many future projects) and the time I've spent on it (which didn't cost me much) I have very little money in this and more importantly to me... have paid no one to touch it.

I have a long way to go, but I feel that I have come a long way. I've never done anything this challenging in my life! As much as I thought from the beginning that I was cutting corners by doing this, I have quickly realized that it has become more of a scenic route and learned a lot from the process. I hope that you will be impressed with the final product. :burnout:


Those old grenades are cool! I've seen them before on civil war history shows, but never knew anyone to own any.

Yeah, I never thought that they used grenades 150 years ago, and NEVER imagined they would be in my possession. There's very little info on the web for this size (3") and style. I would love to put them in a display case as a conversation piece, but my dad is looking for me to sell them in the future. I just might be on a future episode of Pawn Stars!!! Submitted the email for consideration. :cool:


Join the Elite Explorers for $20 each year.
Elite Explorer members see no advertisements, no banner ads, no double underlined links,.
Add an avatar, upload photo attachments, and more!
.


I like this thread , All the great info , helps when I have a 53 In my backyard thats been mine since I was old enough to drive legally lol , Drove it daily back in mid 2003 for about 6 months , then it sat off and on since about 3 years ago when I was able to try and get it going again , but the old 2 barrel carb on the 69 302 in it is toast
DSCF6095.jpg


Back
Top