Spudhut
US Navy Submariner
- Joined
- August 14, 2017
- Messages
- 674
- Reaction score
- 228
- Location
- NW Arkansas
- City, State
- Bentonville, AR
- Year, Model & Trim Level
- 1997 Explorer Sport - 4x4
- Callsign
- KG5SPB
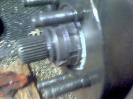
Example of 4R70W shift solenoids available on eBay.
4R70W Transmission Solenoid Package Shift TCC Lock-Up EPC AODE Kit Set 1998-2004 715776776287 | eBay
Will this kit also work on 97' models with 4R70W?
Would it be also good to complete a spring refresh while the pan is dropped?
BCA DIY AODE, 4R70W, 4R75W AND 4R70E JMOD KIT 1996- PRESENT