-
Ford Explorer Community - Maintenance - Modifications - Performance Upgrades - Problem Solving - Off-Road - Street
Explorer Forum Covers the Explorer ST, Explorer Sport, Explorer Sport Trac, Lincoln Aviator,
Mercury Mountaineer, Mazda Navajo, Ford Ranger, Mazda Pickups, and the Ford Aerostar
Register Today It's free!
You are using an out of date browser. It may not display this or other websites correctly.
You should upgrade or use an alternative browser.
You should upgrade or use an alternative browser.
RockRangerII Refresh
- Thread starter RockRanger
- Start date
Elite Explorer members see no advertisements, no banner ads, no double underlined links,.
Add an avatar, upload photo attachments, and more!.
turboexplorer
Elite Explorer
- Joined
- August 23, 2008
- Messages
- 1,922
- Reaction score
- 41
- City, State
- Eagle Mountain, UT
- Year, Model & Trim Level
- 98' XLT 5.0L 4X4
- Callsign
- Turbo
Love all the little fab pieces. Some great ideas!
- Joined
- January 14, 2001
- Messages
- 6,187
- Reaction score
- 292
- City, State
- Fresno CA
- Year, Model & Trim Level
- 86 ranger no more
- Callsign
- KK6TDL
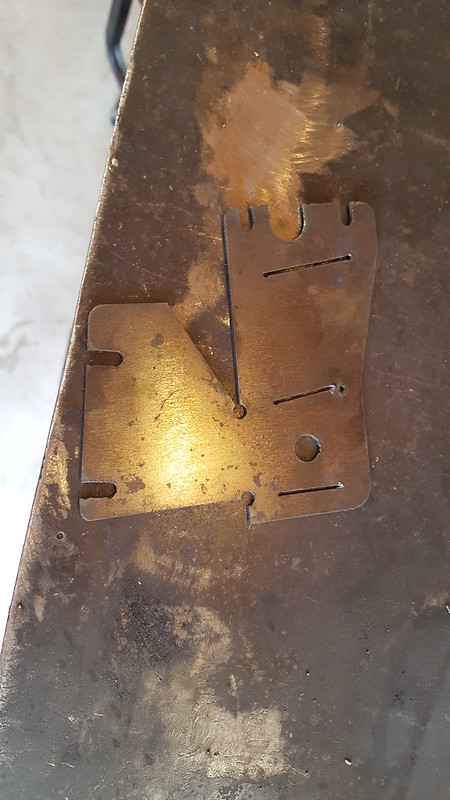
While searching on Amazon I found some $19 LED pod lights so I decided to give them a try. I needed mounts so I decided to try the bottom of the windshield. I drew up a bracket and cut them out.
 20150929_111335 by Matthew Dresselhaus, on Flickr
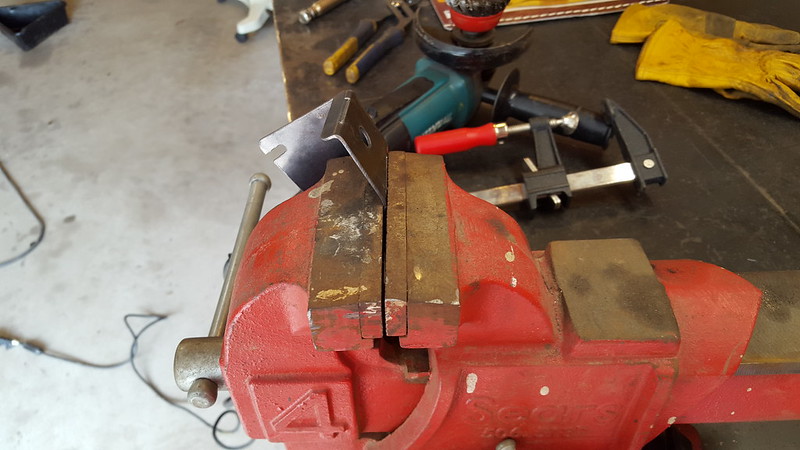
Not having a decent way to bend metal I resorted to a hammer and vice. The cut lines in the bracket help to line up the bend points.
 20150929_111521 by Matthew Dresselhaus, on Flickr
Two brackets mirror images of each other for each side of the truck.
 20150929_134400 by Matthew Dresselhaus, on Flickr
Lights mounted up.
 20150929_175939 by Matthew Dresselhaus, on Flickr
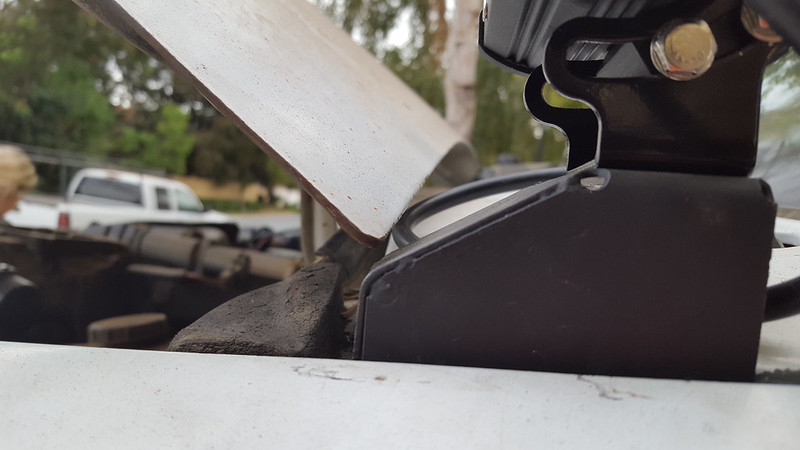
Hood clears all the way through normal motion. I still need to wire and aim them. If I decide I like them I have a few ideas for improving these mounts that I will implement into version two.
 20150929_175656 by Matthew Dresselhaus, on Flickr
20150929_111335 by Matthew Dresselhaus, on FlickrNot having a decent way to bend metal I resorted to a hammer and vice. The cut lines in the bracket help to line up the bend points.
20150929_111521 by Matthew Dresselhaus, on FlickrTwo brackets mirror images of each other for each side of the truck.
20150929_134400 by Matthew Dresselhaus, on FlickrLights mounted up.
20150929_175939 by Matthew Dresselhaus, on FlickrHood clears all the way through normal motion. I still need to wire and aim them. If I decide I like them I have a few ideas for improving these mounts that I will implement into version two.
20150929_175656 by Matthew Dresselhaus, on Flickr- Joined
- January 14, 2001
- Messages
- 6,187
- Reaction score
- 292
- City, State
- Fresno CA
- Year, Model & Trim Level
- 86 ranger no more
- Callsign
- KK6TDL
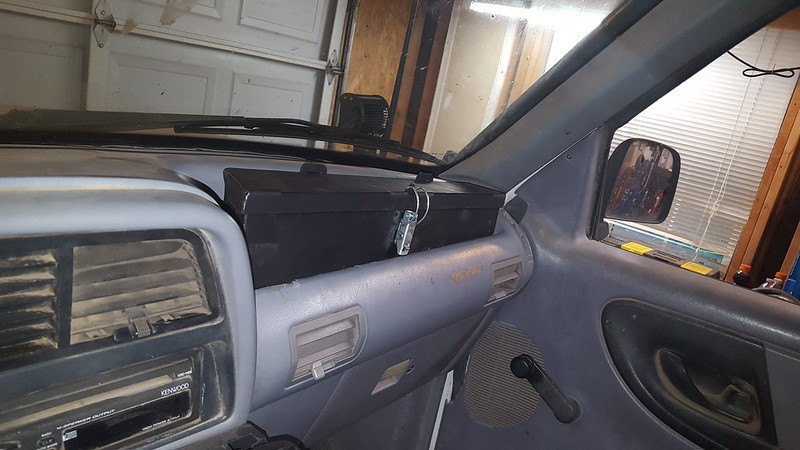
In my quest for more storage spots on the truck I turned to the dash. The 89-94 ranger and 91-94 explorers have a nice flat spot on the dash that is fine to hold pens on the highway but nothing stays there when off road. I decided to build a box to fit in this area.
Little time with cardboard and the computer and I had this drawing.
 dash box by Matthew Dresselhaus, on Flickr
After cutting it on my plasma table I started to make the necessary bends. I need a finger brake as this was what I came up with to make a few of the bends.
 20150929_142010 by Matthew Dresselhaus, on Flickr
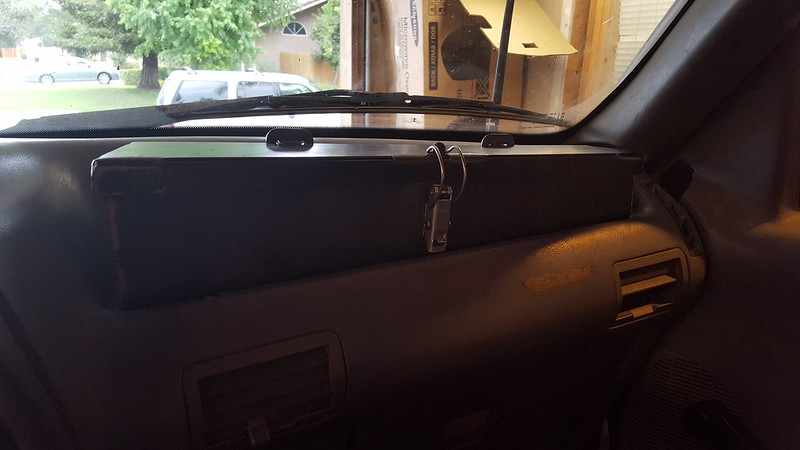
Here is the box in position. To mount it I drilled two holes through the bottom and thru the dash. I dropped the glove box which gave me the room to put a fender washer and nut on the bottom to mount it. I had to grind a bit of the latch to allow it to clear the dash.
 20150929_161041 by Matthew Dresselhaus, on Flickr
Little time with cardboard and the computer and I had this drawing.
dash box by Matthew Dresselhaus, on FlickrAfter cutting it on my plasma table I started to make the necessary bends. I need a finger brake as this was what I came up with to make a few of the bends.
20150929_142010 by Matthew Dresselhaus, on FlickrHere is the box in position. To mount it I drilled two holes through the bottom and thru the dash. I dropped the glove box which gave me the room to put a fender washer and nut on the bottom to mount it. I had to grind a bit of the latch to allow it to clear the dash.
20150929_161041 by Matthew Dresselhaus, on Flickr- Joined
- September 1, 2002
- Messages
- 14,121
- Reaction score
- 1,729
- City, State
- Lake View Terrace, CA
- Year, Model & Trim Level
- '91 Navajo '99 X '19 Rngr
OK, now that is cool. I always wondered why Ford built that flat spot that holds nothing.
DUH! So you know Dino's are coming!
 :JP:
:JP:Kirby N.
Elite Explorer
- Joined
- February 6, 2001
- Messages
- 2,655
- Reaction score
- 466
- City, State
- Colorado Springs, CO
- Year, Model & Trim Level
- 1991 Ranger
Super cool Matt. I love the box idea. With my 60/40 bench seat I don't have any cup holders in my ranger. It is super annoying sometimes. I have considered doing something about it, but never thought of that.
- Joined
- January 14, 2001
- Messages
- 6,187
- Reaction score
- 292
- City, State
- Fresno CA
- Year, Model & Trim Level
- 86 ranger no more
- Callsign
- KK6TDL
Couple better pictures of the dash mounted box.
 20151001_174911 by Matthew Dresselhaus, on Flickr
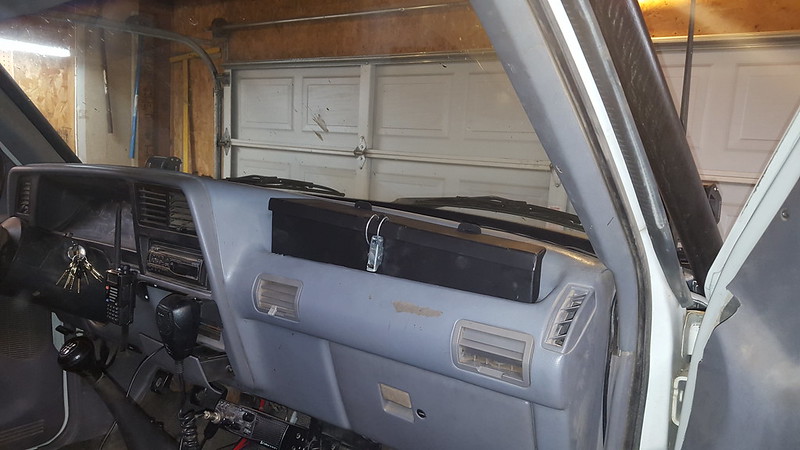 20151001_174844 by Matthew Dresselhaus, on Flickr
20151001_174911 by Matthew Dresselhaus, on Flickr20151001_174844 by Matthew Dresselhaus, on Flickr- Joined
- January 14, 2001
- Messages
- 6,187
- Reaction score
- 292
- City, State
- Fresno CA
- Year, Model & Trim Level
- 86 ranger no more
- Callsign
- KK6TDL
Added some cheap amazon lights for rock lights. See how well they hold up.
 20151002_195130 by Matthew Dresselhaus, on Flickr
- Joined
- November 29, 2000
- Messages
- 10,662
- Reaction score
- 5,060
- Location
- USA
- City, State
- San Diego, PRofK
- Year, Model & Trim Level
- 1994 XLT
My rock lights were off ebay. I think the total was $12.00
Have ten more for spares that were less than $10.
Have ten more for spares that were less than $10.
- Joined
- January 14, 2001
- Messages
- 6,187
- Reaction score
- 292
- City, State
- Fresno CA
- Year, Model & Trim Level
- 86 ranger no more
- Callsign
- KK6TDL
6 for 9 bucks. The wire and connectors cost me more than the lights
- Joined
- January 14, 2001
- Messages
- 6,187
- Reaction score
- 292
- City, State
- Fresno CA
- Year, Model & Trim Level
- 86 ranger no more
- Callsign
- KK6TDL
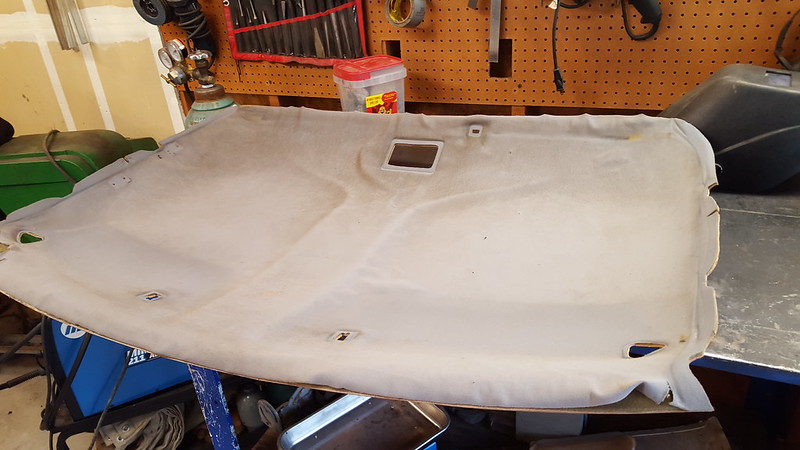
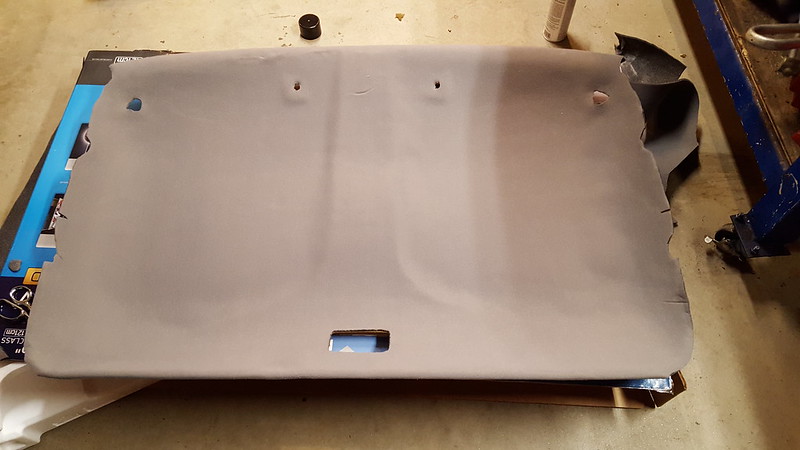
The old headliner was nasty and falling off.
 20151102_154506 by Matthew Dresselhaus, on Flickr
My first trip to Joanns fabric with my wife and $26 later we walked out with Adhesive and new material. Stripped the old material off and glued the new material on.
 20151102_173144 by Matthew Dresselhaus, on Flickr
Installed in the truck.
 20151102_185936 by Matthew Dresselhaus, on Flickr
I also added a switch to the clutch start switch. With the switch off you have to push the clutch in to start the truck. Flip a switch and it will start in gear.
20151102_154506 by Matthew Dresselhaus, on FlickrMy first trip to Joanns fabric with my wife and $26 later we walked out with Adhesive and new material. Stripped the old material off and glued the new material on.
20151102_173144 by Matthew Dresselhaus, on FlickrInstalled in the truck.
20151102_185936 by Matthew Dresselhaus, on FlickrI also added a switch to the clutch start switch. With the switch off you have to push the clutch in to start the truck. Flip a switch and it will start in gear.
- Joined
- September 1, 2002
- Messages
- 14,121
- Reaction score
- 1,729
- City, State
- Lake View Terrace, CA
- Year, Model & Trim Level
- '91 Navajo '99 X '19 Rngr
Defiantly helps with cage in there
Mine needs replacing....but there is only one way it's coming out, and it ain't going back in then.
Mine needs replacing....but there is only one way it's coming out, and it ain't going back in then.
- Joined
- January 14, 2001
- Messages
- 6,187
- Reaction score
- 292
- City, State
- Fresno CA
- Year, Model & Trim Level
- 86 ranger no more
- Callsign
- KK6TDL
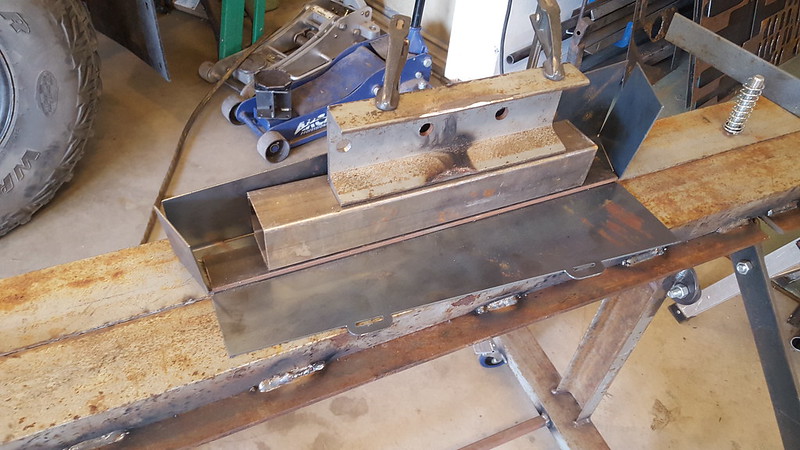
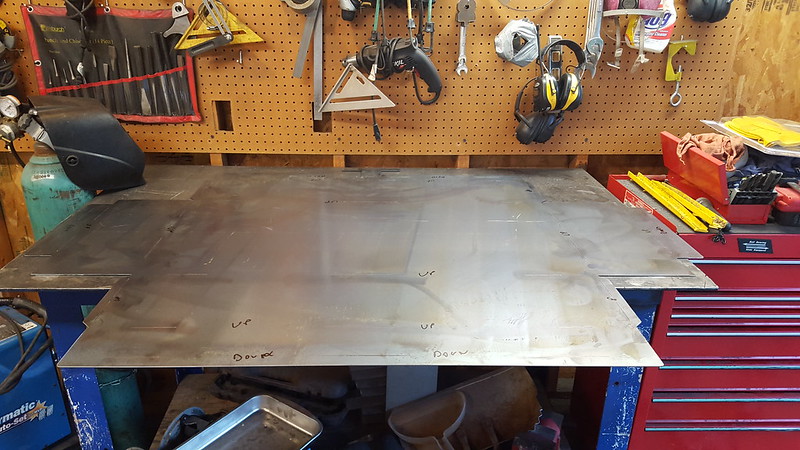
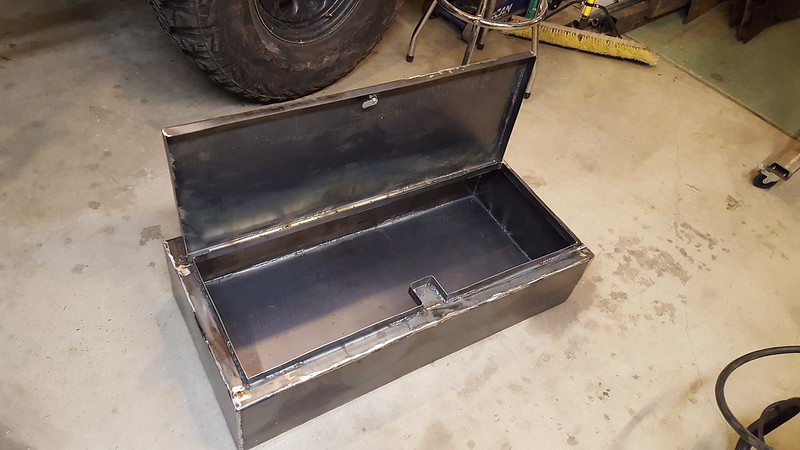
I haven't liked my plastic storage box in the bed of my truck. It is large on the outside and small on the inside. Another issue is I didn't have a good space to store my long side spare front shaft. I have alloy shafts but with a dana 44 and 37"s I still have my doubts on the strength. So I decided to build my own box. After some measuring and computer time I cut the shape of the box.
 20151106_164458 by Matthew Dresselhaus, on Flickr
If you look closely on it you can see where I wrote up and down for the direction each bend had to go. My biggest mistake is I should have made the relief cuts longer on the bend lines as I do not have a good way to bend metal. After a few hours with the help of Tracy I was able to get it all bent. A little more time with clamps was able to get it all welded together. I built a lid and used a piano hinge on the back. I still need to finish the lock and add a handle to it.
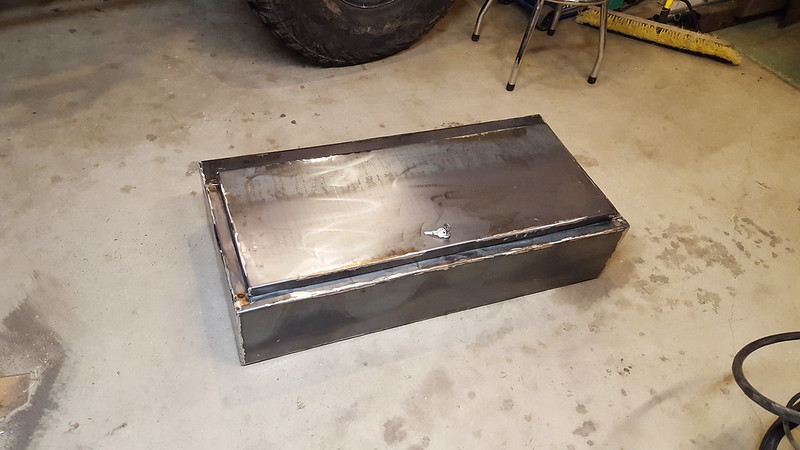 20151107_182127 by Matthew Dresselhaus, on Flickr
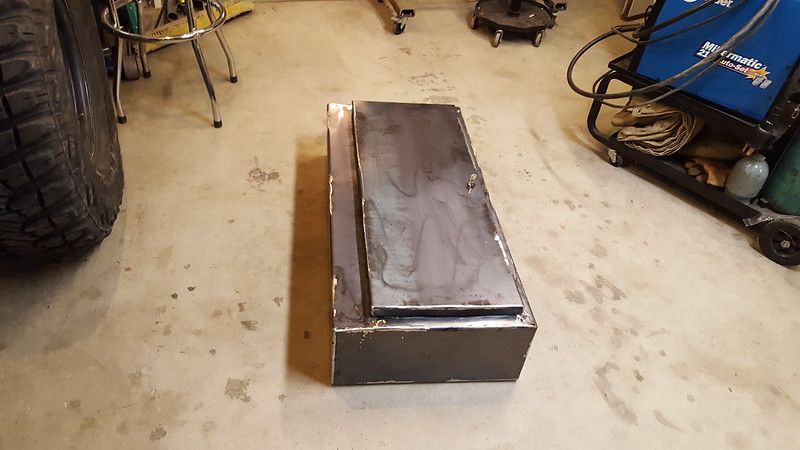 20151107_182133 by Matthew Dresselhaus, on Flickr
 20151107_182152 by Matthew Dresselhaus, on Flickr
20151106_164458 by Matthew Dresselhaus, on FlickrIf you look closely on it you can see where I wrote up and down for the direction each bend had to go. My biggest mistake is I should have made the relief cuts longer on the bend lines as I do not have a good way to bend metal. After a few hours with the help of Tracy I was able to get it all bent. A little more time with clamps was able to get it all welded together. I built a lid and used a piano hinge on the back. I still need to finish the lock and add a handle to it.
20151107_182127 by Matthew Dresselhaus, on Flickr20151107_182133 by Matthew Dresselhaus, on Flickr20151107_182152 by Matthew Dresselhaus, on FlickrFR-425
Used to be a road here.
- Joined
- November 21, 2013
- Messages
- 2,621
- Reaction score
- 114
- City, State
- Phoenix, AZ.
- Year, Model & Trim Level
- 1994 Explorer Limited
- Joined
- February 8, 1999
- Messages
- 35,545
- Reaction score
- 4,590
- City, State
- Wayoutin, Aridzona
- Year, Model & Trim Level
- '93 XL '20 ST
- Callsign
- AB7FH
Mine needs replacing....but there is only one way it's coming out, and it ain't going back in then.
I'm in the same boat. The fabric on mine is delaminating as well.
Your restoration of the headliner turned out great Matt

Elite Explorer members see no advertisements, no banner ads, no double underlined links,.
Add an avatar, upload photo attachments, and more!.
- Joined
- January 14, 2001
- Messages
- 6,187
- Reaction score
- 292
- City, State
- Fresno CA
- Year, Model & Trim Level
- 86 ranger no more
- Callsign
- KK6TDL
Gauge?
16 It is what I had. I probably would have done 18 if I was buying material. Once I get new seats
") I will get some 18 to build the center consul.
I will get some 18 to build the center consul. I'm in the same boat. The fabric on mine is delaminating as well.
Your restoration of the headliner turned out great Matt
Thanks. I was sick of how bad it looked. I plan on keeping the truck many more years so I figured I better make the interior a little nicer.
Explorer Features


Explorer Features
Similar threads
- Replies
- 642
- Views
- 113,157
- Replies
- 19
- Views
- 1,244
- Replies
- 30
- Views
- 6,296
- Replies
- 3
- Views
- 385