Jon And Sheri's Vitamin D Wagon | Page 69 | Ford Explorer Forums - Serious Explorations

  • Register Today It's free!

Jon And Sheri's Vitamin D Wagon

As she sits now,
017.jpg

019.jpg


015.jpg


013.jpg


018.jpg


But it didn't start out like this.


We returned from our trip to Colorado Sept 2009 to find this waiting in the yard.

It needs a few little sumthuns--but it is a great start I do think.
Here is where we begin to take over the work started by trukmajik and dejello


94explorer001.jpg


94explorer003.jpg


94explorer002.jpg


94explorer004.jpg


94explorer007.jpg


94explorer006.jpg


94explorer005.jpg


9-11-2009092.jpg


9-11-2009090.jpg


updated pics ^^^^^how it was when I got it

Now here is how it looks as of 4-1-2010

got the wheels all shiny!

truck002.jpg


frostbite001.jpg


truck001.jpg


truck006.jpg


truck005.jpg


truck004.jpg


truck003.jpg


and as of 8-5-2010

IMG_1105.jpg

with swaybar^^^

without sway bar

IMG_1064.jpg


IMG_1061.jpg


revised shock towers and more flex-Big thanks to Dkchrist for coming over to weld em in. I owe him big time!!

IMG_1905.jpg


IMG_1903.jpg


With a top

IMG_1988.jpg


IMG_1986.jpg


IMG_1983.jpg


LED rock lights

IMG_1925.jpg


Join the Elite Explorers for $20 each year.
Elite Explorer members see no advertisements, no banner ads, no double underlined links,.
Add an avatar, upload photo attachments, and more!
.


Join the Elite Explorers for $20 each year.
Elite Explorer members see no advertisements, no banner ads, no double underlined links,.
Add an avatar, upload photo attachments, and more!
.


Uh huh - thats smashing!


Time for another road trip to check fuel economy.:thumbsup:

Man that parachute, I mean spare tire, sure sticks up back there!! Wait,, I'm gettin an idea ;)


Well, I need to remove my top roll bar intersection pad thingy I made-it looks goofy anyway. This made the cut off top short by about an inch in the center, and the velcro flap does not line up well, so off it comes.

I also needed to add a few snaps to the flaps going up behind the doors, as they were flapping in the wind. I am now going to secure to top excess flaps with added snaps to keep them from flapping.

Then another highway drive. It seemed to hold up fine going for a root beer float last night though. It sure did make the ride up a lot quieter. It seems weird having a roof.


Sparksaflyin came by and brought with him a better idea for padding the roll bar intersection. Now the roof peak is level and it should still shed water well.
He also hung out and supervised while I added some more snaps all around, and we tightened it all up a bit. I still need 2 straps for the rear part to pull it tight forward to the rear seat overhead bar, and, a couple in the front hlaf to pull it rearward to the same bar. However the velcro flap all the way across seems to hold it good

This picture shows the side window angle-and how the fabric wraps the upper roll bars

IMG_1984.jpg


IMG_1985.jpg


other side

IMG_1986.jpg


This is the front channel lock seal--Which Dejello actually installed.

Jonathan I would kinda like to know where you got that part, I can't find it.

IMG_1989.jpg


side view


IMG_1988.jpg


IMG_1983.jpg


Top snaps--kind of hard to explain but some snap two parts together, the corner ones snap it into shape around the rear window pillar area and some hold the extra flaps down

IMG_1990.jpg


The tabs showing on the top are reinforcement for the straps. As soon as all the straps are in, Sheri is going to sew in a continuous strap aver the tabs --double reinforcing the straps and dressing it up a bit. This strap will follow the lines of the bars.


The cover looks good! :thumbsup: Are you going to be lowering the spare tire carrier? It looks like its sitting too high.


Pic's don't do the top Justice. Top is really really nice. I was hoping that it didn't take away some of cool factor of it being a chop top truck and all. But I think it gives it a even cooler look now.

Yeah he's a friend and all but this is one of the nicest trucks around !! ya did good!!


I like it, I like it alot!


Turned out great!:chug:


Thanks Guys

As of today we are rockin' in leather Mountaineer seats from a 97 rollover. I scored them a while ago.

I cheated and spliced the '93 connector to the '97 seat. Other than that they bolted right in.


Ok newbie question time.

Since I would like to add my sub enclosure and amp back into the truck, some more lighting and a winch-

Is there an issue with the 1st gen alternator? Are the 2nd gens higher output?

It looks like the 2nd gen alternator will bolt up. So the question is, will it?

I know I have seen it covered before but I must be searching the wrong criteria or area.


There was a 130 amp alternator option in the 2nd gens. The other option was a 90 amp. I think the 1st gens just had a 90 amp.


Yes Jon, they swap for the OHV's, but most of the later alternators will push more power without issues. I put a later model OHV alternator in my 91 truck when its alternator died. That newer model does make more power and hold more voltage than the old one, and my 91 is bone stock.

Go by the generation number if you can, in the late 90's the 4th generation units came out. Each new generation makes a little more power or does it more easily, less drain from accessories.


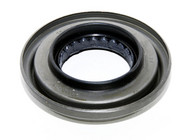
Ok, since I went off road without limiting straps I once again dinged the front pinion seal. While replacing, it appeared to be in backwards. When I last replaced it it went in like it had come out, but after closer attention it appeared to me to be backward so I installed the new one reverse of what was in there.

I assume(d) the spring should wrap the yoke seal area--it was inboard (inside the diff housing) on the seal I removed.

I installed the new one to look like this from the rear of housing

NA42449%2042449%20pinion%20seal%20d60%20d70%20seal%20d44%20alum%20pinion.jpg


the one I removed was facing this way to rear

1238961908_Dana44PinionSeal_Dana44.jpg


Ummm, which is correct?


with the solid axle you only need 1 limit strap, to stop diff droop, i would say,,


Thanks Guys

As of today we are rockin' in leather Mountaineer seats from a 97 rollover. I scored them a while ago.

I cheated and spliced the '93 connector to the '97 seat. Other than that they bolted right in.

Damn lucky you


Ok, since I went off road without limiting straps I once again dinged the front pinion seal. While replacing, it appeared to be in backwards. When I last replaced it it went in like it had come out, but after closer attention it appeared to me to be backward so I installed the new one reverse of what was in there.

I assume(d) the spring should wrap the yoke seal area--it was inboard (inside the diff housing) on the seal I removed.

I installed the new one to look like this from the rear of housing

NA42449%2042449%20pinion%20seal%20d60%20d70%20seal%20d44%20alum%20pinion.jpg


the one I removed was facing this way to rear

1238961908_Dana44PinionSeal_Dana44.jpg


Ummm, which is correct?

Generally the outer rubber lip against the shaft leans outward. That lip should allow pressure out(imagine), but not allow water pressure in. Does that make sense?


Join the Elite Explorers for $20 each year.
Elite Explorer members see no advertisements, no banner ads, no double underlined links,.
Add an avatar, upload photo attachments, and more!
.


Generally the outer rubber lip against the shaft leans outward. That lip should allow pressure out(imagine), but not allow water pressure in. Does that make sense?

You can't see it in the top picture very well, but both sides of the seal have the same excess lip. One side (lip) has a spring encompassing it, it is in the top picture but you cannot see it either.


Back
Top