M90 rebuild (rudy) | Page 24 | Ford Explorer Forums - Serious Explorations

  • Register Today It's free!

M90 rebuild (rudy)

well figured i would start a new thread.just a quick background.did the whole build on my explorer but built it using stock head gaskets and head bolts.did it really as a safety net and i just couldnt afford head studs at the time.well to say the least i blew the head gaskets off from it wile i was in the mountains on a forum trip about two years later.

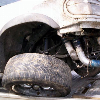
i picked up a 1994 ranger,its got the 4.0 OHV and is a 5 speed 2wd.the plan is to pull the motor out of the explorer and rebuild it.

this thread will basically cover the rebuild and build up of the new ranger.it will basically end up as a street race truck.ive named it Rudy:D:D so let the fun begin.
:burnout::burnout::burnout::burnout::burnout::burnout::burnout::burnout::burnout::burnout::burnout:

UPDATE
new motor specs
BORE: 4" JE asymmetrical pistons (custom over bore)

20141031_163839_zpso5ifzafx.jpg

RODS: 6.058 Manley (longer rod)
20140226_134243_zpsdapxouhk.jpg

VALVES: IN-1.8 EX-1.5 Manley heavy duty (.150 over)
20160527_114556_zpsiohyyelp.jpg

20140515_162402_zpsftg0qlcd.jpg

20160313_161946_zpswgleqayt.jpg

20160318_160734_zpsxxxpuld8.jpg

Transmission:T5 hybrid from a 2006 Mustang and 93 Fox
HEADS: 93TM HEAVILY ported with custom brass guides and copper gaskets/O-ringed with ARP studs
CAM: 422 Comp cams with 988 springs and Toms custom lifters,push rods and 1.7 roller rockers
Complete blueprint and balanced internals
GM M90 supercharged with one 1" intercooler plates with ASP 8 rib belt conversion. .
pushing 16 lbs of boost with small shot of NOS
Running on E50
Dyno tuned by Dyno Tune Performance outa Virginia using SCT

old thread and pic
3800 M90 Build
ported and polished gm 3800 gen 2 m90
Water to air intercooled
port matched 76mm inlet and intake tube
mustang 75mm race tb
90mm maf
36lb injectors
255 fuel pump
sct 5bank dyno tuned
2.7" pulley 10lbs of boost!!;)
2012-06-09201057.jpg


2012-06-09201139-1.jpg


2012-06-09201207.jpg


and the new 1994 ranger 4.0 OHV 5 speed 2WD with 115,000 miles on it.o and i only paid $1,000 for it:shifty_ey
RUDY
IMG952013032295172932_zps77585c66.jpg


FB_IMG_1545061235211.jpg


Join the Elite Explorers for $20 each year.
Elite Explorer members see no advertisements, no banner ads, no double underlined links,.
Add an avatar, upload photo attachments, and more!
.


I remember Tom Morrana telling me that its ok.

Not that this is a glowing example, but I did this on my 347 to add pipe sealant to my head studs (leaking coolant thru the threads) with absolutely no issue afterwards (other than the scored crank which wasn't related).

that wide rubber stance, and rim combo look awesome.

Good to hear..i thought it would be fine but wanted that extra assurance. .

I honestly wanna put the 295s on the front and get a set of 20x12 rims that match for the rear..i want to go to a 335 tire for the rear and my 18x9 wont hold them..but thats long away from now..if i do that, i going to narrow the rear using two short side axles and tubes with a 4 link coilover setup..but like i said...long ways from there..


Join the Elite Explorers for $20 each year.
Elite Explorer members see no advertisements, no banner ads, no double underlined links,.
Add an avatar, upload photo attachments, and more!
.


Anyone have some 42lbs injectors laying around by chance? ??

Talked more to my tuner and hes starting to doubt the 36s i have even if i turn the fuel psi up..hes not believing the power im saying it will make..he wants to just transfer the old tunes over to work on my new pcm and bring it in for a dyno pull..then judge the power to see if new motor and more boost would put me over.he guessing this motor and 10lbs will be at or around 300hp which he feels is fine for 36s,also feels another 5lbs wouldnt out do them..he just doesnt feel the new motor will make that much of a difference but i do!!

Me.. i want to get the vampire knock system and 42s now and have him try and write a tune based off old tables and new 42s with more timing...then bring it in for a dyno and see what it does..ill have both IC on and knock system so he should be able to throw way more timing and fuel at it..plus when new motor is done the tune would still be ""close"" enough to run..i dont want to find out the 36s are to small and have to pull the charger and ICs off to replace injectors,hell thats almost $100 in gaskets. .plus i wanna break clutch in before i get on dyno for final tune


So noticed when i pulled my ported lower intake off last time i had what i considered to be a serious problem..when my guy ported it went through the sides of the first two ports.he said he was trying to straighten them out some and aggressively removing material..he put what he called ""porters putty"" over the slight holes that came through. .ive seen the stuff used plenty of times without issues. .

Well where he put it on the inside of port,it started flaking around the edges.it would've probably never completely come loose but small pieces could,or i think they could..i guess the added heat and fact it was pretty smooth cause the very edges to come up..

I got some stuff called ""lab metal""($40 for 14oz can) its basically a high temp strong ass jb weld material. .i was told it was paint able but thats not true..lol its more like pour-able..but this stuff is strong as can be,i took a hammer and torch to a sample and its literally like metal once it cures (has to be baked).

So i took and sandded down almost all the ""porters putty"" and coated the hell outa the outside of ports.stuff is really hard to work with and it looks slabbed on there because it is..lol i then sanded the putty inside of the ports till its slightly covering the small hole..then mirror polished all of the ports,which wasn't done at first.they were smooth but not mirror. .

I just need to put the body lift and notches on and the charger with both IC's can go on..

Pics of the flake,it only flaked on inside.outside was still solid..i did sand outside some and all the metal around it for the lab-metal.before and after..probably not even gonna sand or pretty up the outsides patches,they cant be seen..
20151027_163633_zpshzfetfyz.jpg

20151027_163042_zpsrfo0fpac.jpg

20151027_163046_zpsxi88hdtj.jpg

20151028_130557_zpstaa7ilkk.jpg


Its about a 1/8" thick covering both sides of the port now..
20151028_150138_zpskk0nebzl.jpg

20151028_150721_zpsrfop20sp.jpg


Stock port for comparison
oldin_zpsisyzrbsv.jpg


porting

That is some serious porting on the intake.
Did you have that thing flow tested, I will bet that it flows pretty darn good amounts of air!
Glad you caught it before anything went wrong.


I have not had the lower intake flow test,might be a good idea.the heads are gonna be though.its basically port matched and opened up around the injectors/ramp . .ive had this lower on the motor for probably 5+ years,when i installed it i did the bbk and a udp.there definitely was a noticeable difference. .

I get asked alot what i use to port and polish and thought i posted pictures. .i use a round and cone burr bit to remove material but the real key is the sponge sanding wheels..i get them from harbor freight, they come with two black paint remover wheel, two red 150 grits and a two grey 240 grits..they do make a 320 but cant find them and 240 takes it to a mirror. .they are like $5 a pack,you cant touch that price in dremel world..i then took a 4"x1/4" bolt and cut the head off it so fits down in my die grinder..works perfect and smothes out ports very fast..proven priceless to me!!
20151028_155815_zpscumtkhpl.jpg

20151028_155920_zps6voyagtu.jpg


Got my pucks today,they seem like they are gonna work out good..ive got MAJOR MAJOR life changing plans coming up though. .ill release them soon.:)
20151102_150118_zpsms2l9kvx.jpg

20151102_150603_zpslcjpfo4f.jpg


:D Moving to Canada? :D


Live changing plans

I was afraid he was going to say something about Caitlyn Jenner.

Moving to Canada would be neat, I have wondered how I would hold up there in that cold.


Happy birthday JD!
Hope you get lots of go fast parts for your ranger!


Well guess the time has come...starters ITS MY BIRTHDAY! !!also this year ive been given the greatest gift one could give.....im gonna be a DADDY!!! Please stay positive for us as we really need it..
20151103_195245-1_zpskj1zwcb3.jpg


Happy birthday! And 'wow'!

Congratulations. Due date?


So just to update the new plans..obviously i cant afford to finish my complete new motor and new trans.its being put on hold for time being, i have basically everything but flywheel and clutch but the machine cost is not cheap and the trans parts are around $1400..the motor will be done in parts as i can afford them..

But right now i have dropped the new heads off at my machine shop.he gonna do valve pedestal/bowl job,fit the valves,bronze guides, valve springs seats and trim the valve seal pedestal down.he will not be doing a O-ring groves for my copper gaskets at this time..he has quoted me $400 for all the head work

Im then taking those heads and putting them on the ranger.ill be using felpro SD gaskets and ARP studs..also the ported lower intake,injectors, supercharger with both IC and my new tuned chip for this ecm. Going to swap all my 8 rib pulleys on and run the 3.2 pulley on the charger for now,should give me 10.6 lbs.this is all that gonna be done to the ranger for awile,should be fun with the new heads and dual ICs,hell i may throw the 2.7 pulley on which should give me 14.7 lbs. New heads will lower the compression to 9:1 also.they are 93tm heads and that block has 90tm speed pro pistons

The heads(95tm shaved) that im pulling off the ranger are going on the spare 95 block (making it 10:1)i pulled outa the red ranger..i have replaced the crank and rod bearings as well as the crank itself..im then gonna throw that motor into the explorer and having the trans rebuilt with all heavy duty clutches and bands..im also removing the 2" blocks in the rear and the F-150 seats up front,just to lower it some and drive better..this will be my baby mobile! !!! Lol

My girl has agreed and is cool with thise plans but not with me finishing my whole ranger motor..lol


Congratz n Happy Birthday!!!!!


Thanks for all the birthday wishes..
Got a little work done today on the truck..i moved my fan temp sensor location. .i put it in the radiator next to the lower hose..this way the fan controls the radiator water temperature and the tstat controls engine water temp..the way it should be..i had it in the upper heater hose next to tstat last time.the problem with this was the fan rarely kicked off.the tstat is a 185* and the fan OFF was 175*...the fan sensor was reading engine water which was staying mostly above 175*..new location wirks perfectly, fan kicks on and off very fast and the motor stays at a steady 185-190.

The second thing and issue im having is once the fan is on and you shut the truck off and try to restart it,it stuggles because fan and starter is running. .i tried to add a time delay to the circuit (resistor and capacitor ) but it didnt work..i copied a post online but they were using it for a IC pump relay..where it delays 10 sec before it starts and runs 10 sec after power off..

My sensor wire would get 12v at a delay and hold voltage after power off but if you connect that wire to the relay the voltage of wire would drop and not kick the relay on..????? I think the capacitor may be to small???...??? (( anyone??
20151114_105229_zpskio50c2q.jpg

20151114_105332_zps5yrjem00.jpg


Also added a light to let me know when fan is on..
20151114_141022_zpsh0cgvk2m.jpg

20151114_143653_zpszk8ozplh.jpg


JD, you need to post how you wired the resistor and capacitor in the circuit.
Also, post the link to where you found the info.

It's rarely as simple as adding a capacitor and resistor in a higher current situation.
I'm guessing you have the capacitor and resistor all in parallel before the relay.

The idea is that when power is applied to the capacitor, it charges and the voltage rises to 13v flipping the relay. Then, when power is removed, the capacitor slowly discharges until voltage drops below the relay keying voltage.

It can get complicated since a relay can actually draw quite a bit of current (relatively speaking).


Join the Elite Explorers for $20 each year.
Elite Explorer members see no advertisements, no banner ads, no double underlined links,.
Add an avatar, upload photo attachments, and more!
.


Back
Top