1956 F100 Explorer Chassis Swap | Page 5 | Ford Explorer Forums - Serious Explorations

  • Register Today It's free!

1956 F100 Explorer Chassis Swap

I've got a neighbor who has offered an engine stand, so that is covered. Today I'm going to make a homemade Trans jack..... hopefully. Been looking around at what people have been using and I think I've got enough stuff around to do it. Pictures will be posted later tonight. Engine crane won't be here til tomorrow.


Join the Elite Explorers for $20 each year.
Elite Explorer members see no advertisements, no banner ads, no double underlined links,.
Add an avatar, upload photo attachments, and more!
.


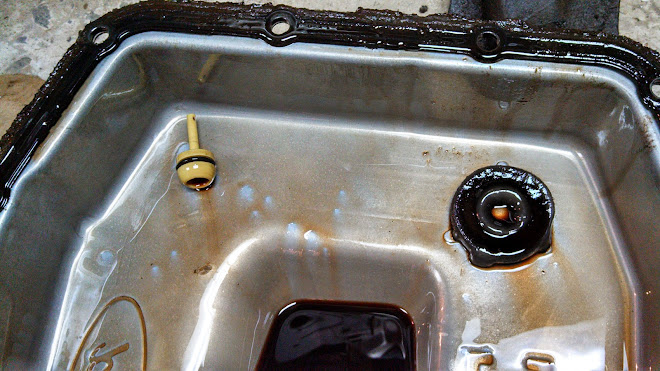
I removed the pan to drain the fluid, the original pan gasket was still in place. The pan actually states that the gasket is reusable, but I would certainly recommend replacing it after signs of seepage. Here you can see the factory filler tube plug that is perfectly normal finding in the pan. This can be thrown away. It usually also means that the fluid and filter most-likely haven't been changed its entire life. The magnet helps collect harmful metal shavings from wear. It does have some signs of wear, but I did not find chunks, clutch material, or other foreign matter that would suggest any problems. The fluid color was actually not terrible and did not have any burnt smell.

IMG_20131030_214318_543.jpg


IMG_20131030_214426_345.jpg


10mm 1/4" drive wobble socket with speed handle makes removing the pan a breeze. You DO NOT WANT to remove the pan bolts with any power tool. Once drained, replace the pan and snug up 6-8 bolts.

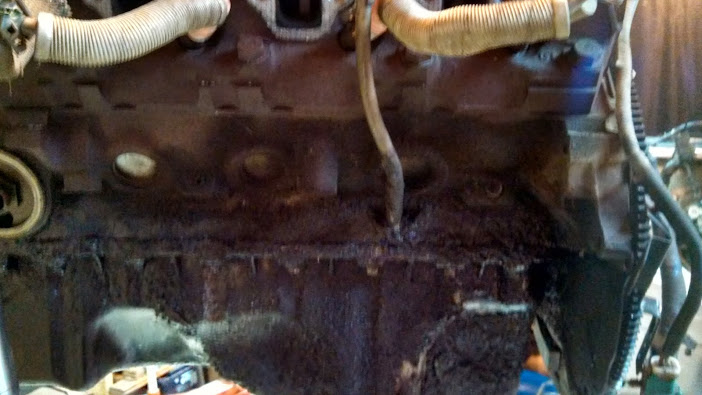
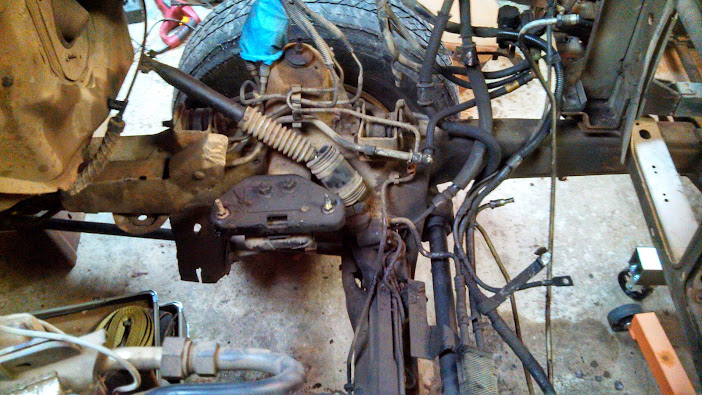
Because the access plate is not the easiest point to remove the torque converter nuts, removing the starter gains access to a better angle to get an impact to remove them. Using a wrench here will be a challenge as the torque converter moves. Using a 15/16" socket 1/2" drive with extension will allow you to turn the crankshaft at the front of the motor to align each of the four torque converter nuts. Be sure to mark one of the threads and the flywheel plate for future re-alignment when installing the transmission. This is important because the torque converter and motor have been balanced harmonically. I used some spray paint to make my mark.

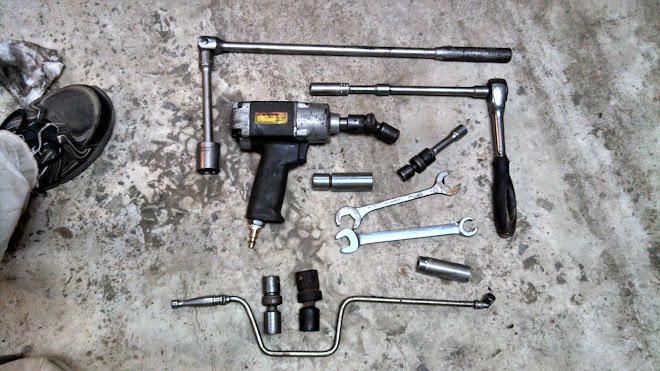
The tools I used to remove the trans:

16mm 1/2" drive wobble socket with 36" extension (not pictured) using impact wrench for the bell housing bolts.
13mm, 14mm, 15mm, 17mm, 18mm 1/2" drive wobble sockets.
10mm, 13mm, 15mm, and 19mm 3/8" drive sockets.
5/8" line wrench and 3/4" thin wrench for the cooler lines.
A few other hand tools were used including a prybar to help separate the trans from motor.

IMG_20131030_232459_675.jpg


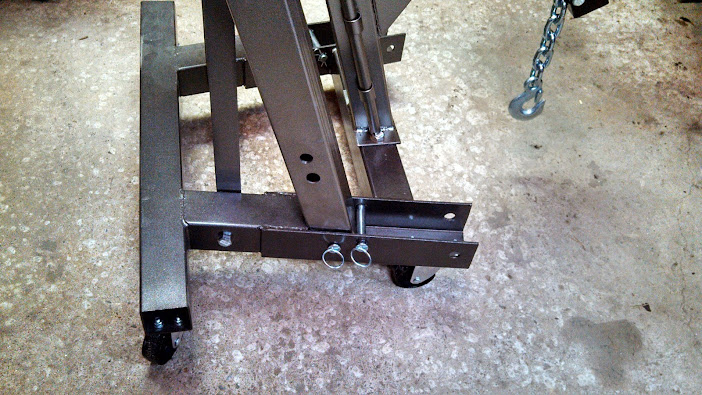
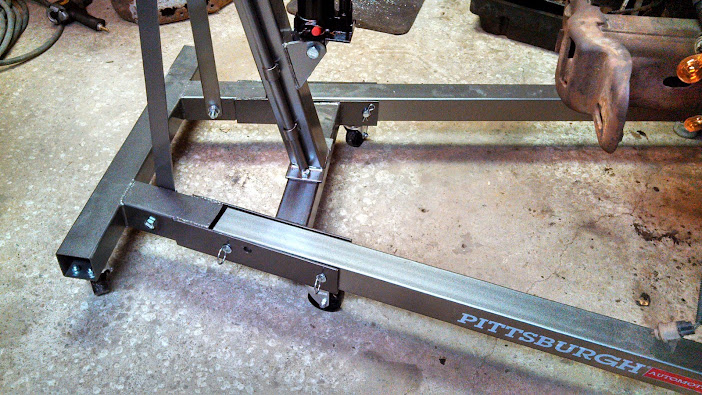
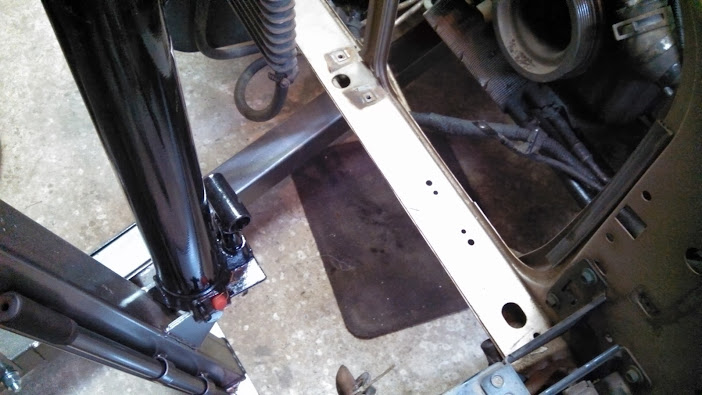
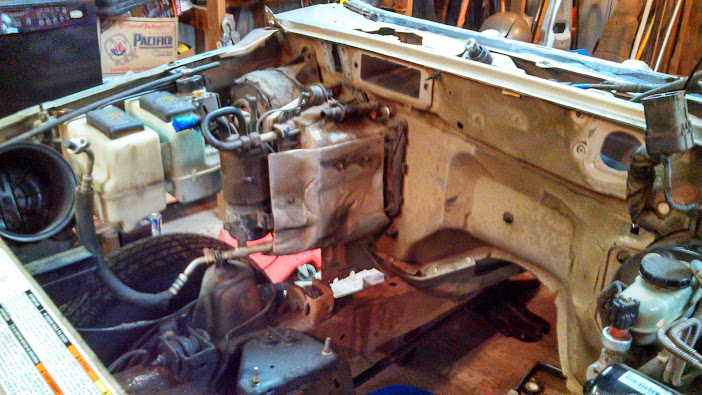
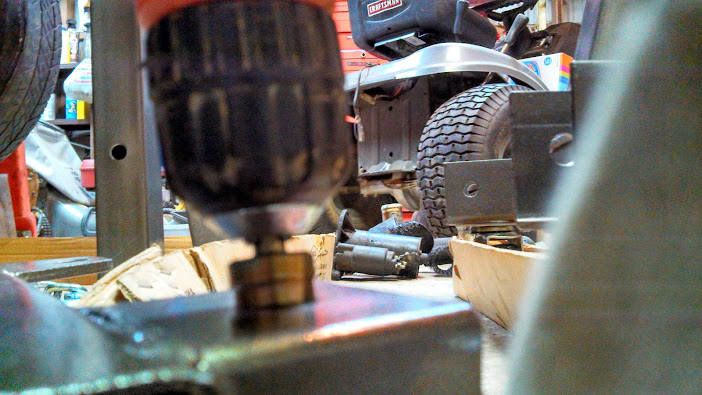
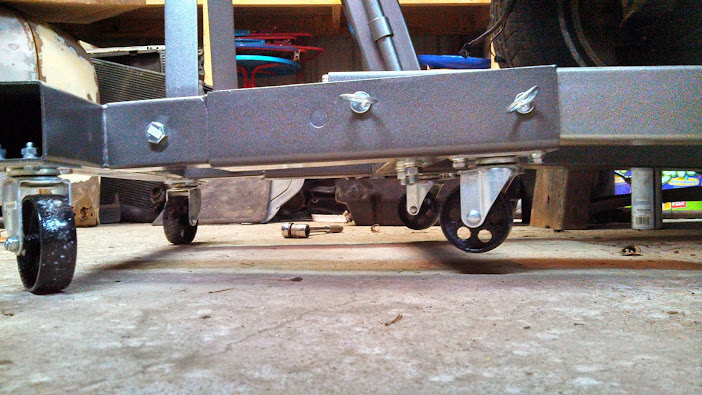
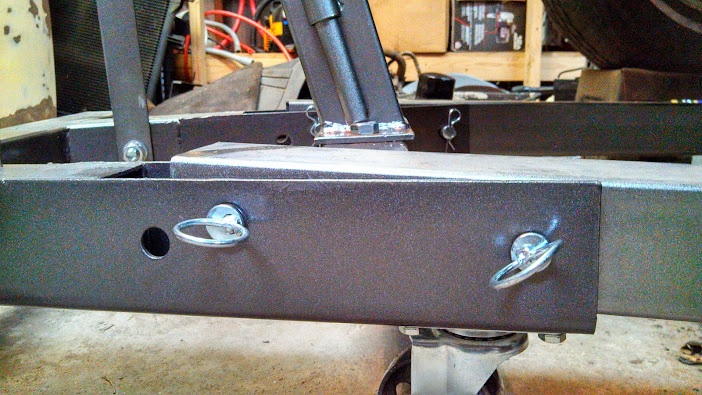
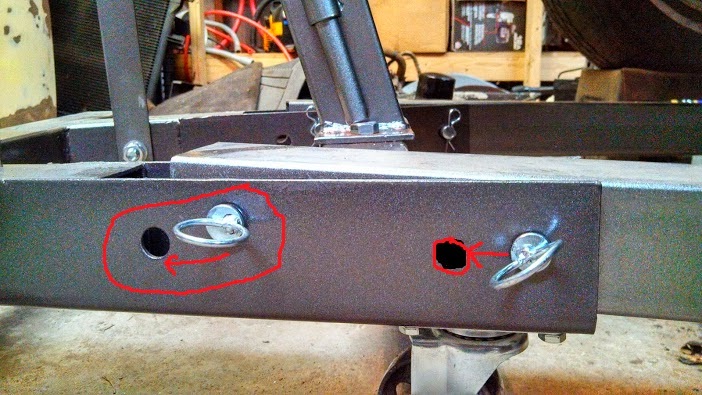
After removing everything except two bell housing bolts, I was about to drop $50 on a jack adapter to safely remove the trans. Instead I opted to save the $$$ by using what I believe to be an s10 crossmember. It fit snug on my jack with the plate removed. I used a hammer to help make it solid and tight.

IMG_20131102_100659_016.jpg


I used towing straps attached to the jack to keep it balanced and small boards between the jack and the pan to reduce damage and give more contact area to the pan to distribute the weight.

IMG_20131102_124043_786.jpg


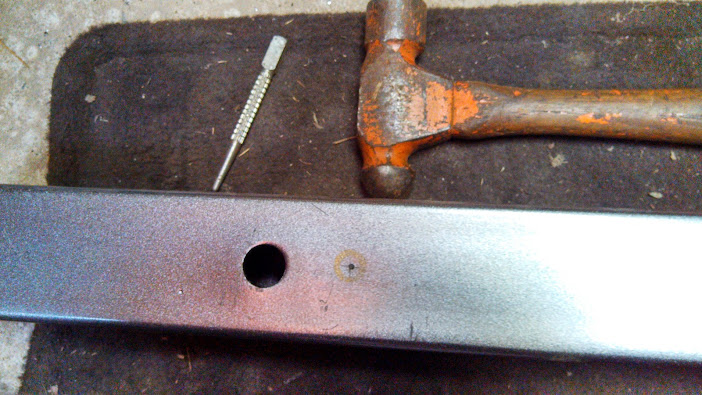
To ensure the torque converter from falling out. I used a piece of steel held in place by the inspection plate bolts. I guess you could use the inspection plate, but it's not what I prefer.

IMG_20131102_131311_623.jpg


IMG_20131102_131332_715.jpg


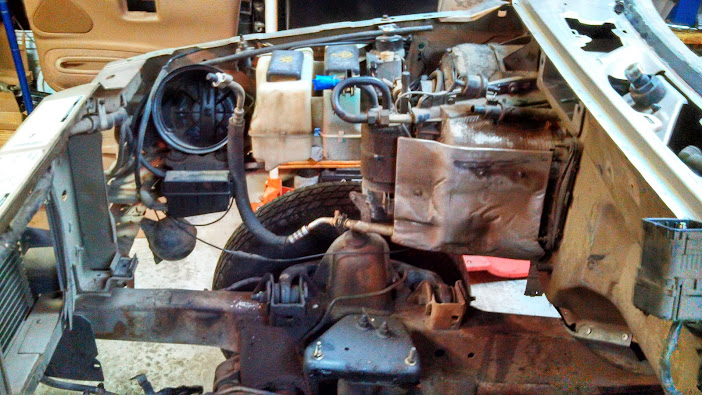
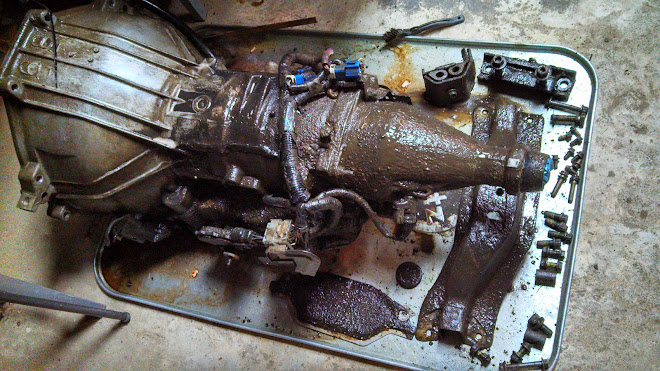
I gently set the trans as well as other parts from it onto a drip pan for cleaning and organization.

IMG_20131103_244622_113.jpg


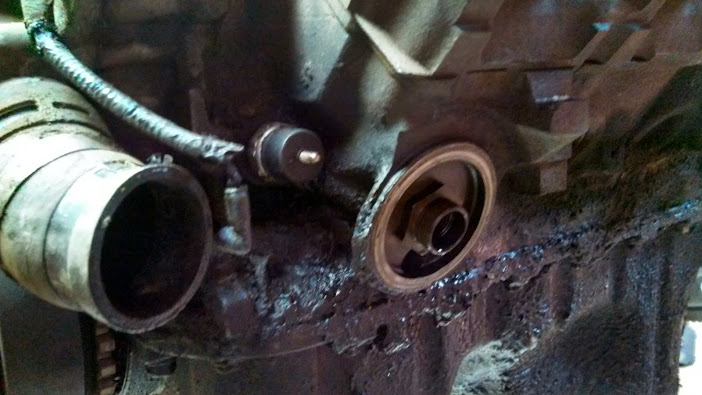
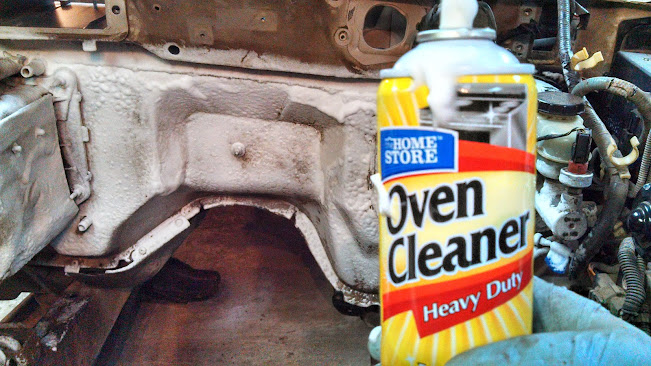
Be sure to plug the cooler lines and the filler tube to make sure no cleaner, dirt, or other contaminants get into the transmission.

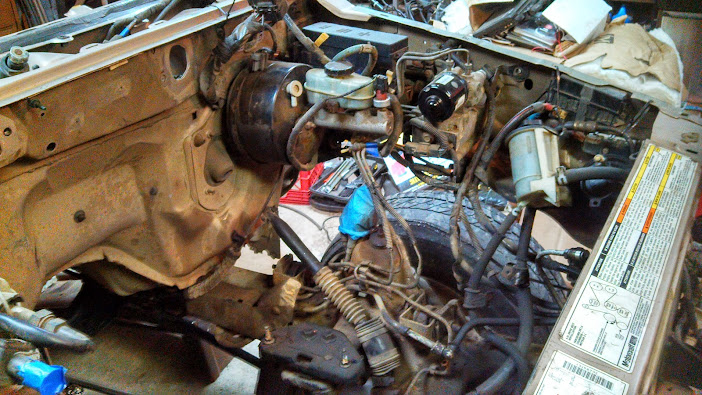
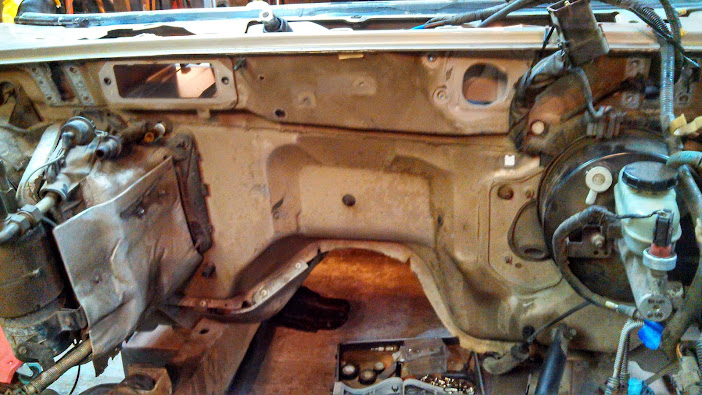
I played around with a spot weld cutter that I got from Harbor Freight the other day, it seems to work quick and effective!!! I will post pics in the future when it comes time to remove the additional panels and firewall section.

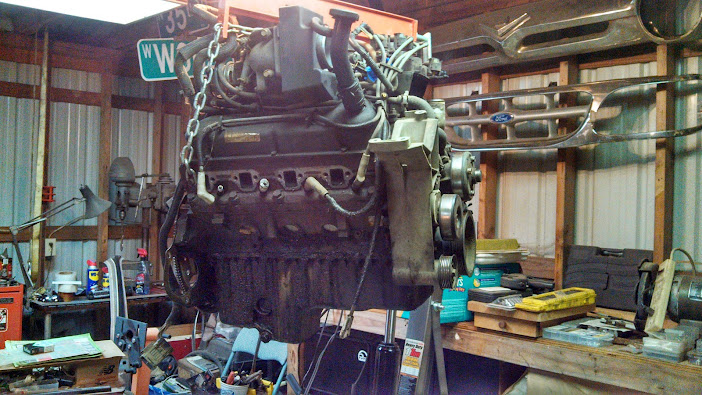
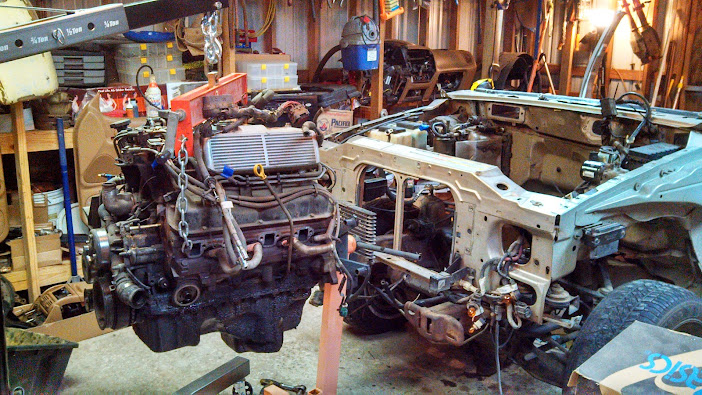
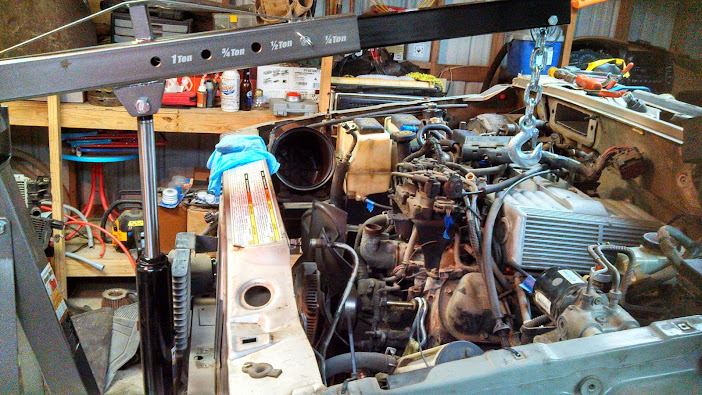
Next up will be the engine removal.


Inside the pan looks real good, the fluid has probably been "changed " a quart at a time by the leak out and fill back up method lol,


Inside the pan looks real good, the fluid has probably been "changed " a quart at a time by the leak out and fill back up method lol,

Ha! That's true! I wasn't even thinking about that! I was expecting sludge or worse in the bottom. I should have gone ahead and opened up the filter (something we did at my dad's shop to look for other signs of damage.) Been pretty lucky so far with this.


I just picked up the engine crane earlier. Looks like I'll be spending tonight just putting it together. It came in two boxes, but one is too heavy to get out of my car by myself. I'll probably remove some pieces to make it lighter.

In case you want some extra info on 5.0 V8 heads, here is a great resource: http://www.fiveohinfo.com/performance/gt40-gt40p.html#identify
Very good link.
Answered some of my questions i had in my head about them. Cheers!


A slight setback... the engine crane came in two boxes, labeled similarly. The SKU numbers were not, however. When I opened the smaller box, it contained the base, hardware, and six steel wheels. Four larger wheels and two smaller. The smaller go in the center. I immediately went to work getting the base together and all seemed ok. When I opened the big box, I grabbed the first upright piece, this is what I ran into.

IMG_20131103_211007_656.jpg


The plate was too narrow in width, hung off the front and back, and is slightly the wrong color. No biggie I thought. I just needed to drill a new hole 1/2" away. Besides, who's bought something made in China that didn't need some slight modification, right?

IMG_20131103_214218_398.jpg


Well, time to put the other parts on using the hardware included in that first box. Bolts were too big. Not a big deal again.

IMG_20131103_222710_649.jpg


Excellent $7.99 investment for the 3-piece bit set. It drilled through the heavy gauge steel like butter, no joke.

IMG_20131103_231741_479.jpg


IMG_20131103_222740_238.jpg


IMG_20131103_222729_077.jpg


I realized that the second box came with an extra set of wheels!!! This was my motivation to live with the extra drilling and color differences.

IMG_20131103_231547_081.jpg


I was simply too far along to stop now! Well, this is where I should have used the user manual, because the very next step after completing the base..... the legs. Yes, it makes sense now, but to me, it just seemed easier to work on the rest without having to maneuver around the long legs in the small cleared area of my shop to do this. Because there are no bolts, just simply pins, this should be plug and play right? Wrong.... not unless anyone out there that has this model or one similar that can tell me that this looks normal?

IMG_20131103_233042_068.jpg


IMG_20131103_233101_675.jpg


I just don't feel comfortable pulling a motor out without making this right. Unless this is the way it's supposed to be, all engine-pulling plans are on hold. Making a call tomorrow to see if anyone recently received an engine crane without wheels that has my parts. Maybe I can modify it???

Untitled.jpg


It's just telling me "you can look, but don't touch", funny... that's what my wife says too!

IMG_20131103_233127_446.jpg


Great project! Thanks for the nice documentation and pictures. I'm probably doing the same with my 54 F100 Panel Truck, and this thread will help a lot.

I'm getting one of those shop cranes this week. I'll let you know if I run into the same issues as yours.

Keep up the good work :thumbsup: Subscribing!


Since you've gone this far with modifications you could always weld plates to the unit and redrill at the proper spot.:dunno:


Yeah I had to make some modifications to mine but they were to the flat steel bars. Can you take out the radiator support to get a little closer or go from the side. Or if the the joist in your garage are pretty sturdy, you could chain hoist it, but I would never recommend that.


Great project! Thanks for the nice documentation and pictures. I'm probably doing the same with my 54 F100 Panel Truck, and this thread will help a lot.

I'm getting one of those shop cranes this week. I'll let you know if I run into the same issues as yours.

Keep up the good work :thumbsup: Subscribing!


Thank you! I'd love to see your build, send me a link when you get it started. I found a 56 panel recently and thought about doing one as the next project for a "kid hauler". Be sure to use that coupon, it saves a lot of $$$!


Since you've gone this far with modifications you could always weld plates to the unit and redrill at the proper spot.:dunno:

Well, this has been on my mind for the last couple of days and I went ahead and bit the bullet and drilled new holes. I contemplated returning the crane or one of the boxes to get the correct parts, however, since I have drilled and modified it, I will have to make do with what I have. Plus, I will enjoy the fact that I have an extra set of wheels should I need them in the future. I first set the legs up and into the furthest back holes.

IMG_20131105_225624_903.jpg


I used a marker to draw the location of the outer holes onto the inner leg rail. I did both holes for both sides then removed them to place onto the floor so I could drill downward rather than sideways. I used a punch to make the indention so that the drill bit wouldn't slide around and once again, cut through the thick steel like butter. I really am impressed with these bits.

IMG_20131105_230651_049.jpg


IMG_20131105_230927_976.jpg


IMG_20131105_232512_195.jpg


The hole was the perfect size for the pins and took no time to complete. One consideration I used was the fact that the factory holes were "inside" the existing holes. Had they been on the outside, I could imagine it being less stable or strong. You can't even see the extra holes once it is together for use.

IMG_20131105_231937_633.jpg


IMG_20131105_231928_557.jpg


I will test the strength of the crane by setting the top bar to the 1-ton setting and use it to lift the Explorer up off the ramps so I can get it in position for the engine removal. The Explorer weighs in at less than 4,000 lbs. complete. With all the parts I've removed, the front end cannot weigh more than 2,000 lbs. right now. For those who are wondering, 2,000 lbs. = 1 Ton.

IMG_20131105_232538_763.jpg


Yeah I had to make some modifications to mine but they were to the flat steel bars. Can you take out the radiator support to get a little closer or go from the side. Or if the the joist in your garage are pretty sturdy, you could chain hoist it, but I would never recommend that.

I'm glad I'm not alone in that!!! I believe that the crane will pull it out without having to get much closer. My neighbor is going to lend me his leveling bar with chains to assist with the removal, so that will help a bit.

The radiator support is factory welded in place and I want to try to leave it intact to assist with radiator mounting, structural support and the aesthetic of the front body panel alignment. There may be some trimming to it, but only what is 100% necessary.

I'd love to have a shop strong enough to use hoists, the rafters are made with 2x4's that I wouldn't trust my own body weight on. I'm looking to add a 30x40 shop extending from the existing structure with more capabilities, but that will be a couple years from now I'm sure.


Update: Spent a couple days being a plumber, kitchen sink and two showers needed attention. Fixed one shower with a paperclip... you can now call me MacGyver, LOL!!! I had to wait for the engine stand and the leveler too. Got them at 9pm last night and went to work removing the engine.

First, I got the Explorer in position, made sure I cleared the fan and hood hanging from the ceiling. The crane lifted the Explorer off the ramps without incident. It is definitely strong enough to remove the engine after testing.

Next, I got the leveler in position, adjusted the chain to equalize the weight and bolted the chains to the exhaust manifold bolt holes. The chain was nearly too short and I wasn't wanting to remove the intake manifold yet.

IMG_20131109_231720_896.jpg


Then it was time to start lifting. I got the chains snug, removed the four 13mm (deep-well sockets) engine mount-to-motor bolts, and wiggled it around to make sure she was ready for removal.

I realized how much extra space I had with the 1/4 ton crane setting, so I adjusted it to the 1/2 ton setting.

IMG_20131109_231738_410.jpg


IMG_20131110_242555_379.jpg


Lifted her on up and voila!!!

IMG_20131109_235405_285.jpg


Pan gasket looks to have been leaking for quite some while.

IMG_20131109_235505_714.jpg


IMG_20131109_235541_886.jpg


IMG_20131109_235740_180.jpg


It appears that this sensor has been replaced in the near-past, oil looks kind of fresh. I will definitely be paying some attention to the work done on this.

IMG_20131109_235803_170.jpg


I'm going to have to go shopping for bolts as the trans bolts do not go all the way through the engine stand's flanges. It is "still in the air"

IMG_20131110_242139_106.jpg


The engine compartment, sans engine (disregard the four mount bolts I set in place until I put them away with the others)...

IMG_20131110_242509_231.jpg


IMG_20131110_242519_959.jpg


IMG_20131110_242532_345.jpg


IMG_20131110_242605_475.jpg


IMG_20131110_242614_721.jpg


IMG_20131110_242624_467.jpg


IMG_20131110_242631_685.jpg


Now that the engine is removed, I will be dealing with the stand/bolt challenge, cleaning, and dismantling. I'm still trying to decide how far I am going to go with the motor. Since it runs.... spend just a small amount to fix what needs to be replaced? I could definitely use the money saved to put into other parts I need now. I could build or buy a "monster" motor down the road.


I agree , clean it up throw some gaskets on it like the blue fel-pros and keep the build going, you have tons of other stuff to do that will eat up time and money,


Just a quick list of "noticeable" parts I will need to replace, most of which have never been replaced.

-Spark Plugs $39.92 Motorcraft (8 @ $4.99)
-Spark Plug Wires $51.99 Bosch (maybe I will look around for alternatives)
-Oil Pan Gasket $22.99 Victor Reinz (steel reinforced 1-piece)
-Oil Pump $38.99 Melling (High Output)
-Exhaust Manifold Gaskets $7.99 Victor Reinz
-Various Hoses $??.??
-Serpentine Belt $29.99 Dayco Gold Label
-Thermostat $10.99 Failsafe
-Thermostat Gasket $2.29 Victor Reinz
-Oil Pan Drain Bolt $3.99 Needa Parts
-Oil Filter & Oil $26.99 Est. (will purchase as set with oil when ready - usually seasonal SALE prices.
-Air Filter $45.99 K&N

TOTAL $350 including taxes should take care of the above items plus a few other inexpensive items I may need (o-rings, lubricants, etc.)

A complete FelPro gasket set sells for $72.99 at AutoZone if I decide to go into it this far. I get worried about getting into it and something go wrong costing me more money or an entire engine. Hmmmmm...

download.jpg


Victor Reinz complete set is $163.99 and has a one-piece pan gasket (preferred)


Nice work, the suspension and front of the frame look pretty clean as in no cancer.


Yeah, there is definitely more grease and oil than rust, luckily. I have a lot more to post tonight, stay tuned!


I picked up some heavy duty bolts today to get the motor set on the stand, I will do that later tonight. Last night I did a little cleaning on the firewall, motor, and trans using degreaser and oven cleaner. I'm not going for perfection, just don't want to be a complete grease ball when I get into the engine bay every time. I will be doing cutting, welding and more in this area.

IMG_20131110_225540_844.jpg


I did more engine inspecting as well, removed each of the spark plugs to see what kind of life they have served over the last quarter million miles. The first one I pulled was from the very front driver's side. The spark plug gap tool couldn't even register the gap. It was way more than 0.080". The factory specs that I found is: 0.052-0.056". Also, the center electrode is rounded to the point that it surprises me that it even ran.

IMG_20131110_232107_692.jpg


The top terminals on the driver side are all white-tipped.

IMG_20131110_232250_524.jpg


The top terminals on the passenger side are all yellow-tipped. Coincidence?

IMG_20131110_232959_817.jpg


Most of the spark plugs looked "ok", a couple were covered in buildup, even one with extra material on the ground electrode.

IMG_20131110_232437_421.jpg


IMG_20131110_232555_592.jpg


All in all, I think that this engine can last another couple of years with a tune up, love, and gentle driving. My Haynes manual's plug condition guide, says that the one with the ash deposits may be from oil-leaking valve guide(s) or fuel additives. It's not as bad as their pictured one. The other ones are simply labeled "worn" and recommend replacing the plugs. I can live with that, I think I will move forward with it.

I FORGOT TO MENTION ON A PREVIOUS POST: If you don't have a 36mm wrench in your toolbox, you will have a heck of a time removing the fan clutch and blade, which will cause you to have a heck of a time with engine removal. Luckily I went back through the Haynes manual at the last minute and realized this. Of course I already took the belt off, so I had to use a special rubber strap tool to hold the pulley in place while loosening the fan clutch. AutoZone offers tool rentals with a specific "fan clutch tool" (obvious name) for $25 + tax and is refunded to you 100% with undamaged return.

I sprayed a little degreaser on the engine and didn't want it to get into the exhaust ports, so I improvised a little here and found that plain Wal-Mart plastic bags are the perfect fit when wadded up and will be easy enough to just pull out when I'm ready. They stay out of the way for spraying, scraping, and will shield most everything out. It's a tighter fit than it looks. I got plenty of these bags just laying around to do all 8!

IMG_20131110_234004_658.jpg


Speaking of using things that are just laying around, on my next post, I will have to share what I am using a dishwasher, cargo lights, and a baby stroller for. (MacGyver style!)


Join the Elite Explorers for $20 each year.
Elite Explorer members see no advertisements, no banner ads, no double underlined links,.
Add an avatar, upload photo attachments, and more!
.


It's way too cold tonight to do much in my shop, plus I am a bit sleepy from a long day, but I wanted to post a couple things that excite me. I don't like to think I collect junk, but I have a HABIT of thinking I will come up with a good use for everything I get my hands on. Not much of a hoarder, because I will eventually consider how long I've had something and get rid of it. Sometimes I do wait too long.

I held on to a dishwasher for over a year trying to decide what to do with it. It is the same model as my own, just a different color. I considered keeping for the racks or computer or pump, etc. Finally, I came up with a storage solution for my electric tools that seem to get tangled up on the floor or workbench and I got tired of having to inspect for spiders hiding around them or tear up the cords and plugs. Now they have a place to call "HOME". The drill bots also fit nicely in the silverware tray that mounts on the door inside. This helps keep bugs, dust, and other debris out. Saves on space and best of all, it was FREE!!!

IMG_20131110_245237_078.jpg


IMG_20131110_245554_893.jpg


IMG_20131110_245609_275.jpg


IMG_20131110_245533_736.jpg


I had halogen lights over my sink when I bought my house. One bulb was burned out and found that buying an entire light fixture was nearly the same price as a 2-pack bulbs. So, I bought the new fixture and within 6 months, both bulbs burned out again! Something had to give. One day while tearing a car into pieces, I ended up with two cargo lights. I don't remember the model car or the location of the lights, but I liked them for some reason and held onto them for several years. They are 12-volt lights and needed an AC/DC adapter with 12-volt output to make them work in my house. Here they are in action now over 3 years without incident or being turned off.

IMG_20131112_210421_969.jpg


IMG_20131112_210433_630.jpg


IMG_20131112_210459_270.jpg


There are other things I don't have pictured or cannot find at the moment (a stroller I turned into a lawn trailer), but these are some of the things I feel like make it worth finding alternate uses for. Anyone else have cool alternatives for junk?


Back
Top