How to: - My A4LD Rebuild Diary - Pt 4 - Postscript | Page 2 | Ford Explorer Forums - Serious Explorations

  • Register Today It's free!

How to: My A4LD Rebuild Diary - Pt 4 - Postscript

Prefix for threads which are instructional.
Glacier991 said:
Stocki... I didn;t mean to ignore your post. Some of what you mention is already commonplace here ... the HD OD planetary for example... some of it I am not sure of... anything more you can provide is appreciated. I am thinking I am closing in on everything that CAN be done to make this transmission as good as it will be. Let me know if you have any parts numbers or anything. Welcome to the thread !
Glacier,
I didn`t disassemble the tranny as its still going, so I can`t help with partnumbers or anything. All I know is that these trannies have a bad reputation in Europe as well, where they have been used mainly in the Sierra(UK Sapphire)/Scorpio(UK Granada) range. The version flanged to the Cosworth engine seems to be more reliable, due to the mentioned upgrades plus a huge aux oilcooler. As for the OD planetary: It is claimed to have 4 pinions instead of 3. That was what mede me wonder, as even your HD version uses 3.

Cheers,
Stocki


Join the Elite Explorers for $20 each year.
Elite Explorer members see no advertisements, no banner ads, no double underlined links,.
Add an avatar, upload photo attachments, and more!
.


Those of you who have suffered through this long ordeal may remember that often I coveted 5R parts to "reverse" engineer into the A4LD rebuild. I dreamt of doing an A4 and 5R side by side... but no 5R's materialized.

Well, Brain, in Golden Colorado (home of the Coor's brewery and the Colorado School of Mines) got a 5R from Jefe to rebuild and do a side by side with the A4. He also appears to have a 4R or some 4R parts. He is doing a detailed comparison of these transmissions that is fantastic. He has some technical experience in transmission design and is the closest thing to a FORD engineer we may find on the hows and whats of these designs. I HIGHLY recommend visiting his thread - for a trannie geek it is truly awesome. It's here:

http://www.explorerforum.com/forums/showthread.php?t=117793


OK... I had another idea.... the trannie vent. If you cross (FORD) rivers or streams you run the risk of water in your trannie.. BAD idea....


The vent is located at the rear on top of the case...3/8 fuel line is a perfect fit... add it and run it up into the engine compartment if you are the kind who gets in deep water with your ex....here's the vent at the back of the case

15286DSCN5153.JPG


another view

15286DSCN5138.JPG


and hose...choose your length...

15286DSCN5139.JPG


For me ? My ex is what I call a soccer Mom ex, so I'll do it a little different. There is a casting web... I drilled mine for anchor the line

15286DSCN5141.JPG


the secured the fuel line there so it ran along the spine of the trannie

15286DSCN5152.JPG


15286DSCN5154.JPG


Remember guys this is a VENT... so if you cross rivers and streams buy 5 or so feet of it, put it on and run it up into the engine compartment... WATER and AFT mixed inside your transmission will KILL your trannie... no kidding!
Me ? I'm gonna run mine down....

15286DSCN5143.JPG


anyway... give it some thought.... H20 is not healthy for your trannie.... especially the frictions (it dissolves the glue holding em together).


I Had a look into Mircrocat and in fact it tells a different OD planet unique to the Scorpio Cosworth.
Here are the part numbers

Standard:4024688 Cosworth:6848450

This might be of interest

Cheers,
Stocki


Stocki, do you know if those numbers are the same for FORD America? I'm used to seeing something a little different Like F6TZ-7069D just to make up an example. Thanks for the legwork on this one, might be VERY interesting to try and pick one up and see if it fits interchangeably - especially since the OD planets are the same in the A4-4R and 5R!


I think I may have discovered (kinda of what I have kind of expected all along) as the answer why a A4/4R/5R trannie will engage in reverse when they are low on fluid but not forward. The line pressures for reverse are nearly DOUBLE the pressures in forward gears (Boost valve I think comes into play here). So if pressure was too low to operate the forward gears, it MIGHT still be enough to engage reverse. I am going to do a thread on using a transmission pressure gauge, and hope to demonstrate this little factoid in the pics in that thread.


Hey Glacier, I got a quick question for you. Why aren't you going to use the stock vent tube that has what is like an inverted p-trap (if you are familiar with plumbing)? The vent comes out of the case metal, has a short piece of tubing, and then it goes back to metal, traverses the length of the tranny, up the bellhousing to the top mounting bolts (where a bracket for the vent line get secured to one of the top bellhousing/engine block mounting bolts), does a u-turn (two radiused 90 degree bends with the bracket connecting the two sides), and then runs back down the drivers side of the tranny to vent down to the ground. The only way I can think of to defeat this trap and get water in the tranny is by having the front of the tranny about 60-degrees nose down in water, in which case they probably have bigger problems to think about....either that or fording water when you have a leak in another one of the gaskets.

Do you want me to post a pic?


Briain... well you got me there. The Ranger this came out of had a piece of tubing attached much like I proposed, I know that trannie had been replaced but apparently along the way the stock ararangement had been abandoned or soemthing, and I was unaware of the stock vent arrangement (DUH). I haven't pulled the working one from my Ex so I was unaware... I crawled under there and Yep - just as you noted. I guess I got ahead of myself and only confirmed what lots of folks here know - STUPID ! <g> Thanks for pointing that out! So, I'll omit this particular post....once everyone has had a chance to enjoy my moment of embarassment.


One note on the stock vent. Many of us have noticed that there are punched 'notches' on the stock vent up near the top, which completely defeats the purpose of it coming back down to pan height. Why does Ford do this? No one knows. However had I known that you could replace it with rubber hose I would have done so, taking it up into the engine bay where all my other breathers are. (Which now leaves me wondering. . .I don't remember my 700R4 having a vent. Have to check that one out)


HEY ! Inadvertant redemption! I guess I'll leave this part of the thread up afterall....Thanks Jefe. (And thank you for providing Brain your 5R ... his thread is VERY instructive.


Glacier991 said:
HEY ! Inadvertant redemption! I guess I'll leave this part of the thread up afterall....Thanks Jefe. (And thank you for providing Brain your 5R ... his thread is VERY instructive.
No, Thank you. I was about ready to take my 5R apart myself for personal know-how, which is something I would have never done had I not read all your A4LD threads. :thumbsup: However, giving it to Brian I knew it would be used for the greater good of the board. (plus its a lot less work :D )


Jefe, I hadn't noticed the notches before- nice catch (and sharp eyes).

The slots are about 1-1/2 inches from the top of the tube, still creating a trap for water if it gets up that high, but also breaking any vacuum that might such water up into the tranny.

Here's a what if situation: You've been wheeling hard all day and the tranny is hot. As it heated up, the fluid expanded and occupies more volume. Now let's say you start to ford a rockerboard-high river and for some reason stop (maybe to fish, or hook up some straps to pull your buddy from the mud.

If the transmission vent didn't have the slits, when the tranny was cooling down with the vent end submerged, it could suck a slug of water back up into the tranny. With the slits, it sucks in air and keeps the water out.

The trap doesn't have to be very deep to work, and that's what they accomplished with the loop up high and the inch and a half of drop before the slits. If the tube ended right there where the slits are located, then if/when the tranny did vent tranny fluid it would get all over the bellhousing and tranny. So the bottom portion is just to help keep things clean, unless you end up like this- :roll: -in which case tranny fluid is pretty far down on the list of things to worry about.


Ya just gotta love this board.


Well I am trying to run down Stocki's idea. I am hoping Torrie at Ford Parts Network can help (BTW a GREAT parts place... and a site sponsor)... meanwhile Brain and I have been talking... the fact the entire innards may swap is very exciting. Someimtes the obvious is just TOO obvious.... why swap SOME when you might be able to swap it all.

In discussing this notion, he mentioned that while the 5R also experienced many failures common to the A4/4R... he felt often these were related to inadequate pressures applied to clutches/bands, due to the fact that everything was run by solenoids, and they were easily plugged. I simple mindedly offered that in the A4, that was minimized so a reverse swap may significantly improve reliability, even over the 5R... Pretty quick I realized that was HIS idea ALL along.

We could revolutionize the life of old A4LD's and spawn a whole generation of folks not afraid to auto trannies here. IF (still an IF but looking promising) the 5R guts can go in a custom A4 case... well then folks, you have just come as close to bulletproof as that trannie is gonna get. If you haven't seen his incredible thread, go visit it, here:

http://www.explorerforum.com/forums/showthread.php?t=117793

Yeah pics and everything! Between my feeble efforts and his thread you can really get an idea how to do this trannie right, YOURSELF !


[EDIT: Torrie at Ford Parts Network has no idea about those parts numbers from Stocki. I HAVE discovered that the 5R55N MAY have used a 4 pinion OD planet.... more to come on this area... watch Brain's thread... as the planet is not likely reverse compatible without more. A study in progress.]


In looking into what Brain was doing, and discussing it with him, we kinda stumbled across the fact that the latest version of the 5R... the 5R55W, has a "high energy" band. I am assuming this will mean something either kevlar, or with more beef. Since the bands have all been interchangeable (A4/4R and 5R - and both OD and servo are identical), this could possibly be something one could use in rebuilding an A4LD. With a beefier band, I'd feel better about going to a stronger servo piston...(either AB for the intermediate, and maybe a ZC for the OD)...or firmer shifts... so... stay tuned.


I have spoken about tool "loan"/rental for this project. I am not really interested in making money on this, nor am I interested in losing tools that are hard to find or doing this as a charity. I have worked up some preliminary thoughts, be curious to have some feedback.... remember these tools are not available at Autozone <g>. What I have done is calculate replacement costs and that becomes your deposit (more or less).... please don't BUY my tools by forfeiting the deposit. That isn't the idea. ( I only have a few of each). Bad people will get a post on here identifying them.

The postage/shipping charges will be your responsibilty both ways. I hope to get some ideas as to shipping costs and post them too. Here is the deposit and "fee"... something to defray the cost of the tools and the handling. I'm searching for something fair for everyone, so feedback is appreciated and "desired"....please let me know if this seems reasonable.

TOOL //// DEPOSIT ////////// FEE

Alignment Pump Tool Set * $200 $15

Servo Insertion Tool * $25 $ 5

Seal Protector Set * $50 $ 5

Torque Converter End Play Tool $80 $ 5

Case End Play Gauge $50 $ 4

Staking tool $50 $ 4

1/4 inch lbs torque Wrench $30 $ 3

Rear Case Race drill Jig * $90 $ 8

Case End Governor Bore Set up
(with bushing to install, U keep bushing) $350 $45

Center Support Bushing Install tool
(With bushing, you keep bushing) * $75 $20

Full 1974 C-3 toolset (pump align,
servo, seal protectors and more) $225 $25

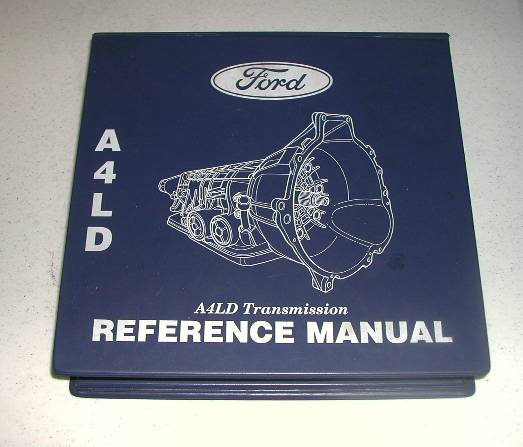
FORD Factory A4LD Manual
(3 ring binder - 2 " thick) $100 $10

* Recommended tools

The loan/"rental" would be for 30 days. Returned tools must be returned undamaged. The governor bore tool is "delicate". Special instructions will be given.


Does anyone see anything else you might need that you saw in the thread?

Does this all seem fair? HELP me help you all.

ps. This involves SOMEONE trusting SOMEONE, obviously. I have NO reason to cheat anyone, and a huge incentive to be fair and honest. SO... YOU get to trust me on the deposit issue, not vica versa with me trusting that my tools come home.


That seems very reasonable, price-wise.


Thanks Zippee. The passage of time between my post and your kind reply suggests I may be missing the mark here. Anyway this is what I hope might provide some incentive for the DIY folks to do their own rebuilds.


I don't know if you're missing the mark. A rebuild is in my future and after reading the thread I'd rather do it myself. Tools were obviously an issue.

I didn't pick up on your comment sooner because I've been swamped on other stuff.


Join the Elite Explorers for $20 each year.
Elite Explorer members see no advertisements, no banner ads, no double underlined links,.
Add an avatar, upload photo attachments, and more!
.


Tools

TOOLS FOR REBUILDING THE A4LD

Precision Tools

I thought this might be a good place to discuss what tools you might want to have available to do your own rebuild... let's start by talking precision measuring tools... here's a more or less full complement (missing feeler gauge and dial indicator and possibly other things)

15286DSCN5263.JPG


But while I used all of these, I could have done it with but one. One you can buy these days for $15... that's this...a digital caliper

15286DSCN5265.JPG


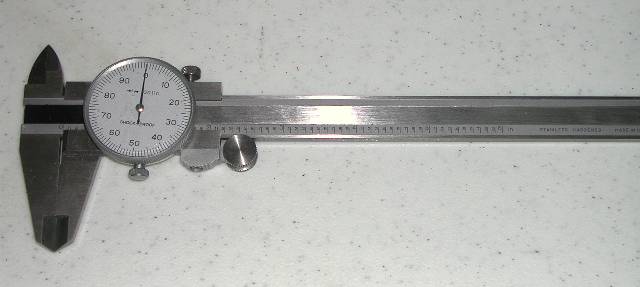
or a similar one using a dial instead of digital

15286Dscn5288.jpg


You need this tool (or others from the list below that can do the multiple jobs it does)

The dial caliper is a good all around tool to own. BUY ONE! Anyway long as we are here let's look at the others. A depth micrometer is a nice tool.... but you can do the same thing in this instance with the dial caliper. Cost fort he depth micrometer? About $40

15286DSCN5267.JPG


Micrometers keep getting cheaper and cheaper... for those who cannot read the micrometer there are digital versions.... a set of 3 of these (0-1, 1-2 and 2-3")will cost you about $30

15286DSCN5269.JPG


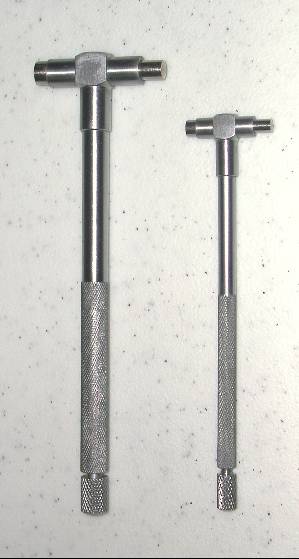
Inside gauges can be nice to check bores for round and for size... cost ? about $20 for a set 0 to 4 inches.

15286Dscn5268.jpg


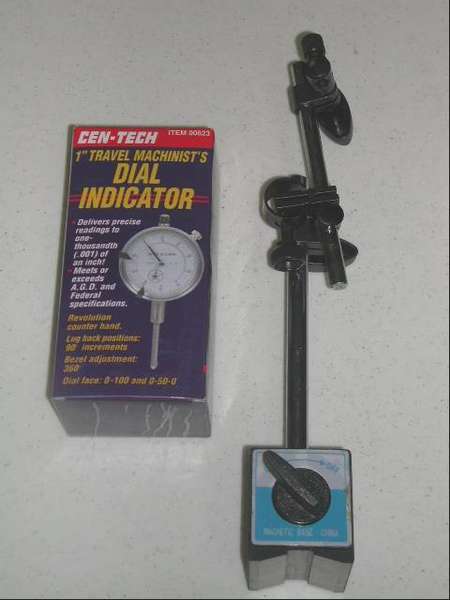
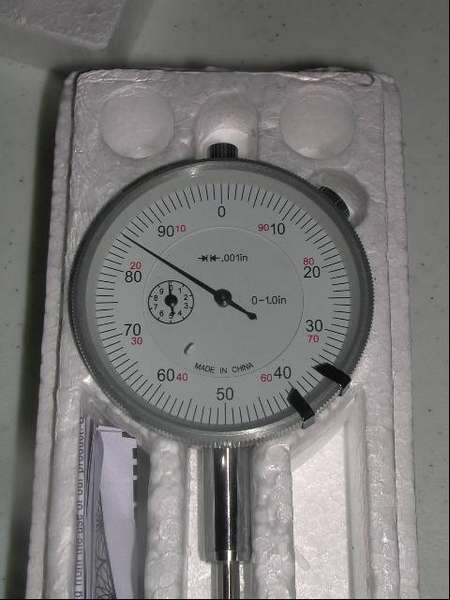
Finally, though you really can do without it, a dial indicator is a nice tool to own for a lot of chores. They can be had now with a mag base for about $25. I only used it to check the torque convertor... and even THAT needed another tool to use as well. They are *nice* to have though... brake rotor runout i where mine sees a lot of use

15286DSCN5270.JPG


15286Dscn5271.jpg


they come in various versions. This one reads up to an inch of travel... there is also a version that reads plus or minus from a set point (usually .100). At their cost it's nice to have both but if you only buy one, my advice is get the the one shown - 1 inch travel..

15286Dscn5272.jpg


TORQUE WRENCHES

These have come a long way. In the old days they were more or less all beam type.... like this:

15286DSCN5273.JPG


To read these you watch where the pointer goes to as the handle with the gauge attached bends under pressure... not always an easy thing..

15286DSCN5276.JPG


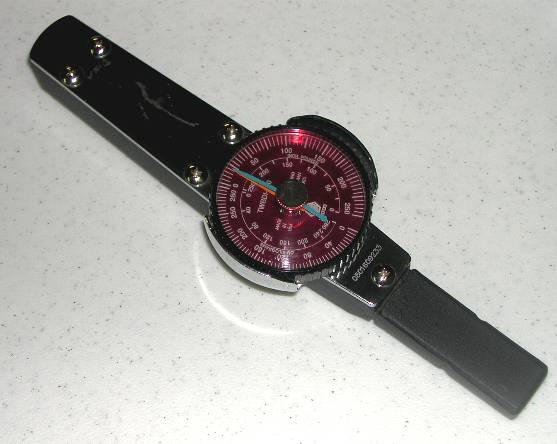
We have come a long ways since then. Dial type torque wrenches appeared, and would indicate the maximum torque on a needle....

15286Dscn5280.jpg


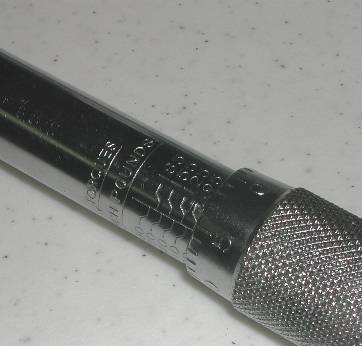
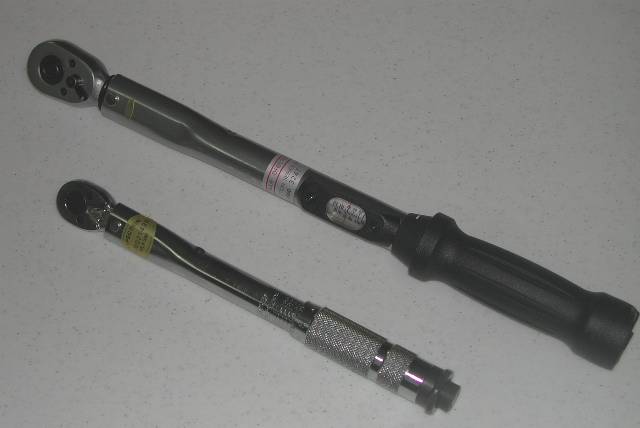
then came "click type" where the wrench could be set for a specific torque "micometer style" and it would audibly click when it was reached. These are handy and increasingly inexpensive.. on sale about $20 each. This is the setting part o a 1/4 inch inch pound" torque wrench

15286Dscn5278.jpg


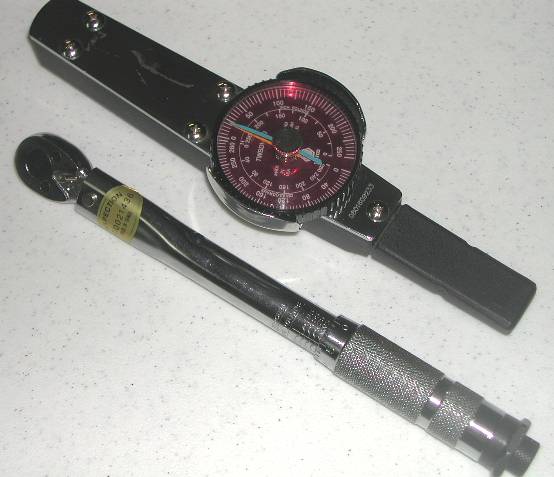
Here it is beside the 3/8" drive inch pound dial version

15286Dscn5281.jpg


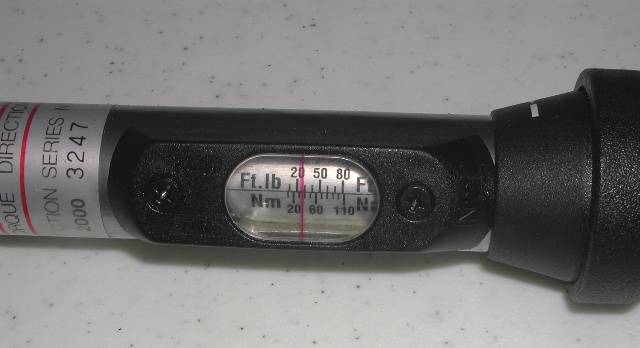
Click style torque wrenches are now coming with other ways to set them...here is a 80 ft lb version of one..

15286Dscn5279.jpg


Side by side with the inch pound version

15286Dscn5277.jpg


A note.. torque wrenches are more accurate at mid range and above.. using a 150 ft lb torque wrench to measure 10 ft lbs is not likely to be very accurate.

finally, we now have VERY expensive highly accurate strain gauge digital ones... guess what - NO PIC ! <g> I bet you can guess why.

Pick up a 1/4 inch click type that reads in "inch pounds" and you are all set. YOU NEED THIS TOOL.

SNAP RING PLIERS

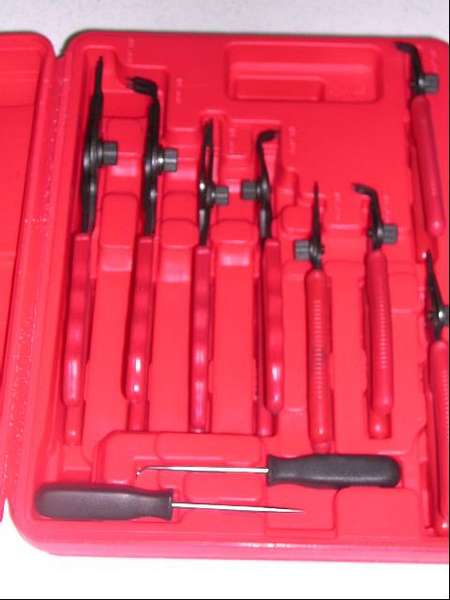
There is but a single traditional snap ring in the A4LD..on the output shaft. It is down in the case deep and a bztch to get off... anyway here is an assortment of snap ring pliers... This particular set bought off E-bay for $35

15286Dscn5282.jpg


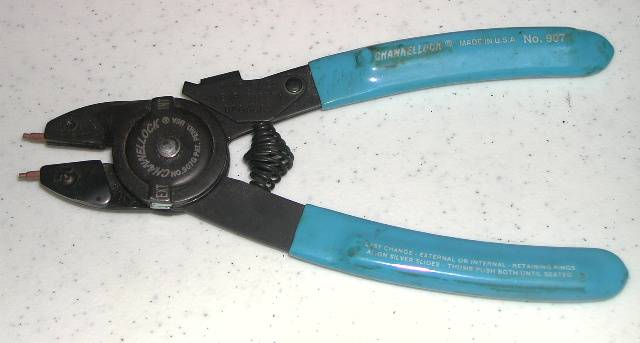
One of these was perfect or the job. Anther approach is a combination tool with replaceable tips, and the tool itself can be converted from inside to outside... this one is a Channellock

15286Dscn5284.jpg


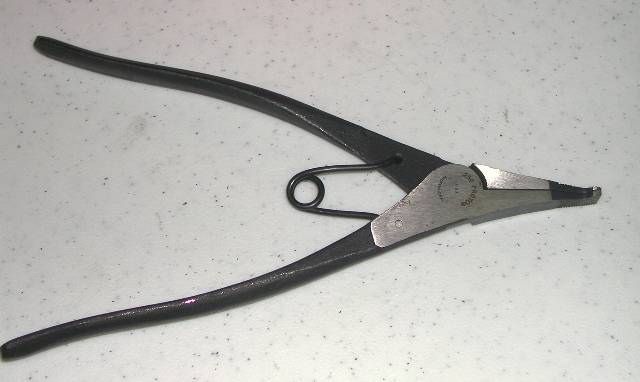
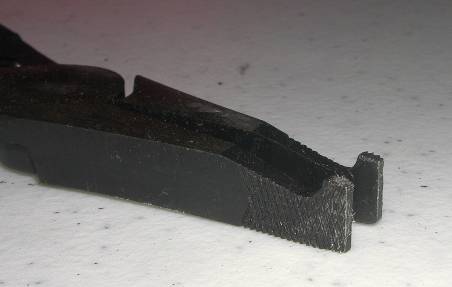
Now the IMPORANT ONE... the snap ring spreader plier... mine was made by Proto... NAPA ought to have it

15286Dscn5285.jpg


here is a closeup of the nose

15286Dscn5286.jpg


YOU NEED A STRAIGHT BIT SNAP RING PLIER AND A SPREADER PLIER to do this job.

SPECIALTY TOOLS (Or Trannie tools)

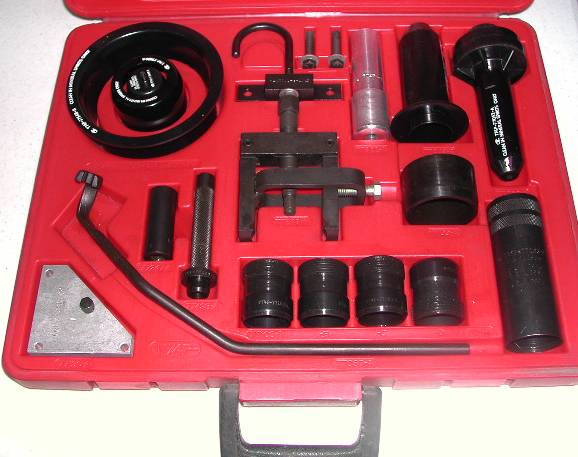
The A4LD is a C-3 with an OD. SO, it should come as no surprise that the tools needed are in fact C-3 tools....first sold in 1974! Here is that toolset

15286Dscn5291.jpg


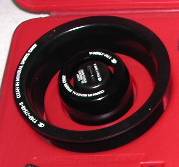
Of these only 1 is a MUST have, and then only if you splt the pump and bellhousing... it is this one...

15286pump_tool.jpg


I found a couple VERY nice to have.... the servo cover tool

15286servo_cover_installation_tool.jpg


and the seal protectors

15286seal_protectors.jpg


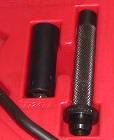
Other useful things include the reverse switch socket and throttle valve seal driver.... but you can replicate these easily...

15286reverse_switch_socket_etc.jpg


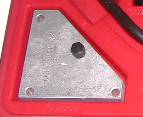
an the low reverse gauge tool....

15286Low_reverse_servo_gauge.jpg


The rest of these tools in the 1974 tool set were not really necessary.

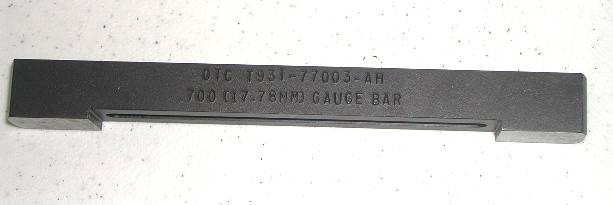
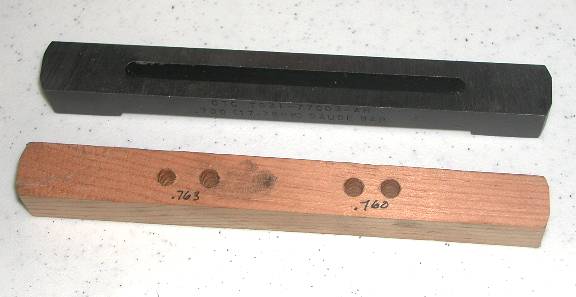
Another tool you will need is a gauge bar, to measure rear case and front case clearance. This tool was first offered by FORD in the 90's.

15286Dscn5307.jpg


15286Dscn5308.jpg


The good news is.... you can make your own...side by side (details are in the diary)

15286Dscn5309.jpg


YOU NEED THIS TOOL


REBUILD MANUALS

Another nice thing to have is the factory manual

15286Dscn5290.jpg


ATSG has a manual too, though a poor second to the factory manual but easier to come by

(pic coming)


[to be continued with more pics.... we'll go through all the tools....)


Back
Top