1956 F100 Explorer Chassis Swap | Page 14 | Ford Explorer Forums - Serious Explorations

  • Register Today It's free!

1956 F100 Explorer Chassis Swap

I got 0.023" welding wire ($13.99) and matching 0.023" tips ($5.99) today while on lunch from a local Ace hardware store. Harbor freight does NOT carry this size product. I will be picking up the rest of all the welding supplies I need tomorrow when I go back to HFT. 20 cu. ft. Argon gas tank for $89.99 (before using 20% off coupon) along with a few other things I found that caught my eyes.

If this rain we have lets up, I am planning on getting things going to finalize the cab prep so I can mount onto the frame officially by next weekend. My late nights are just about to be turned on full-blast!


Join the Elite Explorers for $20 each year.
Elite Explorer members see no advertisements, no banner ads, no double underlined links,.
Add an avatar, upload photo attachments, and more!
.


I like this thread , All the great info , helps when I have a 53 In my backyard thats been mine since I was old enough to drive legally lol , Drove it daily back in mid 2003 for about 6 months , then it sat off and on since about 3 years ago when I was able to try and get it going again , but the old 2 barrel carb on the 69 302 in it is toast
DSCF6095.jpg

That truck is in excellent shape for a good builder! What kind of plans so you have for it?


Those inline filters work pretty well too...If it isn't moisture or humidity...Try doing just the opposite and get slow evaporating thinner. It could just be drying too fast and the popcorning is just from going on too dry...

I tried sending the cowl repair panels back... But they only make them specifically for 56 and list them 53-56... They don't make them specifically for the 54...

Must be since the 56 is the more desirable year... we lower class 54 owners have to make them fit...:( I will send some pics of my modifications... They look pretty good now..


DEFINITELY NOT lower class! :dpchug: We 50's Ford owners are ELITE :salute:

Thanks for the advice, I will be trying the filter out and see what happens. Not a bad price for $1.99. I'd love to see your results with these panels.


That truck is in excellent shape for a good builder! What kind of plans so you have for it?

Thank you , but its not in that great of shape , needs lower door outer shells , cab corners , rocker corners , work on all 4 fenders , hood and tail gate , oh and dent on roof , But Its a pretty good start for what my Dad Paid for it back in 1992 I do believe , think it was around $12-1400 .

Supposedly it has a 1969 Boss 302 motor in it , I believe its a C4 trans , Looks to be a 9" rear and stock front brakes and suspension , I plan to restomod it , Updated interior here and there and possibly make it Efi down the road .

Well "excellent" in the fact that you aren't starting with a basket case like mine! PLUS, this is a keepsake that seems to mean a lot to you as it was your dad's.

Keep me posted in your progress! :thumbsup:


Well "excellent" in the fact that you aren't starting with a basket case like mine! Keep me posted in your progress!

will do , it will be slow going on any progress for a few months at least , at a new job and they work me 40 + hours a week which is nice but has its downsides as well


As far as the "popcorn" look, I concur with either water contamination or "dry spray". Not getting a wet enough coat or depending on the heat/humidity, it can reduce your workability time with whatever you're spraying, especially if it starts to "kick" (cure) on you while it's still in the gun. Some paints don't work well in high humidity as well. That spray gun you picked looks a lot like the one I got from HF, it laid down some decent coats. Just make sure to do a 50% overlap. With your joints looking a little ragged (I'm having trouble picking out exactly where that joint is located), have you maybe thought of trying a polyurethane sealant? Some aren't compatible with certain solvents, so you might want to look into a compatible sealant, especially with your primer being part acetone. I imagine if you sandblasted the joint clean, you could lay down a bead of sealant and smooth it real nice with a putty knife with a little contour to it. It'd be flexible and shouldn't crack like Bondo, it being kind of a hard filler. The risk there is that the paint over the polyurethane could crack if it flexed. Great thread, btw!


As far as the "popcorn" look, I concur with either water contamination or "dry spray". Not getting a wet enough coat or depending on the heat/humidity, it can reduce your workability time with whatever you're spraying, especially if it starts to "kick" (cure) on you while it's still in the gun. Some paints don't work well in high humidity as well. That spray gun you picked looks a lot like the one I got from HF, it laid down some decent coats. Just make sure to do a 50% overlap. With your joints looking a little ragged (I'm having trouble picking out exactly where that joint is located), have you maybe thought of trying a polyurethane sealant? Some aren't compatible with certain solvents, so you might want to look into a compatible sealant, especially with your primer being part acetone. I imagine if you sandblasted the joint clean, you could lay down a bead of sealant and smooth it real nice with a putty knife with a little contour to it. It'd be flexible and shouldn't crack like Bondo, it being kind of a hard filler. The risk there is that the paint over the polyurethane could crack if it flexed. Great thread, btw!

Thank you for all the info!!! :) I'm going to make a trip to a body shop supply company to get the sealer. I'll need to find out which ones are good for these areas and ok to add to already primered areas. I'll never be able to remove all the paint and other "fillers" already there, but I'll go back and blast again as much as possible.

I actually didn't get the smaller sprayer from hft, just the larger one, which I haven't used yet.

I'll be posting more progress soon, been waiting on a few things to get completed on other things, just more delays as normal. :banghead:

Thanks again for everything!!!


Maybe try a wire wheel on a 4 1/2" grinder, followed by bead blast. The wheel will remove nearly anything not metal, the difficulty may come in finding a narrow one. Given enough force and time they can go through thin metal, but if you're careful it shouldn't... that's some honest-to-goodness metal on those old ones. If you can go the polyurethane way, taking a cheap plastic scraper and trimming it with a utility knife/bench sander could be a cheap way of getting it in there nice and uniform. I'd experiment with maybe some wood or angle iron with a mock "joint" because some of that stuff is stupid sticky... figured I'd warn ya.


Oh, where to begin today??? First, an apology for the delay in my posts; due to work changes, lots of weather (rain and wind mainly) and my shop being utilized for other things, I haven't touched the 56 in 2 months! :( That is until yesterday. I will share more of the progress in a moment. The amount of rain here in Arkansas has been torrential, to the point that my Mustang sustained $8600 in flood damage. A new motor and brake booster had to be replaced as well as the carpet had to be pulled for treatment. It floated like a boat on what seemed to be a normally-traveled city street downtown Little Rock.

IMG_20140708_223051_727.jpg


Just got my car back yesterday, EXCITED!!!

IMG_20140725_154006_165.jpg


Here is some rain we got.

IMG_20140626_145946_672.jpg


More rain.

IMG_20140608_081212_744.jpg


And even more.

IMG_20140610_161947_284.jpg


So, I finally had a dry day to myself for whatever I wanted to do. I did have many things that I NEEDED to do, but it was wearing on me, just staring at the project and knowing that I hadn't touched it. I still haven't purchased the gas for welding, so I decided I would do things that wouldn't require welding for now. I have been getting better at welding, as my "practice" trailer has been modified with more things than originally bargained for. A new ramp was built from scratch too!

IMG_20140712_152303_944.jpg


I moved the cab back onto the frame for final fitment, trimmed a few things, may need more, but I should be able to reach everything I might need without fully removing again. Because the front clip wouldn't sit down correctly due to the inner fender wells being in the way of everything, I had to remove them first. I will measure and see how much I can keep when re-installed later. I will need as much as possible for mounting hardware.

IMG_20140725_120612_287.jpg


Once removed, I was able to set the front clip in place for fitment. I noticed that the frame rails were in the way and would need to be trimmed back 3" to allow proper positioning.

IMG_20140726_103134_437.jpg


I cut each side equally.

IMG_20140726_103521_823.jpg


I moved the front clip into place and held it up using bolts through existing holes from the old radiator mount.

IMG_20140726_113845_142.jpg


I placed a couple of bolts where the rear of the fender mounts into the original cab holes. Now I can finally see how my forecast would turn out! It is spot on! tire fits perfectly in the center of the wheel well as I wanted.

IMG_20140726_112928_505.jpg


Once together, I got to step back to see how it would look.

IMG_20140726_112829_874.jpg


Loving it! I put a running board in place for viewing pleasure and measuring purposes, but forgot to get pics to show the whole thing. The measurement below does not account for added weight with all materials or motor, so it will be even lower naturally. Kind of nice that I won't need lowering compomemts, although I may need to stiffen the suspension or somehow limit the wheel travel for bumps. The last thing I need is to hit a bump and damage something.

IMG_20140726_113659_111.jpg


I'm satisfied with the stance.

IMG_20140726_112920_205.jpg


Some may say too low.

IMG_20140726_112957_000.jpg


IMG_20140726_112928_505.jpg


I placed the old windshield back in place for several reasons, but also just simply loved seeing it look more complete.

IMG_20140726_112829_874.jpg


I pulled it up to the front of my house to get closer to my welding area as well as show off a little to my neighborhood ;) Maybe I won't let it be so long before I work on it again.

IMG_20140726_152147_640.jpg


Craigslist find of the day: Suzuki Sidekick converted into a golf cart.... wow!

00M0M_gMBqn19EDay_600x450.jpg


Until next time!


Great to see that you are back at this project. I had hoped you hadn't given up on it...

What a great looking Shelby! That's a fantastic color combo for it. I hope it's all in proper shape again.


Shelby

Glad to see they were able to fix up your car. That much water at one time sucks!
The pictures of your truck build are great. You are doing amazing work here!


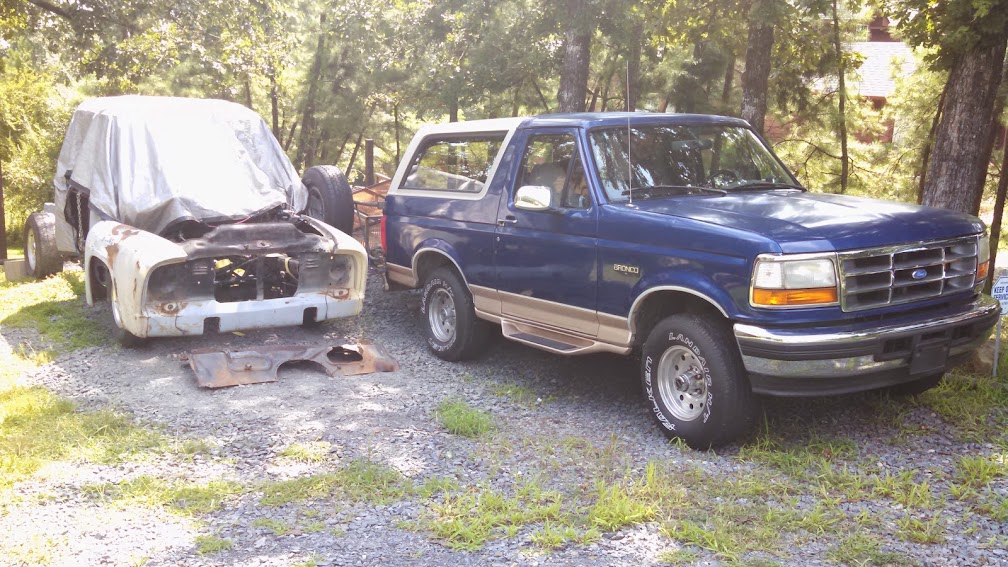
Since my very first Hot Rod magazine subscription in 1992, I've been seeing ads for POR-15 claiming it's "Paint Over Rust" attributes. I've always thought it would be cool to try it out on trucks and other steel things I wanted to preserve to see how well it actually works. There are so many unseen places that are hard to reach, sand, scrape, or otherwise effectively halt rusting effects, and this is where I want to try it.

Some areas I've spent hours sanding and priming are starting to show rust ALREADY, but I know from research, primer isn't meant to stop this process; it has to be covered quickly with a finish coat. This is not available to me as I am working from the inside out, and small sections at a time, essentially. The inner fenders, frame, interior and places that aren't getting a final treatment after prep work need protection. I really hate doing work more than once, but I'm learning this by making the mistakes as I go along.

After seeing that LMC Truck is now selling POR-15, it made me re-visit the idea that this may be the ultimate solution for this project. It is not cheap stuff, in fact at $165/gallon or $50/quart it is somehow more expensive than my wife's makeup ;)

Luckily for me, and anyone who wants to first try a sample amount, there is an awesome kit for $22 or so, which you can purchase online or find locally. I used their website: http://www.por15.com/ to locate a local distributor that had this same kit priced at $20.08. Not only was it cheaper, I didn't have to pay for shipping, OR WAIT FOR DELIVERY!!!

IMG_20140812_160017_462.jpg


This "Super Starter Kit" comes with all the necessities as they state: "You'll get a 4 oz. can of POR-15® Gloss Black (enough to cover 6 square feet with 2 coats), a half-pint of POR-15® Metal Prep, two wooden handle paint brushes, and a pair of our special high-dexterity surgical latex gloves, PLUS an 8-ounce bottle of our famous POR-15® Cleaner Degreaser, the world's greatest WATER BASED degreaser.

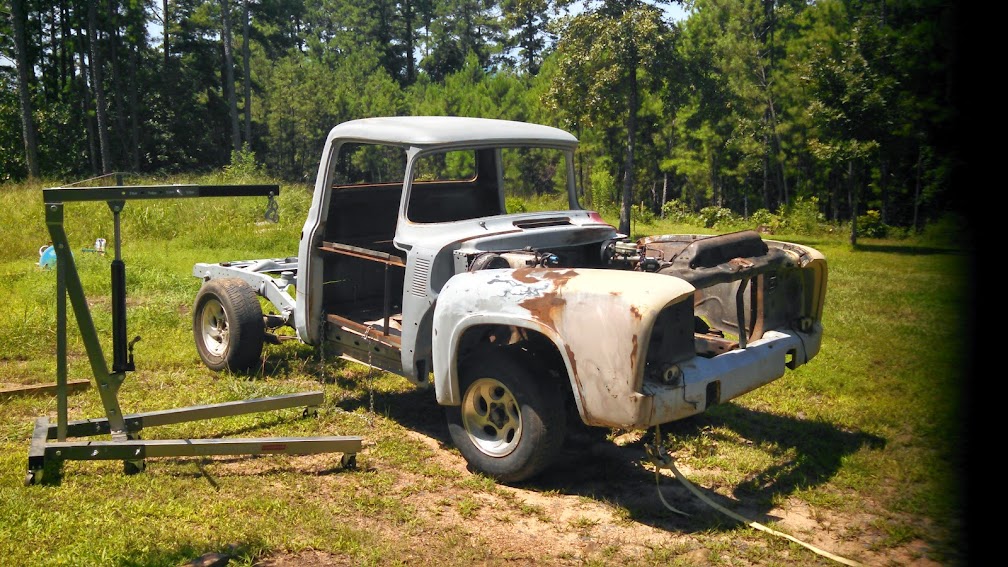
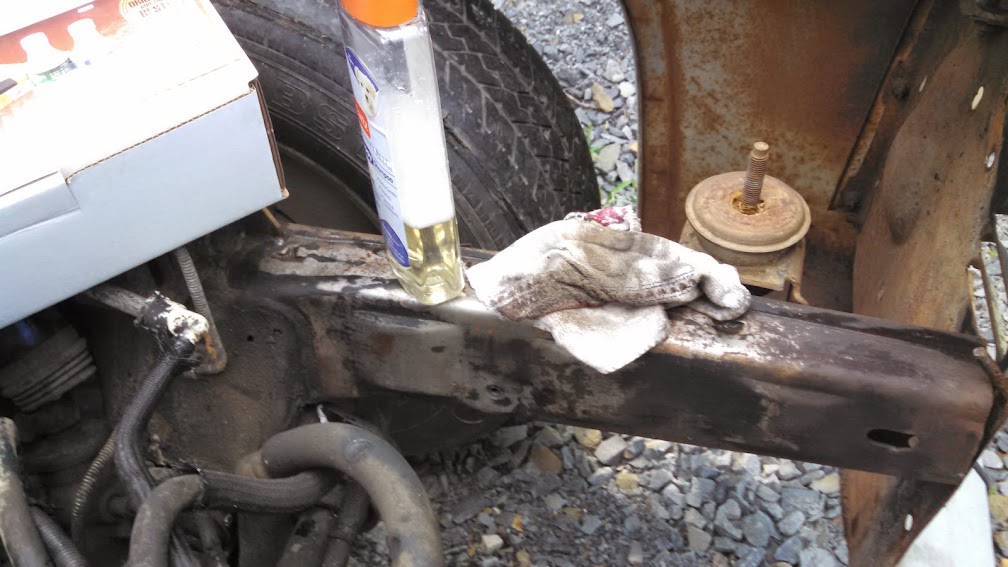
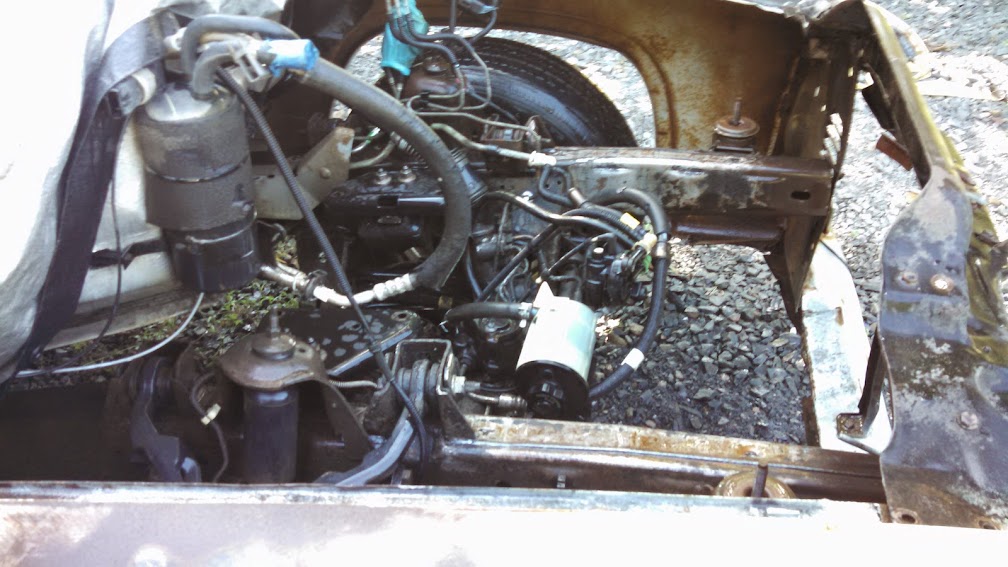
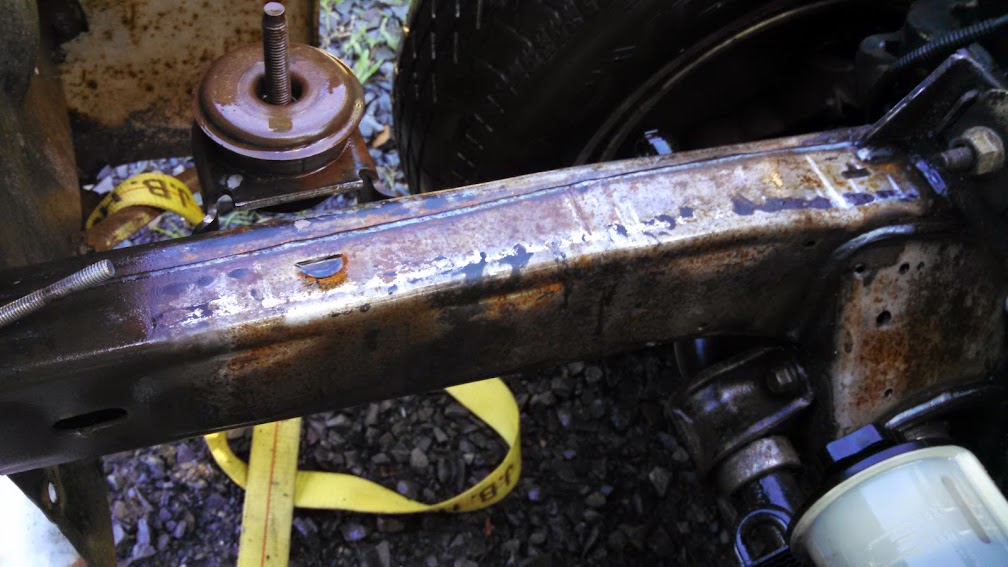
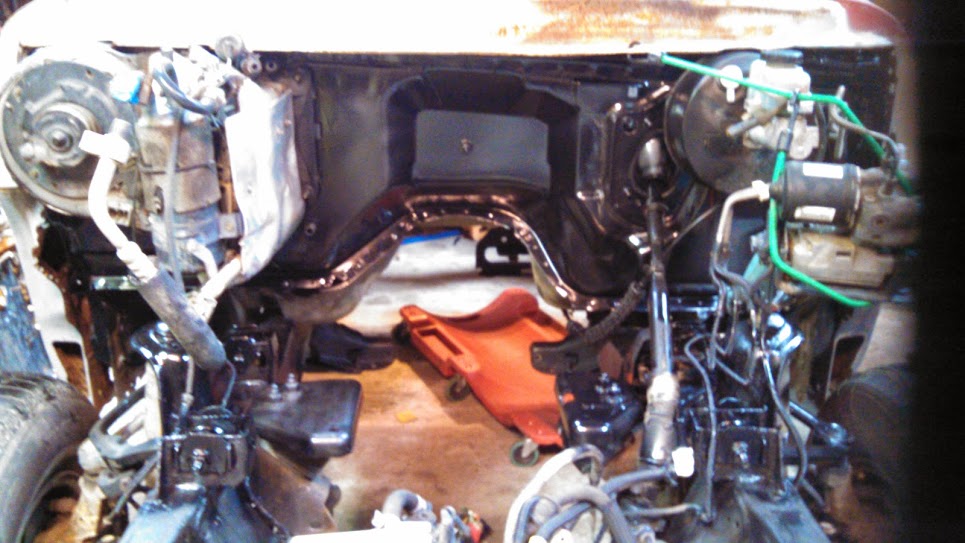
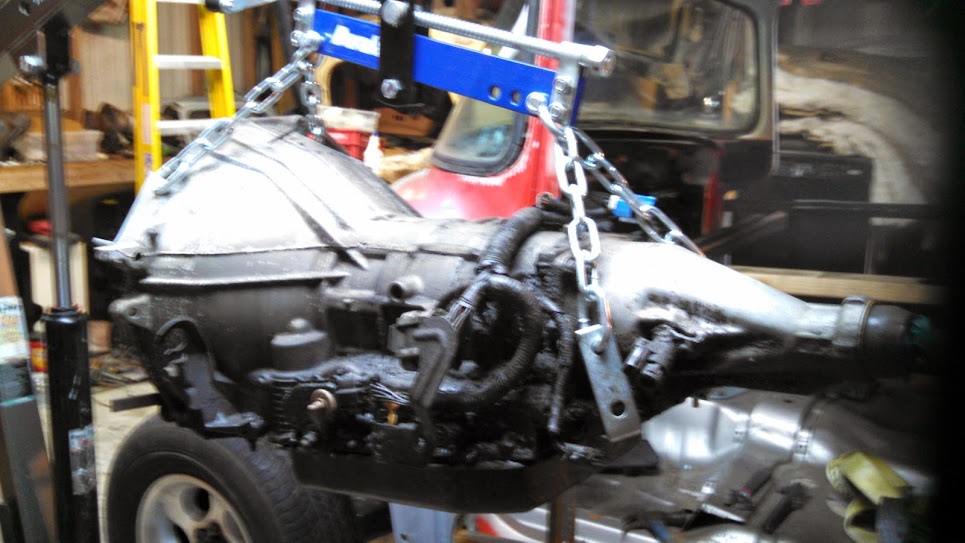
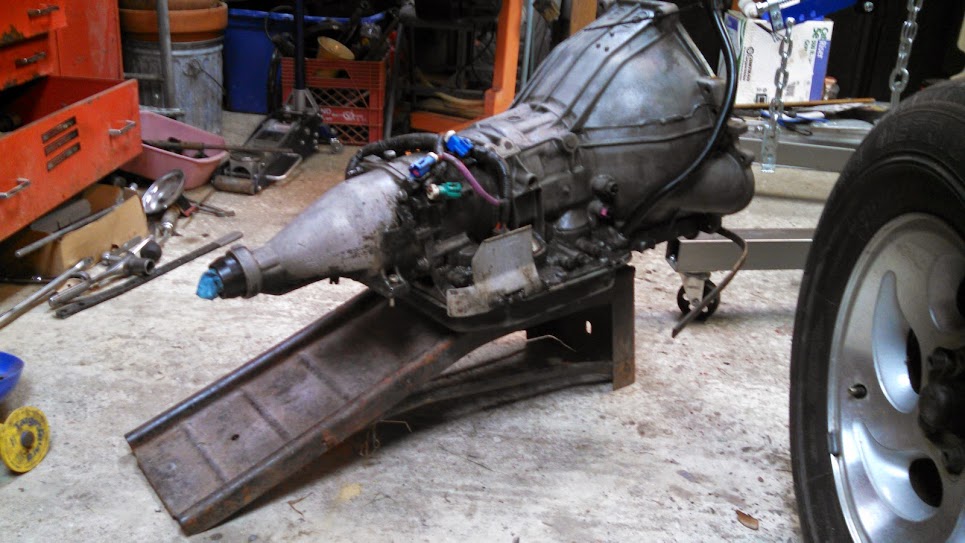
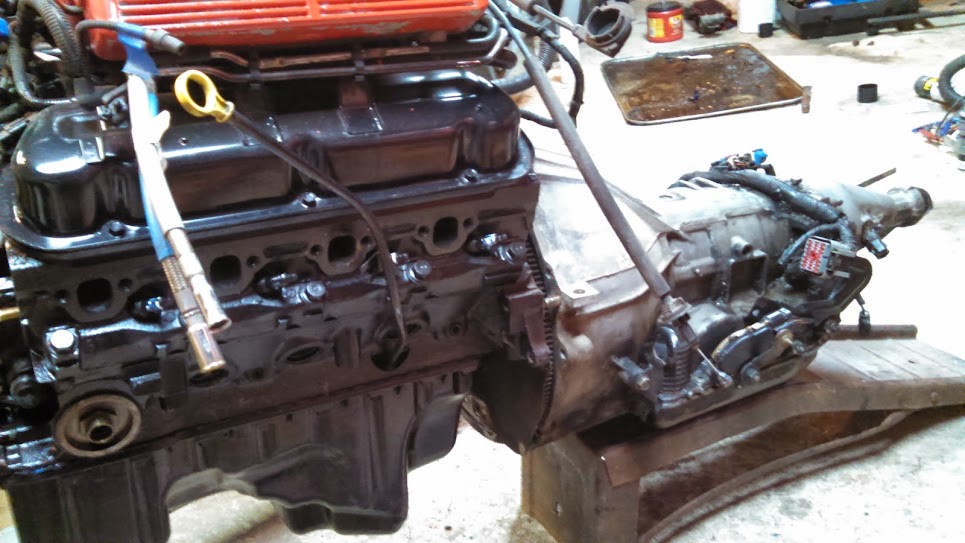
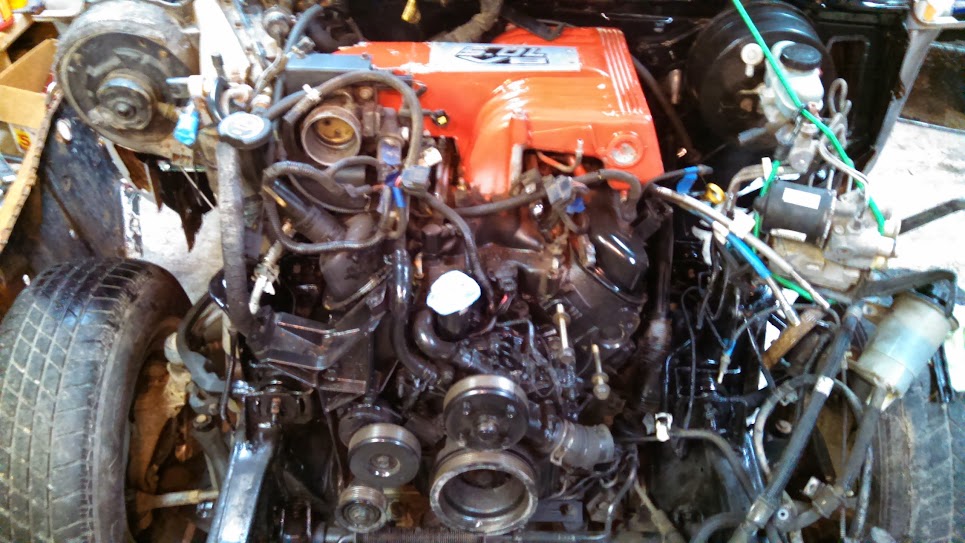
I have been using oven cleaner and degreasers repeatedly since the removal of the engine and I'm comfortable with any remaining amounts that are not noticeable as they surely won't be noticeable once everything is back in place. I think that once I get to the point where I am working on the suspension, brake components, and other individual sections, I will focus on those areas with this treatment at that time, but my main goal today was to prepare the engine bay area so that I can start the process of engine installation in the near-future (I'm excited about that!)

I started to clean with their degreaser, mixed 1:1 with hot water, ans sprayed it on liberally. I used a rag to keep it moist and working it into anywhere I would be soon painting.

IMG_20140812_160024_423.jpg


The areas should remain wet with the cleaning solution for 15-20 mins and then rinsed off. Time to sit back and enjoy a break, or wash another car while you have a hose in your hand :)

IMG_20140812_164207_699.jpg


Next, it was time to use the Metal Prep, I used a sprayer again to wet the areas and let it do its etching to ensure a proper bond for the final coating.

IMG_20140812_164222_354.jpg


IMG_20140812_164228_983.jpg


This is what they say about this step: "POR-15® Metal Prep provides the best adhesion for POR-15® Rust Preventive Coating on any metal surface, including aluminum and shiny polished metal surfaces. Our simple process gently etches metal, creating an ideal anchor pattern for coatings such as POR-15® Rust Preventive Coating, while simultaneously leaving a zinc phosphate coating to insure chemical bonding of paint and steel. Avoid other preps that may leave harmful residues which prevent proper adhesion. After thoroughly degreasing your work piece, apply environmentally safe POR-15 Metal Prep to both neutralize any rust and etch any clean bare metal. This will allow better adhesion of POR-15® Rust Preventive Coating or any other coating. POR-15® Metal Prep is not caustic, corrosive, toxic or flammable."

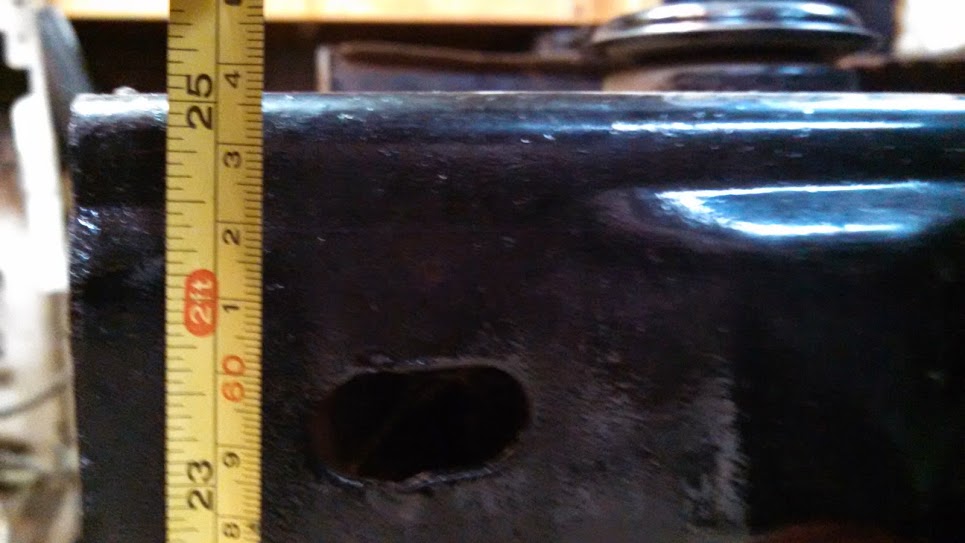
After application for 20+ mins, rinse off again. Once it's dry, a light haze (zinc phosphate) will appear.

IMG_20140812_171341_133.jpg


IMG_20140812_171353_698.jpg


IMG_20140812_171418_069.jpg


Of course, none of this is as fun as the next step!!!

***WARNING*** The POR15 coating you are about to witness has possible undesirable effects; it will permanently stain fabrics, permanently coat solid surfaces, and stain your skin for several days. Use protective (but disposable) clothing and coverings on anything that may come into contact with this stuff. You have been warned!

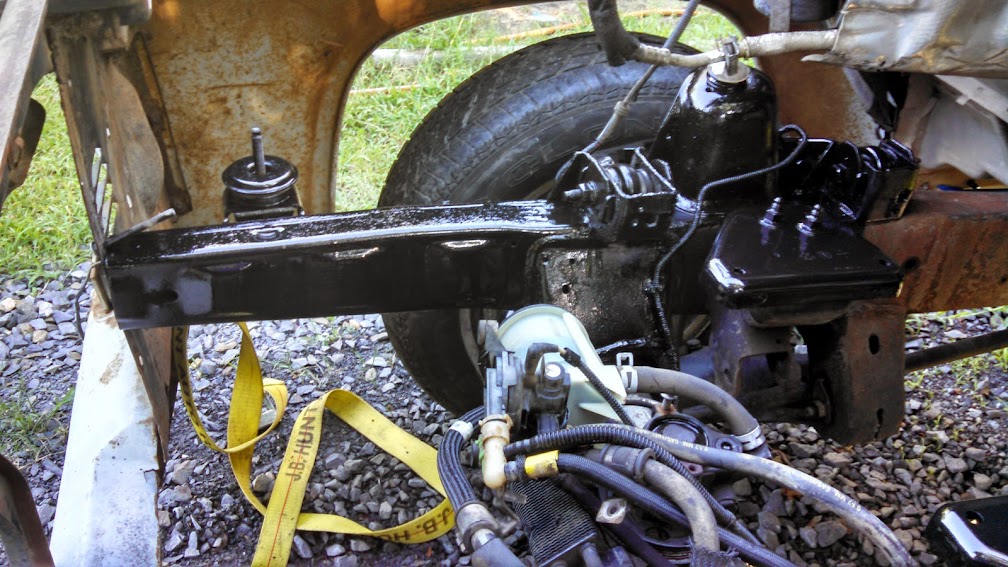
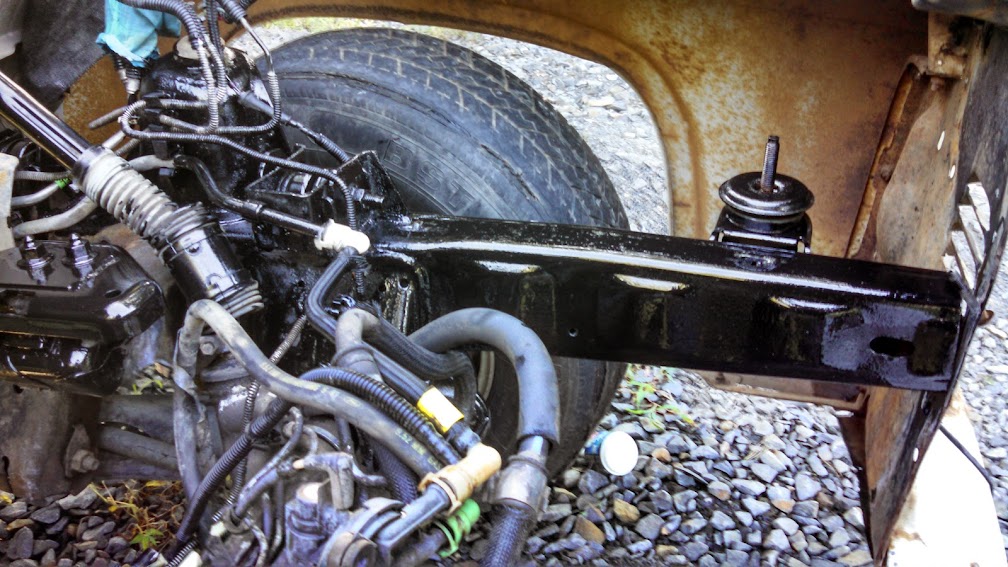
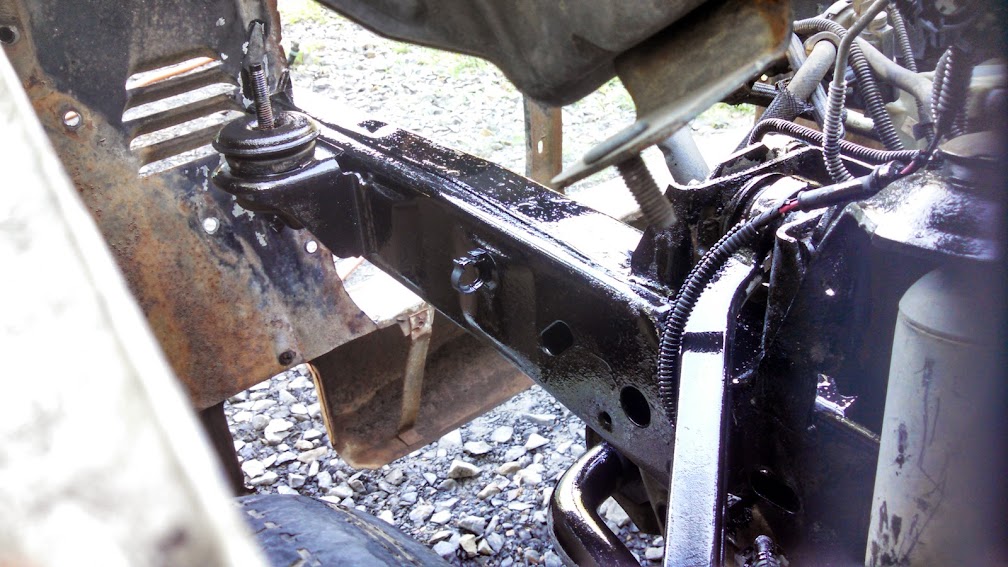
This is the moment I have dreamed about for over 20 years! My first POR-15 coating!

IMG_20140812_183009_377.jpg


IMG_20140812_183033_540.jpg


IMG_20140812_183203_027.jpg


I'll take more pics of it tomorrow evening after it's been dried and cured 24 hours to show how it looks. It should be somewhat glossy, but a matte finish is capable of being added as an additional top coat if desired.

Here's some additional info they say about it:

POR-15® Rust Preventive Coating is a high performance coating designed for application directly on rusted or seasoned metal surfaces. POR-15® Rust Preventive Coating is non-porous and seals and protects many surfaces from water, chemicals, salt, and other corrosive contaminants. POR-15® Rust Preventive Coating is an effective anti-corrosive and rust preventive coating that offers superior chemical resistance due to its dense, cross-linked molecular composition and non-porous attributes.

The secret lies in POR-15® Rust Preventive Coating's curing process. Most paints dry through evaporation, but POR-15® Rust Preventive Coating dries faster when moisture is present. It has the opposite chemistry of ordinary paints. Now add to that POR-15® Rust Preventive Coating incredible hardness, toughness, and flexibility and you have a coating that is practically indestructible. POR-15® Rust Preventive Coating is great for auto restoration, and protecting valuable equipment against rust and corrosion. You'll be amazed at the toughness!

There's a lot of cool stuff on their website as well as other places on the interwebs. Check it out and.....

keep-calm-and-just-say-no.png


TO RUST!!!


Just for fun, I thought I'd stick some random pics of recent projects that I've done for my "clients" which have kept me plenty busy.

IMG_20140809_162523_993.jpg


IMG_20140809_162456_825.jpg


IMG_20140808_134341_474.jpg


IMG_20140808_121440_535.jpg


IMG_20140807_201637_171.jpg


IMG_20140807_201122_390.jpg


IMG_20140807_201108_162.jpg


IMG_20140730_191950_002.jpg


IMG_20140724_221534_447.jpg


IMG_20140517_175437_000.jpg


IMG_20140730_240918_472.jpg


And for a good chuckle..... this Google Street View car that was too busy to realize they were going the wrong way down a one-way street in Little Rock. Can't wait to see how this may appear in Street View!!!

IMG_89294704178032.jpeg


Oh darn, a Google cam car crashed ;)

They caught two of my friends and my friends father out in front of his house one day.
 

Attachments

  • chris_google.jpg
    chris_google.jpg
    72.2 KB · Views: 1,824


It's about time for an update again. I will post more over the weekend, but wanted to let those that are wondering.... YES.... I am still going at it! :) I have been acquiring more parts and tools, just need time and money just like everyone else!

I FINALLY found the welding clamps I needed for the cab corners. I literally went to 3 welding supply shops, 4 auto parts stores, and 3 hardware stores with absolutely no luck. I went in to Harbor Freight Tools recently to get a "free" coupon item and ran into these. Been right here all along right under my nose!!!

http://www.harborfreight.com/8-piece-butt-welding-clamps-60545.html

For only $8, they will be a lifesaver for panel placement/welding. (Don't forget to use the available 20% coupon too!!!)

Since I have trial fit the front end and the cab is ready for final welding to the firewall/floorboard, it's the last chance I have to coat all the "hidden" areas that will be covered up once secured. Since the POR-15 coating is so expensive, I am supposedly to receive some for my birthday. $50/quart is not in my budget lately with limited extra project money. Less than a month and I'll be getting elbow deep into this again.

With the help of my dad and brother last week, we pushed this thing back into the shop. Poor thing had to sit outside for a bit. :( My dad took a brief but inspecting-look at this project and seemed to approve the progress. He gave me some advice I needed for a few items that I was concerned about. It was a great visit and hope next time he's here, I'll get to take him for a spin in it!

That's about it for tonight, I'll post more again soon with pictures and other items.


Good to hear that your still at it! It's always exciting watching a project come together.


Good to hear you are still at it Buddy. :rangergreen:


Join the Elite Explorers for $20 each year.
Elite Explorer members see no advertisements, no banner ads, no double underlined links,.
Add an avatar, upload photo attachments, and more!
.


Moving forward with things, slowly but surely. Here is the most-recent work, but first, my youngest son's expectation for the truck... as if it's going to be a super hero vehicle.

IMG_20141121_202243_222.jpg


Firewall Prep/B]
The firewall has been thoroughly cleaned and painted with engine paint. I was going to use POR-15 for this, but it's never rusted, and shouldn't rust. However, the firewall can get just as hot as the engine, so having paint that can withstand 550 degree temperature is not a bad idea.

IMG_20141122_230311_971.jpg


Transmission Clean-Up
Using degreaser and, ironically, "elbow grease" I removed as much grime and dirt from the crevices making future maintenance and leak-detection cleaner and easier. I used the engine crane to suspend it over a large pan to catch the cleaner and debris.

IMG_20141122_230227_749.jpg


Once dried, I used a vehicle ramp to raise it for easier mounting to the motor and keep it level, as it has the extra bulge in the bottom of the pan.

IMG_20141122_232940_241.jpg


Torque Converter
Before removal, I marked alignment so I could match the exact hole with torque converter bolt. I used spray paint. The marked bolt was pointed at the bottom ready for mating. You can see in the picture, I secured the torque converter to help protect it from accidentally falling out. You definitely don't want that to happen.

IMG_20141122_230254_672.jpg


Flywheel Alignment
Again, this was marked for alignment. I scraped the inside center to match the circle marked on the plate. I tightened the bolts to 80 lbs. per Haynes manual specs. Don't forget to install the flex plate BEFORE flywheel, of course.

IMG_20141123_243644_491.jpg


Mating Engine To Transmission
The engine has been ready for this moment for several months. Sitting covered with no movement, I put a little Lucas oil into the and just a few drops of Marvel Mystery oil into each cylinder to ensure some lubrication before turning the crank a few revolutions. I stopped with the flywheel's torque converter hole pointed down for proper matching and for obvious mounting alignment. Using a leveler certainly makes for lighter work on the mating the engine to the transmission. Once aligned, I started bolts, slowly tightening one side and then the other to ensure flat and equal pressure applied. Check often that the torque converter bolts are going through the proper holes and all brackets are in place before they are nearly impossible to reach. Ultimately I tightened the bell housing bolts to 50 lbs with a torque wrench.

IMG_20141123_010159_137.jpg


IMG_20141123_015521_109.jpg


Electrical Connections
Most electrical connections on the transmission lead from the engine wiring harness, so plugging these in now will save headaches later. Take extra pictures of the back of the engine and other areas that will soon be hidden for future reference.

Into The Rabbit Hole
Ok, the tricky part with this is, not only am I installing both the motor and transmission at the same time (which I have NEVER done) I also have the 56 cab that slightly protrudes beyond the original explorer firewall. I had to carefully select strong points to bolt the leveler to. Slowly but surely I edged it in, then a small problem...

IMG_20141123_022033_380.jpg


Engine Mounts
The engine mounts must be removed to bypass the trans bellhousing. There is only one 3/4" nut on the bottom of each side necessary to remove. Do not attempt to remove the top ones, nearly impossible, and you may damage them. The passenger side will need a 6 inch extension as you must access the nut through the frame at an angle.

IMG_20141123_022044_490.jpg


Before/After Height
Curious at the ride height, I measured the frame at the front end before and after drivetrain installation. With just the engine and trans in place, it dropped 1.5". I'd love to know what the original height would be. Anyone out there have this measurement? Remember from a previous post, this would be about 3" from the end of the frame originally.

IMG_20141123_041342_065.jpg


IMG_20141123_041405_072.jpg


Voila, She Has A Heart Again
And there is the crown jewel. A long way from running, but now I can move forward with things that have been waiting for measurements for brackets, wiring, and other items that were dependent on the engine location. The hardest part of this project is analyzing the processes. What to do first. Do I do "X" before doing "Y" or will I be better off reversing it. Admittedly so, I have been putting off some of the permanent portions just so I have a chance to ensure that I am not overlooking important aspects.

IMG_20141123_041704_513.jpg


The Next Steps
I have more cutting to do, ugh. But it's for important electrical connection points that I have been staring at for several months contemplating my next move. I already know what to do, now that the engine is in place! I guess this all better than this...

3ab479ebf5d2fb875612a9799bab6b5c.jpg


Until next time, thanks for visiting!


Back
Top