The Black Pearls LM7 5.3 LS SWAP! | Page 6 | Ford Explorer Forums - Serious Explorations

  • Register Today It's free!

The Black Pearls LM7 5.3 LS SWAP!

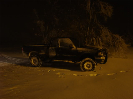
SO I guess the time has came early for my 5.3L LS swap on The Black Pearl!!

LET THE HATE BEGIN!!!

I have a buddy that is a drag-racer but started working for a ****ty speed shop in the area and now he is burnt out from engines and all that; He is getting into guns and i have built a few ARs. We did some talking the other weekend and we figured that one of my ARs is worth about the same as his 400-450 horse Gen3 LM7 (706 heads, Gen4 internals. Titanium valve springs, retainers and guides)

Currently the piston rings are gaped and it has a cam setup for spray but he just hadn't gotten around to get nitro setup in the car yet. This is in a late 80s Monte Carlo BTW.

This are some pictures i loaded on my SAS build thread so i will post them up here to keep it all in one place.

General LS pic.jpg
This is just a general picture i found on google but thats pretty much the setup i am getting.

I have some 2010 Camaro exhaust manifolds that will be used (IF they fit!) that he threw in as well.

I went to the wrecking yard last weekend and picked up a 2000 tahoe fuseblock, harness, MAF and PCM for $40.65 out the door.
Junkyard harness.jpg

Started pulling it apart and removing ALL un-needed circuits, Factory fuse block, A/C, EVAP, Trans and a few other circuits.

harness remains.jpg


i also added a few circuits such as a secondary ground circuit for the Taurus 2-speed fan i have installed. The fans are controlled by the PCM, the PCM sends ground to the fan relays to turn them on/off at set temps (that will be programmed into the PCM when it gets tuned).

This is what we have left:
My harness.jpg


To clean things up in the engine bay i am going to use a Corvette style fuel system. There is no fuel pressure regulator on the fuel rail, it in in-line on the frame rail. It also uses a return-less system incorporated into the fuel filter, with the regulator.

Screenshot_2019-01-03-12-27-01.png

450 is overkill but this pump is a direct for to the explorer in-tank fuel pump according to Walbro.

This fuel filter will replace the factory Explorer fuel filter. It is a Corvette fuel filter with a built in fuel pressure regulator. With a return line back to the tank for unused fuel.
Filter regulator.JPG


These engines require 60PSI fuel pressure and the 1gen explorers are only pushing around 30-40 PSI.


Join the Elite Explorers for $20 each year.
Elite Explorer members see no advertisements, no banner ads, no double underlined links,.
Add an avatar, upload photo attachments, and more!
.


DO IT
5.3 is perfect compact v8 power house excellent drivetrain in a Explorer no matter what others might think.


Join the Elite Explorers for $20 each year.
Elite Explorer members see no advertisements, no banner ads, no double underlined links,.
Add an avatar, upload photo attachments, and more!
.


Welp will winter right around the corner, its finally time to start this swap!

Cleaned up the shop (a little) and did a successful 50 point turn in the shop, swapped out the 35s for some stockers (that apparently have a nice hole in one) and dropped the front axle down as far as I could go.
20191027_160329.jpg


Fighting a migraine I pulled the transfer case and smakl section if the exhaust and called it a day.

20191027_174130.jpg


So thinking about what I already have for the motor, does anyone know of any bolt chevy 350 motor mounts for the RBVs?

My LS has cheby 350 motor mounts and an F-body oil pan. As well at a th400 flex plate adapter already installed.

If the motor mount plates, and flex plate adapter aren't going to be used I can sell then, but that won't net more than a few bucks cause they are cheap to buy new.

But if I can find some RBV bolt on 350 conversion motor mounts I would be pretty set on motor position.


****....
Exhaust Y-Pipe might get sawzall'd off
15723122413244634723987509218976.jpg


Peter piper picd a pake of pickld pepers...

I got your taters right here @gman:cool:


I am going bring some of my snapon sockets home tomorrow and a section of dom/breaker bar and show those bolts what's up tomorrow evening.


Use some map gas or a oxy torch and heat them up then they will come out like butter
Unless of course you have access to the flameless bolt heater thingy
With the v6 the bolts with the springs on them can just snap...I don't mind...it makes it easier

I have never seen RBV Chevy 350 motor mounts, but I have seen a few 5.3 into rangers now...pretty sure they fabricate the mounts using stock ford bits

I do have access to the threaded side of the bolts through the fender, but if they want to snap off thats fine with me too lol

No one in my shop that i know of has the bolt heaters, around here they run for something like $700 bucks.

I soaked them in rust inhibitor last night, a major problem i had last night with the snappy electric impact is that i had 2 4 inch extensions on it and extensions horribly reduce the torque from the gun. but i cant get that big ass impact up there.

LS universal motor mounts are pretty cheap so i just might cut out the crossmember and build a bolt in crossmember so if i need to do any internal motor work it will be pretty easy do do.

There are several motor mount sets available through Dirty Dingo. A member on here used the 240x mounts for his. So i am looking at those too


IM GONNA COME AT YOU LIKEA SPIDER MONKEY!!!

15724004979828535557891882243041.jpg


It cant be seized if its liquid
15724012557725807345262543755046.jpg


Nobody makes me bleed my own blood...
15724036612606055292968973658653.jpg


I see you
15725760725757792794796492625836.jpg

15725761076644278379783816428994.jpg

Got the hvac box out for more room and the heat only box going in.
15725761877132337880991285565062.jpg

3 inch body lift is going to make getting to the bell housing bolts out really easy this weekend
15725762637043903913533404294183.jpg

A bit tighter on the drivers side... might pull the intake off, haven't decided yet.


No need to pull the intake to get to the trans bellhousing bolts???
I drop the t case
then I drop the trans x member
then lower the back of the trans
use 24-36" extension, wobby socket, and impact remove all BH bolts in about 45 seconds......
Auto trans of course first you have to do starter and converter nuts...with your body lift things are much easier can probably pull engine and trans together?


I am pulling the trans out the bottom because the extended radius arm cross member had to be removed, so the RAs are not bolted in right now, and the truck sits really high right now.

Im planning on pulling the trans this weekend, bolting the Ra cross member back up and putting the weight back on the front axle to get the front end lower and start on the engine.

The engine is almost ready to be pulled, just need to disconnect the fuel and power steering lines, starter and TC bolts


@410Fortune

Do you have any more detailed pictures of the lower radiator support you built (to push the radiator further forward)?

You posted a few on page two of this thread, really looking into doing that, but i am not even sure if i well need it. Id rather have a plan to be able to do it ahead of time.


Almost there.
15726758739607229136634789292139.jpg


sure thing dude I have pics!
We built a lower cradle for my BII and then one for the Darth Ranger project (86 Ranger with crate performance 302) both of these trucks are 84-88 style where we do not have as much room for a radiator as your Gen I sploder (89-92 cab in a ranger) I believe the 89+ trucks gained 1.5" of engine bay depth? I never really confirmed that
Anywho if you want to tuck your radiator underneath the rad support without hacking up the top crossbar then do like we did. Make lower cradle that drops the radiator down about 3.5" and pushes it forward under the support.
We use Gen I style radiators with the metal peg feet that sit inside the rubber bushing, this allows some flex which is good (my first $600 Ron Davis radiator V8 conversion pulled itself apart internally).
Now I run Ebay special 4.0 OHV radiator for a 93 sploder all aluminum made in mexico tig welded. Seems to cool the V8 just fine WITH the trans cooler AND AC....started to run a little warm once I put the winch and LED lights up front...but only on hot days in the summer with the AC on (I would see 220-230 water temp) so I need to do something about that. I will probably re visit this situation and run a larger radiator since I do not want to move my winch to a cradle. I use the highest psi cap I could find on the radiator (I think its 20#?) and my water fill is mounted in the upper hose at the highest point in the cooling system up there I use a stock 16# cap...the thinking here is the cap on the radiator should never have to open since the 16# cap will allow flow to the overflow tank first. So far so good.
let me get some pics.

BII (red intake) 84 Ranger (blue intake)
171_111700_530000002.jpg


Love my dimple dyes
171_021104_220000000.jpg


171_021104_220000001.jpg


two rad caps and overfow plumbing
171_021104_220000002.jpg


171_021104_220000003.jpg


171_021104_230000004.jpg


84 ranger 370hp crate 302, dual batteries, ac AND cruise control ALL under the hood with mechanical fan (custom brackets for overflow, power box and two battery trays)
171_021107_280000000.jpg

both trucks use ohv 4.0 fan shroud modified to fit around the v8 fan (add 1.5" of height cut both sides and patch with plastic/ rivets)

171_021107_280000001.jpg


Dont forget to let the hot air out, Darth has cowl hood AND louvers, BII just has cherokee louvers I want a drop center hood shhhhh its secret
Oh and both trucks have intake spacer and TMH....

171_021107_290000003.jpg


Just because I knew you would love this pic "batwing" awning Darth Ranger is my buddies camping/fishing truck we built over a 3 year period, has camper setup in the bed with drop down DVD, custom fly rod holders integrated into roof rack/camper shell, this truck has so many goodies packed into it its not even funny :)

171_021107_290000002.jpg


Join the Elite Explorers for $20 each year.
Elite Explorer members see no advertisements, no banner ads, no double underlined links,.
Add an avatar, upload photo attachments, and more!
.


That hood is pretty badass.

Are you cutting anything inside the core support area?

Looking at mine there is some sheet metal that looks as though it directs air flow from the point where it passes the actual core support, to the radiator itself.

I am not sure if i those need to be cut out, or shortened. Unless i missed it, i dont think there is a good writeup on what needs to be cut and where.


Back
Top