The Black Pearls LM7 5.3 LS SWAP! | Page 12 | Ford Explorer Forums - Serious Explorations

  • Register Today It's free!

The Black Pearls LM7 5.3 LS SWAP!

SO I guess the time has came early for my 5.3L LS swap on The Black Pearl!!

LET THE HATE BEGIN!!!

I have a buddy that is a drag-racer but started working for a ****ty speed shop in the area and now he is burnt out from engines and all that; He is getting into guns and i have built a few ARs. We did some talking the other weekend and we figured that one of my ARs is worth about the same as his 400-450 horse Gen3 LM7 (706 heads, Gen4 internals. Titanium valve springs, retainers and guides)

Currently the piston rings are gaped and it has a cam setup for spray but he just hadn't gotten around to get nitro setup in the car yet. This is in a late 80s Monte Carlo BTW.

This are some pictures i loaded on my SAS build thread so i will post them up here to keep it all in one place.

General LS pic.jpg
This is just a general picture i found on google but thats pretty much the setup i am getting.

I have some 2010 Camaro exhaust manifolds that will be used (IF they fit!) that he threw in as well.

I went to the wrecking yard last weekend and picked up a 2000 tahoe fuseblock, harness, MAF and PCM for $40.65 out the door.
Junkyard harness.jpg

Started pulling it apart and removing ALL un-needed circuits, Factory fuse block, A/C, EVAP, Trans and a few other circuits.

harness remains.jpg


i also added a few circuits such as a secondary ground circuit for the Taurus 2-speed fan i have installed. The fans are controlled by the PCM, the PCM sends ground to the fan relays to turn them on/off at set temps (that will be programmed into the PCM when it gets tuned).

This is what we have left:
My harness.jpg


To clean things up in the engine bay i am going to use a Corvette style fuel system. There is no fuel pressure regulator on the fuel rail, it in in-line on the frame rail. It also uses a return-less system incorporated into the fuel filter, with the regulator.

Screenshot_2019-01-03-12-27-01.png

450 is overkill but this pump is a direct for to the explorer in-tank fuel pump according to Walbro.

This fuel filter will replace the factory Explorer fuel filter. It is a Corvette fuel filter with a built in fuel pressure regulator. With a return line back to the tank for unused fuel.
Filter regulator.JPG


These engines require 60PSI fuel pressure and the 1gen explorers are only pushing around 30-40 PSI.


Join the Elite Explorers for $20 each year.
Elite Explorer members see no advertisements, no banner ads, no double underlined links,.
Add an avatar, upload photo attachments, and more!
.


I also ended up having to go the the wrecking yard and getting another Taurus 3.0L (not 3.8L) fan shroud as I had chopped up my original in an attempt to get it to clear the water pump (mechanical fan) snout.

Decided to take only 9mm or so off the radiator side of the shroud and trim the top and bottom to fit. I will get some pictures of the fan mounted when I get a chance.

Currently the low speed it set to a thermistor switch on/off probed between the fins, ran to a basic 5 pin relay. Terminal 87 to the thermistor switch and terminal 87A to a manual on/off switch on the dash. If for some reason the engine isnt staying cool enough on low, I simply flip the switch on the dash, then power from relay terminal 87 (to the thermistor switch) is removed and switched to 87A to the high speed side of the fan

. Fully automatic operation on low, with high speed override.

But the LS ECM has a high and low speed relay ground circuit from the factory. Relay has power at all times, and the ECM supplies the ground to trigger the relay.


Join the Elite Explorers for $20 each year.
Elite Explorer members see no advertisements, no banner ads, no double underlined links,.
Add an avatar, upload photo attachments, and more!
.


how is the bottom of the radiator supported?
I ask because I had a Ron Davis custom radiator built which included upper mounting tabs like this. My problem is I had 4 mounting tabs like this all bolted to the radiator support. The radiator pulled itself apart in a few months.. I went back to the two tabs on top and 2 pegs in rubber bushings on the bottom. $650 down a black hole.............stupid me that was waaaaay too much for a radiator but back then we did not have 10000 options posted online to shop from.
I havent decided yet on the bottom. I was thinking pegs like the OE radiator, but after welding the top two tabs i am going to build a cradle for it to sit in, and tie it into each side of the core support (that i had cut out)


building a cradle for it to sit in and lining it with some 1/4" or so rubber is a good option so long as your core support is solid mounted. thats how we do all the race trucks and such


building a cradle for it to sit in and lining it with some 1/4" or so rubber is a good option so long as your core support is solid mounted. thats how we do all the race trucks and such
Yeah thats the plan at least for now lol.
As far as the core support goes, it is the factory configuration but with the bottom section (directly under the OE radiator) cut out. that is the section i plan to fab but like @410Fortune had posted on here several posts ago. I dont have access to a dimple die set, but i did see a few guys make on with bearing races and a tow hitch ball LOL worked out better than i thought it would, so i might attempt to build one.

Edit: Correction, it was 410 that posted up on page 6 of this thread


I have dimple dyes
what size do you need? I can ship you can borrow?

the cradles I have built incorporate the factory style mounting pegs and bushings, easy to make oval hole with plasma cutter


Maybe something like this would work for you?

I used a thicker version of these for my transfer case / transmission mount and they are holding up well.


I have no idea what size to use lol. I havent put much thought into using them cause i have never had access to them


Maybe something like this would work for you?

I used a thicker version of these for my transfer case / transmission mount and they are holding up well.
Hell thats a good idea!


I used 1.5" for the "airflow" holes in the front cradle "cover"
I have like 1/2" up to 2"
They are super simple to use even with small press....send me a pm


I used 1.5" for the "airflow" holes in the front cradle "cover"
I have like 1/2" up to 2"
They are super simple to use even with small press....send me a pm
I sent you a PM. Also sent you one about those badass round headlights. that will be high on the do to list as well as EVERYthing else i need to do


FINALLY!!!

Just mocked up the wiring to make sure everything was where i wanted it, and i wasn't going to get any parasitic drain or anything like that.

Still a lot to do but that's a big step i think


Starting system.png

Started on permanently modifying the wiring last night. Connector 140 has a pink wire (circuit 329), and Red/Lt Blue (circuit 32) that need to be jumped together. There are many different ways to do it, but this one was the easiest to get to, being that is it on the drivers side wheel well. It is one of the round gray 8 pin connectors behind the washer fluid bottle.

All i did was just jump with a wire to confirm that those were the correct wires, then de-pinned them and solder/crimp them together and wrapped them in adhesive shrink tube. Then used woven polyester tape to secure those to connector 140.

The LS uses a starting solenoid that is mounted to the starter itself, and the trigger wire for the solenoid is within the ECM. I removed the Explorers starter solenoid on the fender and soldered/crimped it to the LS harness.

I removed the battery tray to make room for the York 210 On-Board Air so the battery is going to be on the drivers side, behind the headlamp. That also frees up tons more room on the passenger side of the engine bay for the LS ECM, and LS standalone fuse block; so i also mounted that to the fender.


Great thread,

Used to mess with Explorers so much and wheel areas in your neck of the woods for years. Fkat Nasty, Smorr, Moonlight, which very exciting many more offroad parks have opened in Missouri.

Looking forward to seeing how it all works for you. When i took a brief break to play with a Jeep, I did 5.3 swap into that TJ was so fun, this will be very fun build.

Personally I want to build another 2 door TTB sport, gutted most body removed for cage, kept low on 31s for tuff truck style racing with a 5.3 auto setup. Was glad to see you kept crossmember.


Very cool, keep up the good work.

I used to be 5.0 swap person, which is fun works well. However I'm now an LS swap into anything believer.


Ok now that the forum is back up and running!
I am just going to go through all the pictures I've taken the passed few months and make one big build post.
20200915_123647.jpg

With the new job, new manufacturer (went to Ford) there is a big learning curve and the cash I had saved for the Color Run had to go to Bills due to low hours. I was going to try and save that cash for the Northwest fab ecobox or the Moab trip next May. But Bills dont stop coming in because flag hours are low.

So I have opted to keep the np241C transfer case, the down side to this is the slip yoke on the back. THIS is a dodge type companion flange with a 3.25 bolt spacing, and about a 3 inch pilot (to center the rear driveshaft) the explorer is a 2 inch pilot, same bolt spacing.

I have a co-worker with a lathe that is going to machine it down to 2" pilot. So my current CV rear shaft will work just fine with a little shortening.

20200913_111901.jpg

Got all but the trans temp gauge hooked up, and everything works well besides the water temp, the water temp is plumbed into the upper right side of the Griffen Radiator because the factory temp sensor runs the ECM. The hope was that they would only be a few degrees but that is not the case according to scan tool data. The engine temp is almost at operational temp, while the radiator temp sensor is barely above 100 degrees. Disappointed. I may have a ground issue with the sensor (needs to be grounding through the sensor body) so I will address that soon.


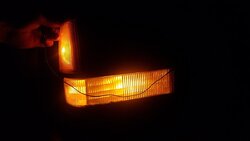
Got a little bored of working on interior and engine stuff so I changed it up and installed a spare 194 bulb socket into the corner reflector.
20200904_191026.jpg

The clear 194 bulbs are too bright and dont match the factory bulbs. So I picked up a pair of amber 194 bulbs and they are almost exact.
 

Attachments

  • 20200904_191104.jpg
    20200904_191104.jpg
    54.4 KB · Views: 99


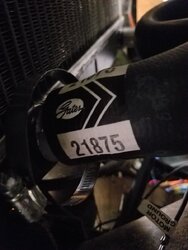
Got a thermostat, housing and gasket from a 93/94ish windstar to make for a straight LS water outlet with a random lower hose I found at the local auto parts store. No cutting required and it fits well
20200723_195052.jpg
 

Attachments

  • 20200723_193901.jpg
    20200723_193901.jpg
    123.8 KB · Views: 102


The upper hose fill neck is from a 2000-02 dodge Dakota. A little modification and it also fits well.
20200801_184031.jpg


While at the wrecking yard me and Gman found an overhead console from a 90s blazer. The mounting and wiring will be pretty straight forward.
20200705_213838.jpg

20200705_213725.jpg


It has several storage areas and a milage display, which I removed and will install the Air Locker switch for the front Diff, and whatever else I decide to out there.

There is enough to put a dozen or so switches I think. Now if anyone wants to come help run wires that would be nice.
20200606_122432.jpg


Join the Elite Explorers for $20 each year.
Elite Explorer members see no advertisements, no banner ads, no double underlined links,.
Add an avatar, upload photo attachments, and more!
.


Back
Top