I have been at this for a little while now. I haven't really taken any pictures of the steps leading up until now. I am bad about blogging as I do things, so I will take pictures when I think to and if any of you guys have questions or input I will snap pictures along the way. I fabbed the outriggers from scratch. I used the boomerang shackles to give me more clearance around the body mount and give me a littler better ride. The front cross member was made from a 2"x3" rectangle tubing with hangers from ruffstuffspecialties.com. I then bolted it to the frame in a few places as well as used it as a back mounting support for the winch. I made a dimple die to press the clearance holes and add some more strength and make them look better. I opted to use heims instead of using tie rods. I got the teflon lined 5/8 holes with 3/4" shank both for the tie rod as well as the drag link. I plan to use a pitman arm from either an astro van or a jeep wagoneer. The gear box is from a jeep cherokee which is what I got the Dana 30 from. I bought a crossover steering bracket from bluetorchfab.com made specifically for the jeep dana 30/44 axles. This is a great setup which I will transfer over when I find myself a good dana 44 to swap for the dana 30 I got now. The steering shaft is a hybrid of the stock explorer shaft and cherokee shaft. It had to be shortened by about 13-1/2 inches and reinforced for peace of mind. The gear box will be drilled and tapped later for hydro assist when I find a new 44. I am still in the process of re-plumbing the box, but all my fittings should be here this week. When I do the setup for the hydro-assist I will be adding an adjustable relief valve to upgrade the steering pump pressure that I read about somewhere on this site recently. The pitman arm right now is facing to the back and is looking all kinds of hell, but don't worry I plan to flip it to the front. You can see it's got a little of that explorer detroit lean to the driver side that I will have to address at some point. I'm sure there is more to cover that I haven't covered, so just let me know what you think. Be gentle this is my first major project like this. I’m all for constructive criticism, but don’t be a dick. I will grab a bunch more pictures tomorrow in the daylight, but here is a couple teaser pics.
-
Performance Upgrades - Maintenance - Modifications - Problem Solving - Off-Road - Street Trucks.
Covering the Explorer, ST, Sport, Lincoln Aviator, Sport Trac,
Mercury Mountaineer, Mazda Navajo, Ford Ranger, Mazda Pickups, and the Aerostar.
Featuring H.I. - Human Intelligence.
Register Today It's free!
You are using an out of date browser. It may not display this or other websites correctly.
You should upgrade or use an alternative browser.
You should upgrade or use an alternative browser.
Project Green Hornet '01 Sport SAS
- Thread starter 1-MEAN-X
- Start date
Elite Explorer members see no advertisements, no banner ads, no double underlined links,.
Add an avatar, upload photo attachments, and more!.
1-MEAN-X
Well-Known Member
- Joined
- May 13, 2009
- Messages
- 163
- Reaction score
- 1
- City, State
- Tennessee
- Year, Model & Trim Level
- '01 Explorer Sport
I also got around to fixing the lean. I have to add a pro comp leaf and remove the bottom leaf of the pack and it got it pretty close. Once it settles it should be perfect. I did a little cutting on the front fenders to make them line up with the bumper a little nicer. I still need to figure out something to prtect that edge from tires and other stuff. I'm thinking about some kind of hard plastic trim like a UHMW, but not sure yet.
I cut my driveshaft in prep to get it extended this week. When I did it caught fire which I though was weird and sure enough there was a cardboard sleeve inside. Is this normal? I definately was not expecting it either way.
I cut my driveshaft in prep to get it extended this week. When I did it caught fire which I though was weird and sure enough there was a cardboard sleeve inside. Is this normal? I definately was not expecting it either way.
Attachments


Elite Explorer members see no advertisements, no banner ads, no double underlined links,.
Add an avatar, upload photo attachments, and more!.
College Student
Explorer Addict
- Joined
- September 27, 2010
- Messages
- 1,364
- Reaction score
- 4
- City, State
- Indinapolis, IN
- Year, Model & Trim Level
- '03 EB
I've never heard of cardboard in the shaft before maybe it was how someone extended the shaft in the past. It would work as it looks hold the tubes in alignment until tacks and full welds can be achieved.
And I've been watching your thread for some time. I was hoping that since you already had the tape marks in the past that sometime you will build a set of these.

And I've been watching your thread for some time. I was hoping that since you already had the tape marks in the past that sometime you will build a set of these.
MidnightRebel07
Explorer Addict
- Joined
- March 6, 2010
- Messages
- 5,008
- Reaction score
- 12
- City, State
- Pittsburgh, Pa.
- Year, Model & Trim Level
- 2003 Explorer Sport Trac
Cardboard is put in driveshafts as a sound deadenor, been done for as long as I can remember.
1-MEAN-X
Well-Known Member
- Joined
- May 13, 2009
- Messages
- 163
- Reaction score
- 1
- City, State
- Tennessee
- Year, Model & Trim Level
- '01 Explorer Sport
T
Those are on my list, but quite a ways down. I still have sliders, back bumper, tranny/transfer case swap yada yada yada. I'll get around to it maybe next summer when it's hot out.
Yea, that's what a buddy of mine said too. I just wasn't expecting it I guess.
I was hoping that since you already had the tape marks in the past that sometime you will build a set of these.

Those are on my list, but quite a ways down. I still have sliders, back bumper, tranny/transfer case swap yada yada yada. I'll get around to it maybe next summer when it's hot out.
Cardboard is put in driveshafts as a sound deadenor, been done for as long as I can remember.
Yea, that's what a buddy of mine said too. I just wasn't expecting it I guess.
1-MEAN-X
Well-Known Member
- Joined
- May 13, 2009
- Messages
- 163
- Reaction score
- 1
- City, State
- Tennessee
- Year, Model & Trim Level
- '01 Explorer Sport
I hope everyone had a good thanksgiving.
Here are a few poser shots from today. I am figuring out shock location and bump stops. I should be able to get this wrapped up soon and get some real flex shots.
Here are a few poser shots from today. I am figuring out shock location and bump stops. I should be able to get this wrapped up soon and get some real flex shots.
Attachments


Bruces expo
Explorer Addict
- Joined
- January 19, 2005
- Messages
- 2,133
- Reaction score
- 3
- City, State
- Middle GA
- Year, Model & Trim Level
- 91 Mazda Navajo
Looking Great !

ZakyJ
Active Member
- Joined
- April 19, 2011
- Messages
- 67
- Reaction score
- 0
- City, State
- honolulu, hawaii
- Year, Model & Trim Level
- 2002 Explorer Sport 4x4
absolutely amazing. I'm hoping to have the skills and knowledge to SAS my sport someday. maybe when i move to Virginia next year, i'll be able to meet someone who would be will to hold my hand and walk me through it. lol
However like you, i'm waiting for my x to take sh*t on me before i do anything major. But with as much as i baby it, i dont see that happening anytime soon. not sure, if thats a good thing or a bad thing.
However like you, i'm waiting for my x to take sh*t on me before i do anything major. But with as much as i baby it, i dont see that happening anytime soon. not sure, if thats a good thing or a bad thing.
1-MEAN-X
Well-Known Member
- Joined
- May 13, 2009
- Messages
- 163
- Reaction score
- 1
- City, State
- Tennessee
- Year, Model & Trim Level
- '01 Explorer Sport
I did about 4 years worth of reading and searching through threads on this forum before I tackled this thing. I am by no means an expert, but getting your hands dirty is the best way to figure things out. Having a non-mobile truck makes things better because you can go at your own pace and screw up and not put yourself in a bind. As far as babying your ride, I did the same so just wait your turn it will take a dump ") they all do at some point.
they all do at some point.
they all do at some point.mynameisaric
Explorer Addict
- Joined
- January 18, 2004
- Messages
- 1,823
- Reaction score
- 11
- Location
- Illinois
- City, State
- Bolingbrook, IL
- Year, Model & Trim Level
- 98 XLT
- Callsign
- KD9OWX
You're going to want to put rim stiffeners on your parts list/to do list. I have the 8 bolts on my truck and lost a wheel to a tree stump. bent the outer ring just enough to let all the air out.
Not a picture of the damage to the wheel... but a picture of what the damage caused...

Not a picture of the damage to the wheel... but a picture of what the damage caused...
1-MEAN-X
Well-Known Member
- Joined
- May 13, 2009
- Messages
- 163
- Reaction score
- 1
- City, State
- Tennessee
- Year, Model & Trim Level
- '01 Explorer Sport
Yea, that sucks bad. They are definitly on my parts list when I recenter and get off these spacers too. For now, I will see more trail riding and take it kind of easy until I go full 4x4 (new trans/transfer). I am kind of digging these rock rings from trailworthfab.com on something like this wheel center:
Attachments

Mike's brother
Elite Explorer
- Joined
- September 11, 2011
- Messages
- 167
- Reaction score
- 2
- City, State
- Ithaca, NY
- Year, Model & Trim Level
- 2001 Explorer Sport
Add my voice to the chorus ... this is just amazing work. Great research, great pics, great explanations. Just great stuff. Looking forward to some trail pics down the line.
:exp:
:exp:
fordtrucknut77
Member
- Joined
- December 3, 2012
- Messages
- 28
- Reaction score
- 0
- City, State
- goodview va
- Year, Model & Trim Level
- 2001 explorer sport
i may have missed it, but did you build the front bumper or buy it? also what holds the grille in? I have an 01 sport that im just getting started on, hope to be wheeling it by summer of 2013 (fingers crossed)
1-MEAN-X
Well-Known Member
- Joined
- May 13, 2009
- Messages
- 163
- Reaction score
- 1
- City, State
- Tennessee
- Year, Model & Trim Level
- '01 Explorer Sport
Here is a link to the bumper build :
http://www.explorerforum.com/forums/showthread.php?t=315977
The grill mounts to the factory bolt holes. All I did was cut up the factory front clip to fit and fill that area after adding the bumper to make it look "factory"
http://www.explorerforum.com/forums/showthread.php?t=315977
The grill mounts to the factory bolt holes. All I did was cut up the factory front clip to fit and fill that area after adding the bumper to make it look "factory"
fordtrucknut77
Member
- Joined
- December 3, 2012
- Messages
- 28
- Reaction score
- 0
- City, State
- goodview va
- Year, Model & Trim Level
- 2001 explorer sport
ah ok thanks..im really anxious for mine to be DONE, sadly im going to have to contract out a lot of the suspension (fun) work. I simply do not have time to build the thing and Im ready to be wheeling with the ac on!
1-MEAN-X
Well-Known Member
- Joined
- May 13, 2009
- Messages
- 163
- Reaction score
- 1
- City, State
- Tennessee
- Year, Model & Trim Level
- '01 Explorer Sport
ah ok thanks..im really anxious for mine to be DONE, sadly im going to have to contract out a lot of the suspension (fun) work. I simply do not have time to build the thing and Im ready to be wheeling with the ac on!
A/C? You don't need A/C, just roll your windows down. :biggthump
MidnightRebel07
Explorer Addict
- Joined
- March 6, 2010
- Messages
- 5,008
- Reaction score
- 12
- City, State
- Pittsburgh, Pa.
- Year, Model & Trim Level
- 2003 Explorer Sport Trac
Hell, I totally removed my A/C components except for the A/C heater box ( gotta get a A/C delete ranger heater box for that) and it'll open up alot more room in my engine bay.
fordtrucknut77
Member
- Joined
- December 3, 2012
- Messages
- 28
- Reaction score
- 0
- City, State
- goodview va
- Year, Model & Trim Level
- 2001 explorer sport
A/C? You don't need A/C, just roll your windows down. :biggthump
100 degree trail rides that last 5 or 6 hours..I aint sweating if I can help it
1-MEAN-X
Well-Known Member
- Joined
- May 13, 2009
- Messages
- 163
- Reaction score
- 1
- City, State
- Tennessee
- Year, Model & Trim Level
- '01 Explorer Sport
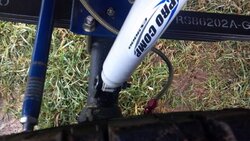
Well, I'm finally done.... sorta'... I mounted all of the shocks and finish welded everything and added some bump stops in the rear. The front didn't look like it would need them so I haven't done them. If I get into trouble later I'll go back and add them. I took it out on a test run around the neighborhood and had TERRIBLE death wobble, so I ordered a ram and hoses/fittings from surpluscenter.com. I ordered the 1.5x8x1.0 ram to help stabilize and also help with steering all together. The steering wasn't bad, but that wobble really didn't feel good. I'll get that put on in the next few weeks and hopefully get it back on the road. I also noticed that it was having a hard time going up and down hills and I thought I smelled some burning. I hope it's not the trans having a hard time shifting because of the VSS. I will look into that a little closer next time I take it out. Here are some pictures of the work I did. These are the upper rear shock mounts that I cut from f250 shock towers.
Attachments


Elite Explorer members see no advertisements, no banner ads, no double underlined links,.
Add an avatar, upload photo attachments, and more!.
1-MEAN-X
Well-Known Member
- Joined
- May 13, 2009
- Messages
- 163
- Reaction score
- 1
- City, State
- Tennessee
- Year, Model & Trim Level
- '01 Explorer Sport


Featured images


Featured images
Similar Threads
- Replies
- 97
- Views
- 33,725
- Replies
- 1
- Views
- 1,289
- Replies
- 148
- Views
- 43,072
- Replies
- 5
- Views
- 4,819
- Replies
- 106
- Views
- 30,033